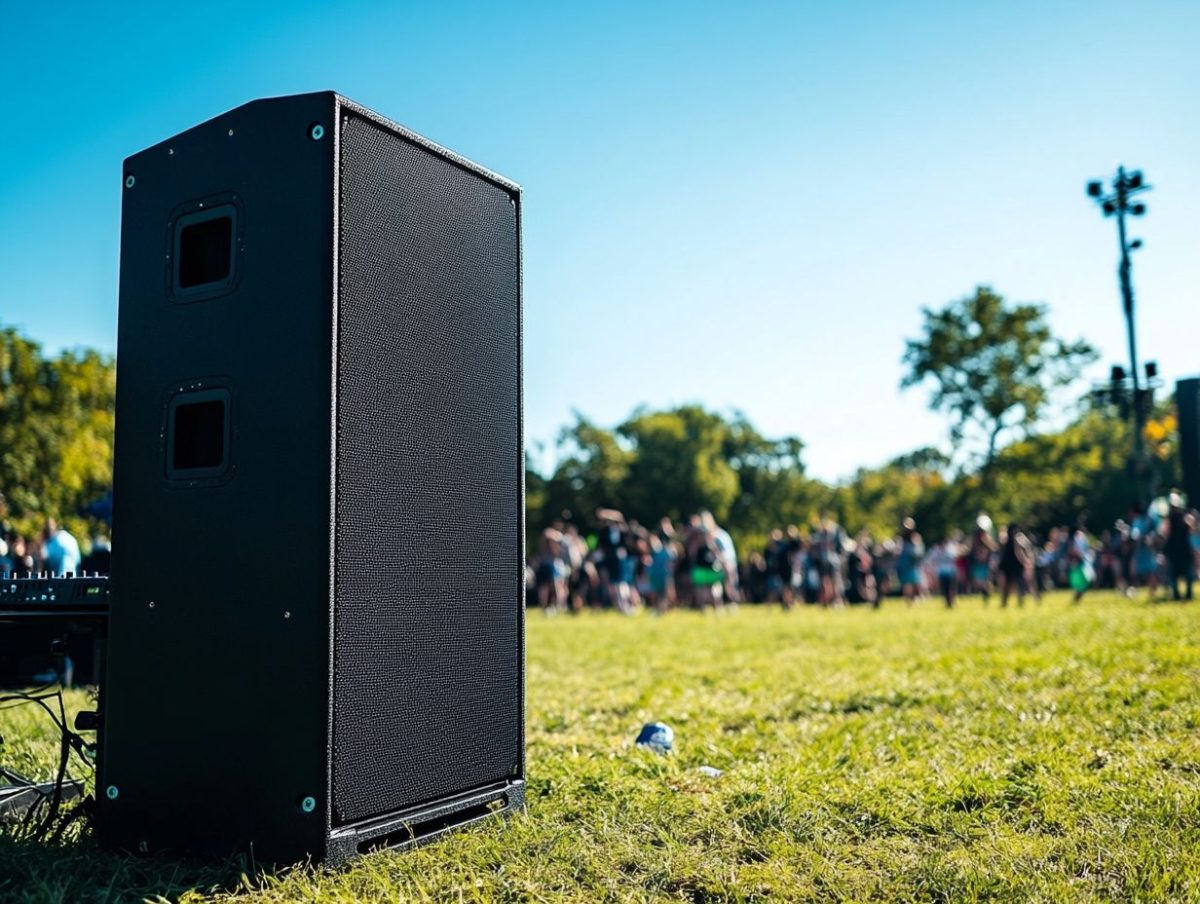
Best Field Subwoofer for Powerful Outdoor Sound

When it comes to enjoying music or sound in outdoor settings, a quality subwoofer is crucial for delivering the deep bass and powerful sound that create an immersive experience.

Whether you’re hosting a backyard party, setting up for a community event, or simply enjoying a day at the park, the right outdoor subwoofer can transform your audio experience.

This guide will help you navigate essential factors to consider, recommend top models across various price ranges, and share tips for optimal installation and setup.

Dive in to discover how to elevate your outdoor sound with the best field subwoofers available!

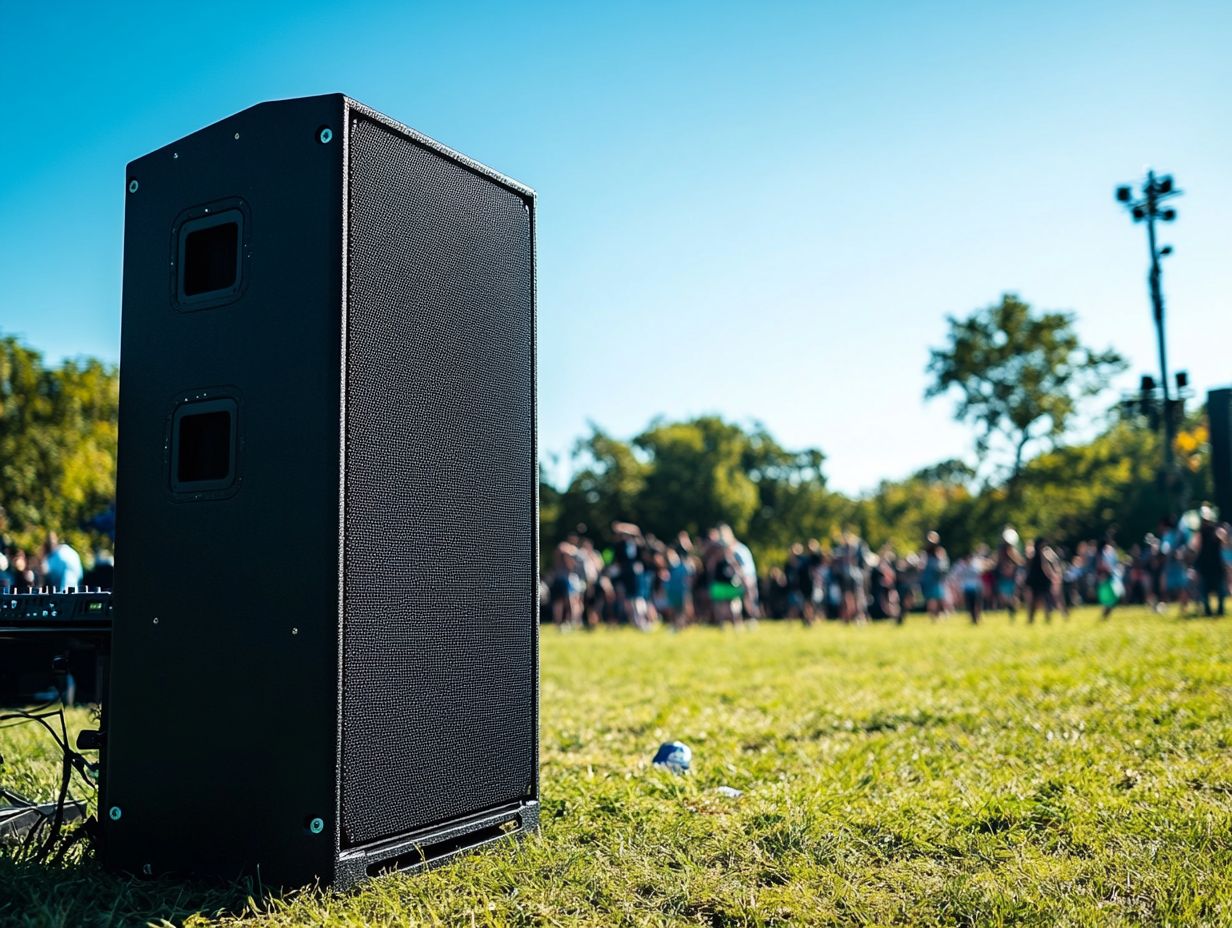
Why a Subwoofer is Essential for Outdoor Sound
Why a Subwoofer is Essential for Outdoor Sound

A subwoofer is a crucial component for outdoor sound systems, as it significantly enhances bass response, which is essential for providing a comprehensive auditory experience when listening to various music genres in open environments. Without the deep, resonating tones produced by a high-quality subwoofer, outdoor music listening can feel flat and lack the richness needed to adequately fill larger spaces such as backyards or patios.

The dynamic capabilities of a subwoofer ensure effective sound wave propagation, maintaining audio clarity and balance across extended listening distances, even amidst environmental noise.

This enhancement is particularly important in outdoor settings, where sound can easily dissipate. The design of different subwoofers, such as ported versus sealed enclosures, plays a significant role in their performance outdoors. For example, ported subwoofers often deliver more powerful bass at lower frequencies, making them well-suited for vibrant music styles like hip-hop, while sealed subwoofers offer more precise and tighter sound, making them ideal for genres such as classical or acoustic.

Integrating subwoofers with high-quality audio systems, including amplifiers and speakers specifically designed for outdoor use, further optimizes the listening experience. By ensuring compatibility and strategic placement, one can achieve a balanced soundscape that enhances the enjoyment of the outdoor ambiance for all attendees.

Key Factors to Consider When Choosing an Outdoor Subwoofer

When selecting an outdoor subwoofer, it is essential to consider several critical factors to ensure optimal sound quality and durability in various weather conditions. Key considerations include the subwoofer’s weather-resistant design, which is vital for withstanding environmental elements, and its compatibility with an audio receiver or existing speaker system.

The installation process should be user-friendly, facilitating seamless integration into an outdoor audio setup while taking into account the desired bass response and overall speaker performance tailored for open spaces.

The overall power output of the subwoofer is significant in achieving the desired volume levels without distortion, thereby enhancing the immersive listening experience. It is advisable to seek models that exhibit robust construction and protective enclosures to improve durability and ensure resilience against rain, sun, and other outdoor elements.

Additionally, evaluating the frequency range can provide valuable insights into the clarity of sound reproduction, which is particularly crucial for expansive outdoor environments. Lastly, ease of maintenance should not be overlooked; convenient access to components for servicing can significantly extend the lifespan of the subwoofer.

Top Recommendations

Selecting the optimal outdoor subwoofer involves navigating a diverse market that provides a variety of options tailored to different needs and budget constraints. This ensures that consumers can identify a suitable model that aligns with their audio requirements.

The range includes the best overall outdoor subwoofers, which are engineered for exceptional sound performance, as well as budget-friendly alternatives that still offer commendable bass response. For audiophiles seeking advanced features, there are high-end models available.

Furthermore, portable outdoor subwoofers present an ideal solution for individuals desiring flexibility in their outdoor audio arrangements.

Best Overall Outdoor Subwoofer

The OSD Audio AP650 is recognized as the premier outdoor subwoofer, offering exceptional sound quality and performance tailored for outdoor environments. Constructed with a robust, weather-resistant enclosure, this subwoofer guarantees consistent audio playback across diverse outdoor conditions, making it an excellent choice for music enjoyment on patios or during social gatherings. Its powerful bass response enhances a wide range of audio products, delivering an immersive listening experience while maintaining sound balance and clarity, regardless of listening distance.

This subwoofer features 6.5-inch polypropylene cones and a high-quality built-in amplifier, which significantly enhance its capabilities, ensuring deep, rich bass that can effectively fill larger spaces without distortion. Users will find the installation process to be straightforward, as it can be seamlessly integrated with existing audio systems utilizing standard speaker wire connections.

Listening tests demonstrate that the AP650 performs exceptionally well in outdoor settings, providing clear sound reproduction even at elevated volumes. Its versatile design allows for multiple mounting options, making it a flexible addition to any outdoor audio setup. Ultimately, the combination of durability, ease of installation, and superior acoustic performance cements its status as the preferred choice for outdoor sound enthusiasts.

Best Budget Outdoor Subwoofer

For individuals seeking an affordable solution that does not compromise on performance, the Dayton Audio IO8XTB stands out as the premier budget outdoor subwoofer, offering exceptional value for its price. This model is designed with durability in mind, allowing it to withstand outdoor conditions while delivering remarkable sound quality and bass response.

Its straightforward installation process and compatibility with various outdoor speaker connections make it an ideal choice for enhancing audio experiences without incurring significant costs.

Equipped with weather-resistant components, users can have confidence that their investment is safeguarded against the elements, thus ensuring both longevity and reliability. The speaker provides clarity and depth, facilitating crystal-clear highs and rich lows, which makes it suitable for both social gatherings and tranquil evenings spent outdoors.

Additionally, its lightweight design allows for easy mounting and placement, while still delivering powerful performance typically associated with higher-end models. This subwoofer effectively balances affordability with superior sound characteristics, catering to both audiophiles and casual listeners who seek an improved outdoor audio experience.

Best High-End Outdoor Subwoofer

For audiophiles, the ideal high-end outdoor subwoofer seamlessly integrates exceptional audio performance with superior build quality. A notable example is the Victrola Rock Speaker Connect, which provides remarkable sound quality and deep bass response.

Engineered for discerning listeners, this high-end subwoofer complements sophisticated audio receivers and enhances outdoor audio systems. Its weather-resistant features ensure durability, making it an excellent long-term investment for outdoor sound quality.

With a visually appealing rock design, it blends effortlessly into garden landscapes while delivering an enhanced listening experience. The Victrola Rock Speaker Connect is equipped with advanced technology that allows for easy connectivity to multiple devices, ensuring uninterrupted enjoyment of favorite music.

Its superior sound staging and clarity elevate outdoor gatherings, creating memorable experiences. This model not only distinguishes itself through robust performance but also fosters the immersive atmosphere that audiophiles seek.

Furthermore, the product is backed by reliable customer support, reflecting a commitment to excellence in providing high-quality outdoor audio experiences.

Best Portable Outdoor Subwoofer
Best Portable Outdoor Subwoofer

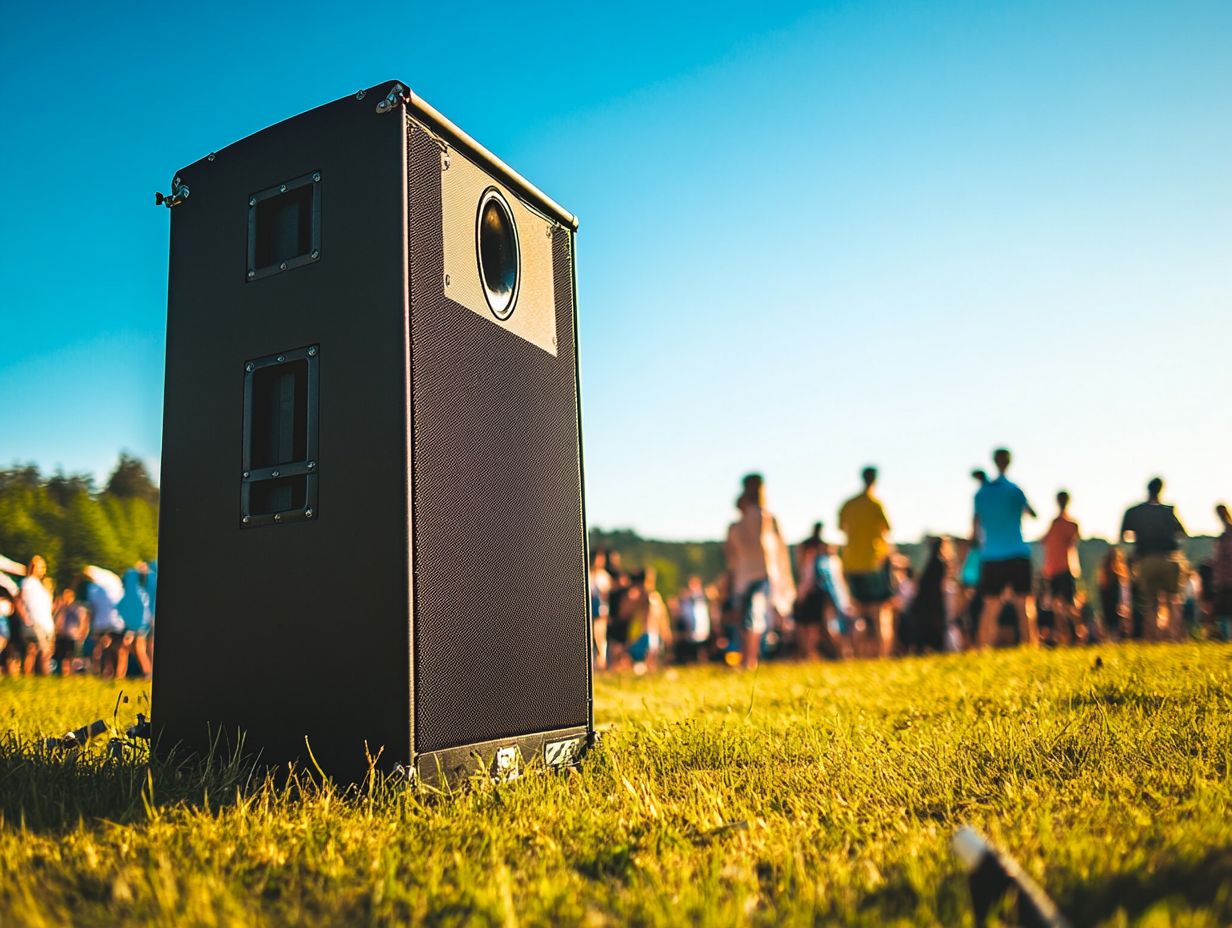
The OSD Audio BTR805 is a highly recommended option for individuals seeking a premier portable outdoor subwoofer, providing exceptional convenience and sound quality within a compact design. This model enables users to easily transport their audio system from one location to another, making it ideal for outdoor events or gatherings.

Despite its portability, the BTR805 maintains impressive performance, delivering robust bass response and compatibility with a wide range of Bluetooth speakers and other audio devices.

A notable feature of the BTR805 is its user-friendly installation process, which requires minimal setup time—perfect for spontaneous outdoor gatherings or barbecues. Its lightweight and compact structure ensures that transporting it, whether for a picnic in the park or a beach party, is convenient and effortless.

This subwoofer is also built to be highly durable, designed to withstand various environmental conditions, thus ensuring quality sound even in less than ideal settings.

Ultimately, it embodies the essence of contemporary outdoor sound systems, merging portability, superior sound fidelity, and ease of use, making it an essential companion for any outdoor enthusiast.

Performance Features

When evaluating outdoor subwoofers, the performance features are critical in determining their overall effectiveness and suitability for outdoor environments.

Key features to consider include:

  • Sound quality, which encompasses both clarity and richness of audio;
  • Bass response, which is essential for delivering impactful low frequencies;
  • Durability, which ensures that the subwoofer can withstand various weather conditions.

Furthermore, assessing weather resistance is crucial for long-term performance, as it protects the subwoofer from moisture, dust, and other environmental factors.

Sound Quality and Bass Response

Sound quality and bass response are essential elements of any outdoor audio experience, as they significantly affect how music is perceived in open environments characterized by ambient noise. A high-quality outdoor subwoofer must deliver clear audio with a comprehensive sound range that enhances the listening experience across various music genres.

In particular, the bass response should be sufficiently powerful to penetrate outdoor elements, ensuring that deep low frequencies are felt even amidst competing sounds from nature or crowd chatter.

The selection of subwoofer technology is crucial for achieving optimal audio clarity under diverse listening conditions. For example, ported subwoofers typically offer greater efficiency and deeper bass, while sealed models provide enhanced precision and tighter sound reproduction.

Understanding the nuances of each type enables enthusiasts to make informed decisions and customize their setups for optimal performance, whether at a picnic, during a camping trip, or at a backyard gathering. Ultimately, prioritizing sound quality and robust bass not only enhances outdoor enjoyment but also transforms the listening experience into an immersive journey through music.

Durability and Weather Resistance

Durability and weather resistance are critical considerations for outdoor audio devices, particularly subwoofers, which frequently encounter challenging environmental conditions. A robust design with a high Ingress Protection (IP) rating, such as IPX6 or IP54, ensures that the subwoofer can endure exposure to rain, dust, and other elements without compromising sound quality. This protective design not only prolongs the lifespan of the subwoofer but also preserves its performance, enabling consistent audio enjoyment across various outdoor settings.

To achieve optimal outdoor audio quality, these subwoofers utilize materials specifically engineered to resist corrosion and prevent fading due to UV exposure, thereby enhancing their longevity. Additionally, features such as reinforced enclosures and weatherproof connectors play an essential role in safeguarding the internal components, ensuring that the sound produced remains rich and powerful, regardless of weather conditions.

Investing in outdoor subwoofers that emphasize these protective attributes allows audio enthusiasts to relish their favorite music during outdoor events or gatherings without concern for sudden climate changes that could cause damage or diminish performance.

Power and Volume Capabilities

Power and volume capabilities are essential factors to consider when evaluating outdoor subwoofers, as they directly impact the unit’s ability to effectively fill outdoor spaces with rich sound. A proficient subwoofer should possess sufficient power to achieve high volume levels without distortion, ensuring that audio remains clear and balanced, even at extended listening distances.

Features such as adjustable volume control and built-in amplification can significantly enhance the user experience, allowing for customization based on the specific environment and size of the audience.

In outdoor settings, sound coverage is similarly critical; the design of the subwoofer must ensure that sound is evenly dispersed throughout the area. Outdoor environments often present challenges such as wind and ambient noise, necessitating that subwoofers produce deep bass frequencies capable of penetrating these obstacles effectively.

The incorporation of directional audio features can aid in directing sound towards specific areas, thereby minimizing wastage and maximizing auditory impact. Ultimately, achieving the appropriate balance of power and volume control not only enhances the listening experience but also provides the versatility needed to adapt audio output for various outdoor events and scenarios.

Installation and Setup

The installation and setup process for outdoor subwoofers is a critical phase that can greatly influence the overall audio experience. An effective setup should facilitate straightforward wiring options and seamless connections to existing outdoor audio systems without necessitating extensive technical expertise.

It is imperative to position the subwoofer optimally for sound distribution, as this significantly impacts performance. Therefore, it is essential to adhere to the guidance and tools provided by manufacturers during the installation process.

Wiring and Connectivity Options
Wiring and Connectivity Options

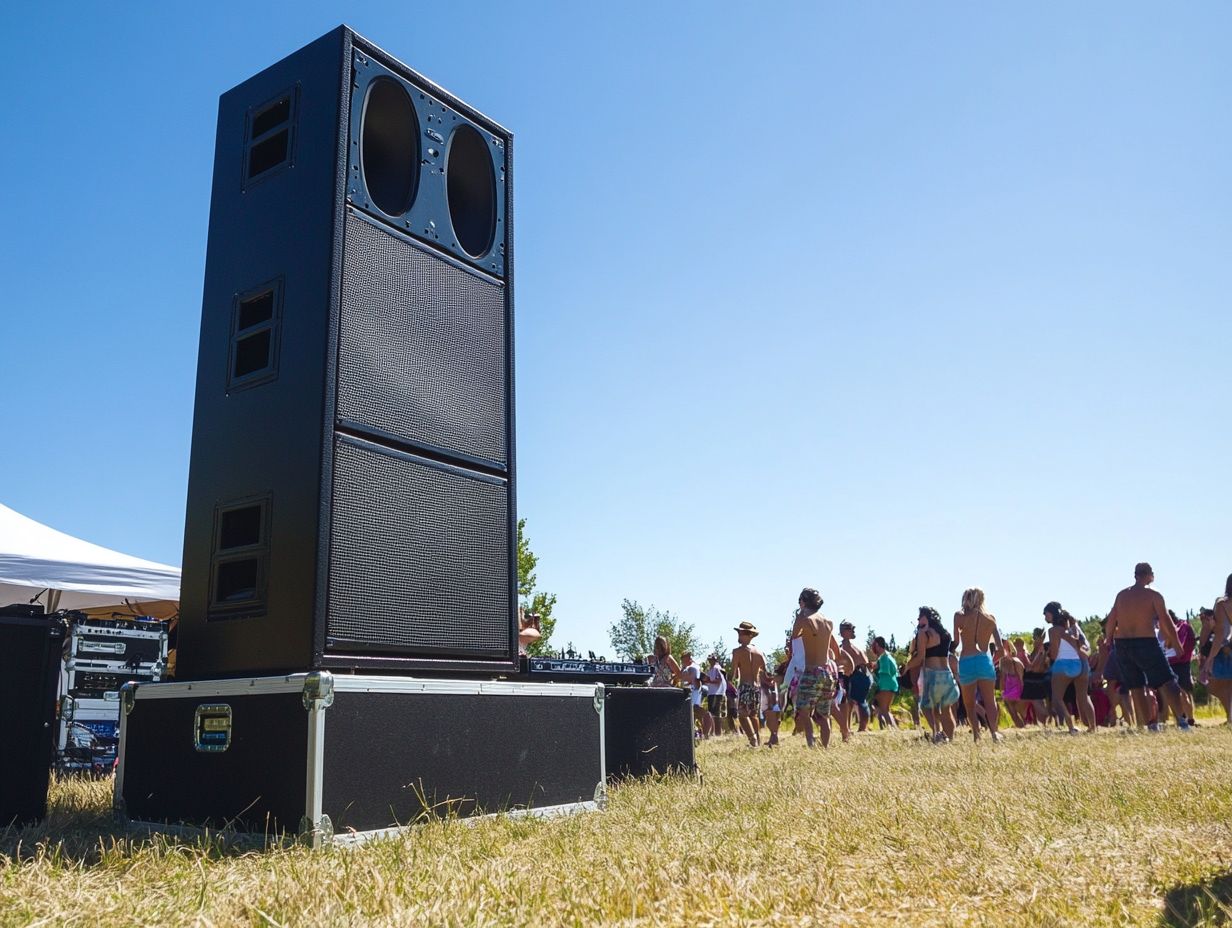
Wiring and connectivity options are critical factors to consider when setting up outdoor subwoofers, as they influence the integration of the subwoofer with other outdoor audio systems. The selection of appropriate speaker wire, as well as an understanding of the various available speaker connections—whether wired or wireless—can significantly impact the ease of installation and the overall audio performance.

Additionally, proper installation hardware is essential to ensure stable and secure connections capable of withstanding outdoor conditions.

Furthermore, it is important to assess the gauge or thickness of the speaker wire to mitigate signal loss over longer distances. Generally, thicker gauge wires are recommended for extensive outdoor configurations.

Another crucial element involves choosing weather-rated connectors that resist corrosion, thereby ensuring a reliable connection in diverse environmental conditions. It is advisable to utilize installation hardware specifically designed for outdoor use, such as water-resistant mounts and suitable cable ties, which will enhance both the durability and performance of the audio system.

These carefully considered choices not only enhance sound quality but also ensure that the subwoofer operates effectively in outdoor environments.

Optimal Placement for Best Sound

The optimal placement of outdoor subwoofers is essential for achieving superior sound distribution and overall audio performance in outdoor environments. Strategic positioning of the subwoofer can significantly enhance the listening experience by ensuring that sound waves effectively reach the intended audience while considering factors such as listening distance and surrounding obstacles. Proper placement not only improves bass response but also aids in achieving sound balance across various areas of a patio or backyard.

To accomplish this, it is important to evaluate the layout of the space, taking into account walls, trees, and furniture that may obstruct sound waves. Placing the subwoofer near hard surfaces can facilitate sound reflection, thereby enhancing its impact, while avoiding corners that may lead to a muddied sound quality. It is advisable to test different positions to assess how the bass responds, selecting locations that allow for even sound distribution without overwhelming specific areas.

Additionally, elevating the subwoofer slightly can optimize sound projection, ensuring an immersive and satisfying audio experience for all individuals enjoying the outdoor setting.

Comparison of Top Models

A comprehensive comparison of the leading outdoor subwoofer models highlights significant differences in specifications and features that may impact purchasing decisions for a diverse range of users.

By analyzing factors such as sound quality, power capabilities, and weather resistance, prospective buyers can make informed decisions that align with their particular needs and preferences.

This section is designed to elucidate the performance metrics of each model, assisting users in identifying the most suitable option for their outdoor audio requirements.

Specifications and Features Breakdown

Understanding the specifications and features of leading outdoor subwoofer models is essential for making a well-informed purchasing decision. This section will analyze key specifications such as power output, frequency response, and durability, as well as distinct features designed to enhance audio performance in outdoor settings. By evaluating these factors comprehensively, consumers will be better positioned to identify which subwoofer best meets their outdoor audio requirements.

It is crucial to consider aspects such as weather resistance and material quality, as these significantly impact the longevity and sound clarity of the subwoofer when exposed to outdoor elements. Different models offer varying power outputs; some may provide deeper bass and higher volumes, which are essential for expansive outdoor areas, while others may focus on delivering refined audio suitable for more intimate gatherings.

Frequency response is another critical parameter, determining how effectively a subwoofer reproduces low-end sounds, thereby ensuring that every beat resonates accurately, regardless of ambient noise. A thorough understanding of these elements can enhance the listening experience, transforming backyard barbecues or outdoor parties into memorable events characterized by superior sound quality.

Pros and Cons of Each Model

Evaluating the advantages and disadvantages of each outdoor subwoofer model yields valuable insights into their performance and user satisfaction. By analyzing feedback from listening panelists and considering the strengths and weaknesses of each model, consumers can gain a clearer understanding of which subwoofer best meets their outdoor audio requirements. This comparative analysis will emphasize the unique characteristics that differentiate each model while addressing common concerns expressed by users.

Among the various models available, some exhibit exceptional bass response and weather resistance, making them ideal for outdoor environments, while others may lack sufficient power for larger spaces. User experiences suggest that features such as wireless connectivity and ease of installation significantly enhance overall satisfaction; however, certain models may demonstrate shortcomings in durability over time.

Performance evaluations reveal variations in sound clarity and volume levels, which are critical factors for those seeking to fill expansive areas with rich sound. As potential buyers consider these elements, comprehending the nuanced feedback can assist them in making a more informed decision that aligns with their specific outdoor audio needs.

User Reviews and Feedback

User reviews and feedback are essential in the assessment of outdoor subwoofers, as they offer valuable insights into performance, durability, and overall satisfaction. By systematically analyzing customer feedback from a variety of sources, it is possible to identify recurring issues and strengths associated with different models, thereby assisting potential buyers in making informed decisions.

Gaining an understanding of user experiences is critical for determining which outdoor audio systems effectively meet expectations and provide optimal sound quality across a range of environments.

What Customers Are Saying
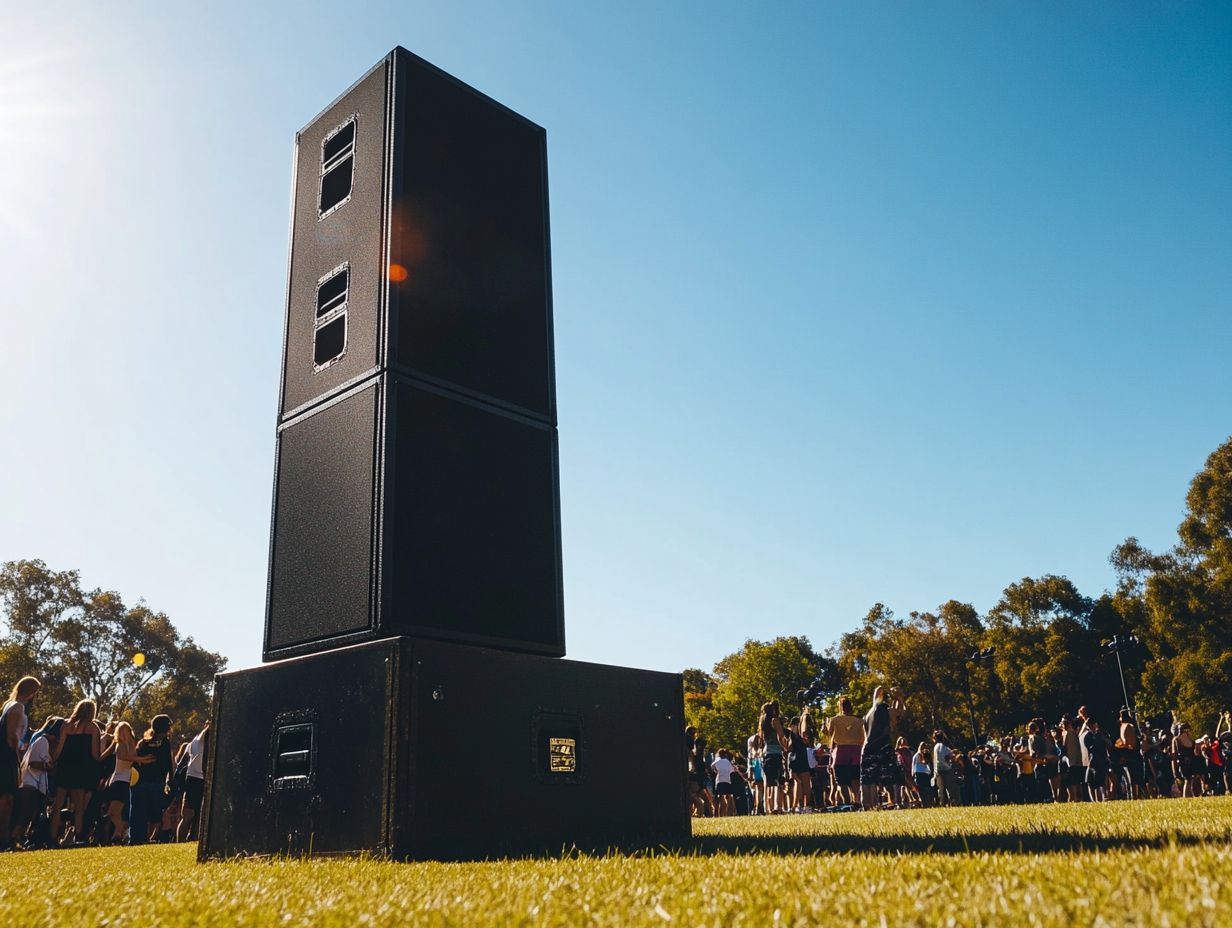
What Customers Are Saying

Customer feedback provides a comprehensive overview of the varied experiences and satisfaction levels of users regarding outdoor subwoofers, offering valuable insights into sound quality and overall performance. Many customers emphasize the critical significance of bass response and clarity, highlighting how different models perform in various outdoor settings.

Reviews frequently contain recommendations based on personal experiences, illuminating the strengths and weaknesses of each subwoofer to assist prospective buyers in making informed decisions.

Enthusiasts, in particular, appreciate subwoofers that deliver deep, resonant bass without distortion, thereby creating an immersive listening experience that is ideal for backyard gatherings or outdoor movie nights. Conversely, some users have raised concerns regarding specific models that may lack sufficient power for larger spaces, resulting in a less satisfying auditory experience.

The balance between volume levels and sound clarity is crucial for many consumers, with some even recommending upgrades or additional components to enhance performance. Given that various outdoor listening environments significantly influence customer experiences, selecting the appropriate subwoofer can substantially improve overall enjoyment.

Common Issues and Solutions

Identifying common issues faced by users of outdoor subwoofers is essential for potential buyers to understand the limitations and challenges associated with various models. These challenges can include connectivity problems and durability concerns in harsh outdoor environments, which are often highlighted in user feedback. By addressing these prevalent issues, potential solutions can be proposed to enhance performance and ensure a satisfactory audio experience for outdoor music listening.

For example, numerous users report difficulties with Bluetooth connectivity, particularly when surrounded by competing wireless signals. To address this concern, it may be beneficial to consider models equipped with a stronger and more stable wireless range.

Durability is a critical factor, as users frequently express concerns regarding the vulnerability of their subwoofers to weather elements such as rain or extreme heat. A prudent recommendation is to seek subwoofers that offer weatherproofing features or protective casings.

Additionally, optimizing the placement of the subwoofer can significantly influence sound quality. Positioning the subwoofer away from walls or barriers can help minimize distortion and improve overall acoustics, thereby enhancing the user experience during outdoor gatherings.

Final Thoughts on Choosing the Best Field Subwoofer

Final thoughts on selecting the optimal field subwoofer emphasize the importance of outdoor sound systems in enhancing overall audio experiences, thereby providing immersive enjoyment for music enthusiasts. The appropriate subwoofer not only delivers robust bass but also integrates seamlessly with outdoor speakers, creating a cohesive audio system that addresses diverse listening preferences. By considering leading models, user feedback, and essential performance features, individuals can make informed decisions regarding a subwoofer that complements their outdoor environment.

A properly selected subwoofer can significantly elevate any outdoor gathering, whether it is a casual barbecue or a lively celebration, ensuring that every beat is delivered with clarity and depth. It is crucial to evaluate factors such as durability, size, and wireless capabilities, as these aspects can greatly influence functionality in open spaces.

By thoroughly researching customer reviews, one can gain valuable insights into how specific models perform under various weather conditions, thereby aiding in the assessment of their reliability. Investing in the right outdoor subwoofer not only enhances the auditory experience but also contributes to the overall ambiance, facilitating unforgettable moments shared with family and friends.

Where to Buy Your Subwoofer

When considering the purchase of outdoor subwoofers, potential buyers have a range of options available through both physical retailers and online stores that specialize in audio products. Major retailers typically carry a selection of popular outdoor subwoofer models, allowing customers the opportunity to see and hear the equipment prior to making a purchasing decision.

Conversely, online marketplaces provide convenience and a broader assortment of choices, often accompanied by competitive pricing and customer reviews to assist in the decision-making process.

Individuals contemplating their purchase should consider visiting local audio equipment shops, where knowledgeable staff can offer valuable insights and personalized recommendations. Online retailers, particularly dedicated audio e-commerce platforms, generally feature comprehensive product descriptions, comparison tools, and user reviews, making them suitable for well-considered choices.

In seeking the best deals, it may prove advantageous to wait for seasonal sales, subscribe to newsletters for exclusive discounts, or examine clearance items. It is essential to ensure that the chosen outdoor subwoofer meets specific requirements related to power output, durability, and compatibility with existing audio systems, thereby guaranteeing satisfaction with the purchase.

Further Reading

Individuals interested in delving deeper into outdoor sound systems and enhancing their audio experiences will find that further reading offers valuable insights and practical guidance on best practices and technologies.

Comprehensive guides can assist users in navigating the complexities of outdoor audio setups, including the selection of appropriate outdoor speakers and subwoofers, understanding installation procedures, and optimizing overall performance.

By exploring the intricacies of audio equipment, enthusiasts can significantly elevate their outdoor music listening experiences.

Guides on Outdoor Sound Systems

Guides on outdoor sound systems provide essential information and best practices necessary for achieving optimal audio performance in outdoor environments. These resources encompass various aspects, including the selection of appropriate audio equipment, the installation process, and effective placement strategies for speakers and subwoofers.

Readers can anticipate detailed insights regarding how various environmental factors, such as acoustics and weather conditions, can influence sound quality. These guides frequently offer troubleshooting tips for common issues that may arise following installation.

Whether an individual is aiming to set up a backyard party, enhance the ambiance of a patio, or implement a robust sound system for outdoor events, these resources serve as invaluable tools. By leveraging expert knowledge, users can navigate the complexities of sound optimization, ensuring that they achieve sharp clarity and deep bass, thereby transforming any outdoor space into a captivating auditory experience.

Tips for Maximizing Outdoor Audio Experience

Maximizing the outdoor audio experience requires the implementation of practical tips and strategies aimed at enhancing sound quality and creating an enjoyable listening environment. Key considerations include the selection of appropriate outdoor speakers and subwoofers, as well as the optimization of placement and setup. Numerous factors contribute to achieving the best audio experience in outdoor settings. By applying these strategies, individuals can transform their outdoor spaces into acoustically rich environments suitable for gatherings or casual music listening.

To begin, it is essential to recognize the significance of acoustic spaces. Identifying locations with natural sound amplification, such as patios or areas adjacent to walls, can greatly enhance sound delivery. Utilizing speakers specifically designed for outdoor conditions ensures durability and reliable sound performance in various weather scenarios. Additionally, managing background noise is crucial; positioning audio equipment away from noisy streets or neighboring properties can significantly enhance the overall listening experience.

Furthermore, experimenting with speaker angles and heights can optimize sound dispersion, fostering an immersive atmosphere that all attendees can appreciate, whether during a tranquil evening or a vibrant gathering.

How to Properly Install XLR Cables: Tips and Tricks

XLR cables are essential tools for anyone involved in audio production, from musicians to sound engineers.

Known for their reliability and superior sound quality, these cables play a crucial role in connecting microphones and other audio equipment.

This article covers everything you need to know about XLR cables, including their components, common uses, and the tools required for installation.

It provides a step-by-step guide to ensure your connections are secure and effective, along with tips to avoid common mistakes.

Whether you are a DIY enthusiast or a professional, mastering the installation of XLR cables will enhance your audio setup.

How to Properly Install XLR Cables: Tips and Tricks

How to Properly Install XLR Cables: Tips and Tricks

Proper installation of XLR cables is essential for achieving high-quality audio performance across various applications within the audio industry. These balanced cables, frequently equipped with Neutrik connectors, play a critical role in connecting audio devices for studio wiring, live sound setups, and custom cable assemblies.

Adhering to correct installation techniques not only enhances the durability of the cables but also mitigates issues such as ground loops, which can distort audio signals. A comprehensive understanding of the components involved, along with adherence to best practices, will facilitate efficient cable maintenance and optimize overall performance.

What are XLR Cables?

XLR cables are a specific type of balanced cable designed for professional audio applications, providing an effective means of transmitting audio signals between various audio devices. Typically, these cables feature three pins: pin 1 serves as the ground, pin 2 functions as the positive wire, and pin 3 acts as the negative wire. This configuration ensures a secure and reliable connection.

The design of XLR cables minimizes electromagnetic interference, making them particularly suitable for high-quality audio production and live sound reinforcement.

The intelligent pin configuration of these cables allows for balanced signal transmission, which is essential for maintaining audio integrity over long distances. By effectively rejecting noise and providing a clean signal path, XLR cables enhance sound clarity and offer an increased dynamic range. Their robust construction and locking mechanism further ensure that connections remain stable during performances or recordings, positioning them as a preferred choice among sound engineers and musicians.

Due to their versatility, XLR cables can connect microphones, mixers, and other audio equipment, contributing to a seamless professional audio setup.

Common Uses for XLR Cables

XLR cables are widely utilized in various audio applications, including studio wiring, connecting microphones to mixers, and linking audio electronics. Their robust design renders them suitable for both modern audio devices and vintage equipment, ensuring high-quality signal transmission across diverse setups.

From live sound reinforcement to recording sessions, XLR cables are a fundamental component in the audio industry, providing reliable connections that enhance overall audio performance.

In studio environments, XLR cables play a critical role by linking condenser microphones, which capture vocals or instruments, to mixing consoles, thereby enabling pristine sound quality. During live performances, they connect powered speakers and stage monitors, facilitating seamless audio output for both performers and audiences.

Additionally, their compatibility with classic equipment, such as vintage tube microphones, allows artists to achieve unique tonal qualities often sought after in recordings. The versatility and durability of XLR cables significantly contribute to their essential status within both contemporary and nostalgic audio settings.

Understanding XLR Cable Components

A comprehensive understanding of XLR cables necessitates an examination of their key components, including connectors, wires, and shielding, all of which play a crucial role in their ability to deliver balanced audio signals.

Prominent among these components are Neutrik connectors, which are recognized for their durability and reliability across a range of audio applications, thereby ensuring secure electrical connections.

Moreover, the implementation of shielded wire and meticulous solder joints is essential for preserving the integrity of the audio signal and conforming to established wiring standards that mitigate interference.

XLR Connector Types

XLR Connector Types

XLR cables are equipped with various connector types, among which Neutrik connectors are highly regarded for their reliability and robust design. These connectors are available in different pin configurations, typically including 3-pin, 4-pin, or additional options, to accommodate diverse audio applications. The proper assembly of these connectors is crucial for ensuring secure and efficient audio transmission in both professional and amateur environments.

In practice, the choice of connector can have a significant impact on sound quality and signal integrity. Neutrik connectors are particularly esteemed for their durable construction, which minimizes wear and tear, thereby enhancing longevity. Their design prioritizes both ease of use and versatility, making them suitable for a wide range of audio devices.

When selecting the appropriate connector, it is imperative to pay close attention to the pin configuration, as it determines compatibility with microphones, mixers, and other audio equipment. A careful selection of XLR connectors can lead to optimized performance, ensuring that audio professionals achieve the precise sound reproduction they require.

Wiring Configuration of XLR Cables

The wiring configuration of XLR cables is fundamental to their functionality as balanced cables, which is essential for professional audio transmission. Typically, this configuration adheres to established wiring standards that designate the role of each pin: pin 1 is allocated for ground, pin 2 for the positive wire, and pin 3 for the negative wire.

Implementing effective soldering techniques during cable assembly is critical to ensure optimal performance and to minimize the risk of signal loss or interference.

A comprehensive understanding of this configuration is vital not only for audio engineers and sound technicians but also for anyone involved in music production or live sound reinforcement. Properly connecting these pins is essential for maintaining audio integrity over long distances, as balanced cables significantly reduce unwanted noise and hum that may occur in unbalanced systems.

Adhering to these wiring standards is recognized as a best practice that protects equipment while enhancing overall performance, making it imperative to follow these guidelines meticulously during the soldering process.

By utilizing high-quality connectors and techniques, the reliability and durability of the XLR cable setup can be greatly improved, ensuring that every performance or recording proceeds without disruption.

Tools and Materials Needed for Installation

When installing XLR cables, it is essential to have the appropriate tools and materials to achieve high-quality results. A temperature-controlled soldering iron is critical for ensuring secure solder joints, while wire strippers and cable cutters aid in the preparation of the cables for assembly.

Furthermore, the use of heat shrink tubing for insulation and a third-hand tool to stabilize components during the soldering process can significantly improve the efficiency of the installation.

Essential Tools for XLR Cable Installation

The essential tools for XLR cable installation include a soldering iron, wire strippers, and cable cutters, all of which are critical for the preparation and connection of cable components. A soldering iron equipped with temperature control facilitates the creation of precise solder joints, while wire strippers are designed to remove insulation from the wires without causing damage.

Utilizing a third hand tool can provide stability for the connectors and wires during the soldering process, ensuring that all components remain perfectly aligned for optimal performance. A utility knife is invaluable for cutting and trimming the cable length to meet specific requirements, allowing for clean and accurate adjustments.

Additionally, a multimeter plays a crucial role in testing continuity and ensuring that each connection is secure prior to final assembly. Collectively, these tools enhance the installation process, significantly contributing to the durability and functionality of the XLR cable and enabling clear audio connections that meet the high standards of audio professionals.

Recommended Materials for DIY XLR Cables

Recommended Materials for DIY XLR Cables

For individuals interested in constructing DIY XLR cables, it is advisable to utilize high-quality solder, heat shrink for insulation, and durable wiring that adheres to industry standards. A thorough understanding of wiring diagrams is essential for proper cable assembly, as this ensures that connectors are assembled correctly, thereby preventing issues such as ground loops. Selecting materials that provide effective shielding, such as copper shielding, will also enhance the overall performance of the cables.

Along with these critical components, it is imperative to invest in high-grade connectors, as they have a direct impact on audio fidelity and the reliability of connections. The importance of a meticulous soldering process cannot be overstated; substandard joints can result in signal loss and noise interference.

Furthermore, employing twisted pair wiring within the cable aids in minimizing electromagnetic interference, which can adversely affect performance in professional audio environments. By being attentive to these factors during the assembly process, one can create a durable product that delivers exceptional audio quality and maintains reliable performance across various settings.

Step-by-Step Guide to Installing XLR Cables

A comprehensive guide to installing XLR cables is essential for users seeking to achieve optimal performance and reliability in their audio systems. This process encompasses several key steps, including the preparation of the cables, making connections through precise soldering techniques, and conducting tests to ensure proper functionality.

Adhering to these steps is critical not only for ensuring high-quality sound but also for facilitating ongoing cable maintenance, as correct installation significantly influences the longevity and performance of the cables.

Preparing the Cables

Preparing the cables for XLR installation requires careful consideration of the appropriate cable length and meticulous stripping of wire insulation to facilitate soldering. Initially, one should use cable cutters to trim the cables to the desired length, followed by the use of wire strippers to remove insulation from the wire ends without damaging the internal conductors. This preparatory stage is critical for successful cable assembly, as it significantly influences the quality of the electrical connections.

To ensure accuracy, it is advisable to measure the length twice to avoid any miscalculations, marking the cable with a fine-tip marker to indicate clear cutting points. When cutting, one should employ a smooth, steady motion to prevent fraying at the ends. For the stripping process, position the wire in the stripper at the designated mark, applying just enough pressure to slice through the insulation without compromising the integrity of the metal strands beneath.

Ensuring that the exposed wire ends are neat and even is essential for establishing solid connections during the soldering process, as this significantly contributes to the overall durability and performance of the assembled cables.

Making Connections: How to Wire XLR Connectors

Making connections for XLR cables requires meticulous wiring of the XLR connectors in accordance with their specific pin configurations. It is essential to ensure that the ground pin is correctly connected to minimize interference. Effective soldering techniques must be employed to create secure solder joints, ensuring that each wire—positive and negative—is firmly attached to the appropriate pin. This attention to detail is vital for maintaining a balanced cable setup and ensuring optimal audio performance.

When undertaking the wiring process, it is imperative to begin with a clean workspace and organized tools to prevent confusion. Each XLR connector typically comprises three pins, designated as pins 1, 2, and 3, with pin 1 serving as the ground, pin 2 as the positive (hot), and pin 3 as the negative (cold). Before making connections, it is advisable to double-check the specifications of the connectors being utilized, as variations may exist.

For soldering, it is important to heat the joint sufficiently before applying solder and to avoid excessive movement to promote strong bonds. Utilizing heat shrink tubing can offer additional protection against wear and tear, thereby enhancing the longevity of the cable and ensuring reliable performance in professional environments.

Testing the Connections for Proper Functionality

Testing the Connections for Proper Functionality

Testing the connections after wiring XLR cables is essential for ensuring proper functionality and reliable performance in audio devices. This process typically involves utilizing an audio reference or a cable tester to verify that the electrical connections are intact and that the signal is transmitted without issues. Regular testing and maintenance of the cables help prevent potential problems in the future and ensure optimal audio quality.

To effectively test XLR cables, one should begin by connecting the cable to an audio source and a destination, such as a microphone and mixer. Listening for clear sound without hum or distortion is crucial, as this indicates that the connections are functioning correctly. Additionally, observing any loose connections or physical damage is important, as these factors can directly impact performance.

To preserve the integrity of the cables, routine inspections and testing should be conducted, as environmental factors and frequent handling can compromise their durability over time. By remaining diligent about cable maintenance, audio professionals can avoid costly repairs and uphold the highest standards in their audio production.

Tips and Tricks for Effective Installation

The implementation of established techniques for the effective installation of XLR cables can substantially improve the quality and reliability of audio connections. By steering clear of common errors, such as improper soldering methods or incorrect pin configurations, individuals can ensure optimal performance of their XLR cables.

Furthermore, adhering to best practices in cable management can extend the lifespan of the cables and sustain performance over time, thereby facilitating a more seamless audio experience.

Common Mistakes to Avoid

When working with XLR cables, avoiding common mistakes is crucial for enhancing installation success and audio performance. Key errors to be mindful of include inadequate soldering techniques, which can result in weak solder joints, and neglecting wiring standards that outline pin configurations and grounding. Failure to address potential ground loops may lead to unwanted noise and interference in audio signals, ultimately compromising overall quality.

It is imperative to conduct soldering meticulously, as overheating the cable can damage either the conductor or insulation, leading to shorts or breaks. To prevent wiring errors, users should consistently refer to established color codings and pin configurations, which are essential for maintaining signal integrity.

Understanding and preventing ground loops is vital; this can often be accomplished by utilizing balanced connections and properly isolating equipment. Additionally, employing high-quality connectors and cables can further minimize issues and enhance audio fidelity, resulting in a more professional setup.

Best Practices for Cable Management

Implementing best practices for cable management is essential for preserving the integrity and functionality of XLR cables, particularly in environments with multiple audio devices. Properly organizing cables by length and type can prevent tangling and damage, contributing to a cleaner and more efficient setup. Regular maintenance, which includes inspecting cables for wear and ensuring secure connections, further enhances longevity and optimal performance.

Taking the time to label cables can significantly improve organization, enabling audio professionals and enthusiasts to quickly identify connections during setup or troubleshooting processes. Utilizing cable ties and racks can assist in neatly arranging these critical components, thereby reducing the risk of accidental disconnections and maintaining a professional appearance.

It is also imperative to regularly clean and coil XLR cables in accordance with manufacturer specifications, as this careful handling helps preserve audio signal quality and prevents wear that could lead to costly replacements.

By prioritizing these management strategies, individuals can greatly enhance the overall efficiency and audio fidelity of their setups.

Maintaining Your XLR Cables

Maintaining XLR cables is crucial for ensuring long-lasting performance and reliability in audio applications. Proper cable maintenance involves conducting regular inspections, confirming secure electrical connections, and promptly addressing any signs of wear or damage.

Furthermore, understanding the appropriate methods for storing XLR cables can help prevent tangling and damage, thereby extending the lifespan of the cables and ensuring optimal audio quality.

How to Store XLR Cables Properly

Proper storage of XLR cables is essential for maintaining their quality and preventing damage over time. Cables should be stored in a manner that avoids kinks and tangles, as these can lead to wear and tear.

Utilizing cable ties or wraps can assist in organizing cables by length and type, making them easier to access and minimizing the risk of damage during transportation or storage.

Storing XLR cables in a cool, dry environment, away from direct sunlight, can significantly extend their lifespan. If feasible, it is advisable to use a dedicated cable bag or a storage box specifically designed for audio equipment, as this can further protect against adverse environmental conditions.

When rolling cables, it is recommended to use the over-under method to prevent twists, ensuring a smooth connection each time. Regular inspections for any signs of wear, such as fraying or exposed wires, are important, and cables should be replaced as necessary to ensure optimal performance during use.

By adopting these practices, individuals can safeguard their valuable audio equipment and enjoy trouble-free sound experiences.

Regular Maintenance Tips

Regular maintenance of XLR cables is essential for ensuring reliable performance and preventing issues that may arise from wear and tear. Users should routinely inspect the cables for any signs of damage, such as frayed wires or compromised soldering joints, and address any issues promptly to maintain secure electrical connections. Implementing a regular maintenance routine can significantly extend the lifespan of XLR cables.

It is advisable to keep XLR cables coiled properly and stored in a cool, dry environment to prevent kinking and moisture damage.

Additionally, cleaning the connectors periodically with a contact cleaner can enhance connectivity and reduce noise interference. Users should also conduct periodic continuity tests to verify that audio signals are transmitted without loss.

By adhering to these best practices, individuals will not only ensure consistent audio quality but also protect their investment in these vital pieces of audio equipment.

Understanding Speaker Box Names: A Comprehensive Guide

Are you curious about the world of speaker boxes and their various names? This comprehensive guide unpacks everything you need to know, from the basics of speaker box design to the different types available.

You’ll explore the history of speaker enclosures, learn about subwoofer boxes, and discover critical calculations for optimal performance.

Whether you’re a novice or an audio enthusiast, this guide will equip you with the knowledge to navigate speaker box terminology with confidence.

Buckle up for an enlightening journey into audio excellence!

What is a Speaker Box?

What is a Speaker Box?

A speaker box, or enclosure, is a structural component that houses a loudspeaker driver, specifically designed to enhance the performance of sound waves produced by the driver. This enhancement is achieved through various enclosure designs, such as bass reflex or sealed configurations.

These enclosures play a critical role in shaping the acoustic characteristics of the sound produced. The primary components of a speaker box typically include the driver itself, the cabinet or enclosure, and often internal materials that assist in managing sound waves.

For example, a bass reflex design employs a ported enclosure that facilitates increased low-frequency response, resulting in a richer bass sound. Conversely, sealed enclosures provide a tighter and more accurate bass response, albeit with a potential limitation on overall output volume.

Comprehending these design differences can significantly influence an individual’s choice in achieving the desired audio quality across various listening environments.

The Role of Speaker Boxes in Audio Quality

The role of speaker boxes in audio quality is crucial, as they influence sound pressure levels, frequency response, and the overall interaction of sound waves generated by the loudspeaker driver.

A well-designed speaker box can substantially enhance audio performance by optimizing sound pressure, which refers to the maximum loudness achievable without distortion. For instance, larger cabinet sizes typically provide improved low-frequency performance due to increased air displacement volume; however, they can also introduce complexities in frequency response if not designed with precision. Conversely, poor construction may result in unwanted resonances that create a distortion effect, thereby compromising sound clarity.

By considering the materials used and the internal geometry of the cabinet, designers strive to create environments that facilitate balanced and accurate audio reproduction, ultimately enhancing the listening experience.

History of Speaker Box Design

The history of speaker box design has undergone substantial evolution, transitioning from early acoustic models to contemporary innovations.

Pioneers such as Richard Small have made significant contributions, particularly through the development of the Thiele-Small parameters, which established a foundational framework for modern high-fidelity audio systems.

Evolution of Speaker Enclosures

The evolution of speaker enclosures has progressed from basic wooden boxes to sophisticated designs that account for cabinet resonances, acoustic damping, and optimal tuning frequency, thereby enhancing sound performance.

This journey commenced with rudimentary wooden constructions, which frequently resulted in sound distortion due to their limited structural integrity. As knowledge of acoustic models advanced, designers began to incorporate superior materials such as MDF and plywood, which considerably minimized unwanted vibrational interference.

Innovations in construction techniques, including precision joinery and advanced finishing methods, have further enhanced cabinet characteristics, enabling more controlled sound reproduction.

The focus has since shifted toward hybrid designs and computational acoustic modeling, resulting in enclosures that not only accommodate larger drivers but also optimize frequency response and damping. These advancements have ultimately led to the development of today’s high-fidelity audio systems, which deliver exceptional clarity and depth.

Key Innovations in Speaker Box Design

Key innovations in speaker box design, such as the bass reflex system and the introduction of passive radiators, have significantly transformed sound production, enabling greater bass extension and improved overall performance.

These advancements give the power to speakers to generate richer low-frequency sounds while maintaining clarity across all frequency ranges. By optimizing enclosure characteristics, designers can customize speaker behavior to suit specific listening environments, resulting in a more immersive audio experience.

For example, advancements in materials and construction techniques ensure that the enclosure remains rigid and inert, thereby minimizing unwanted resonances that can compromise sound quality. The integration of advanced digital signal processing facilitates precise tuning of bass response, complementing the physical design and maximizing overall efficiency.

Collectively, these innovations not only enhance audio quality but also increase the accessibility of high-performance speakers across various applications.

Types of Speaker Boxes

There are various types of speaker boxes, each engineered to meet specific acoustic requirements. These include:

  • closed-box (sealed) enclosures
  • ported (reflex) systems
  • dipole configurations
  • horn designs
  • transmission line enclosures
  • quarter wave resonators

Closed-box (Sealed) Enclosures

Closed-box (Sealed) Enclosures

Closed-box or sealed enclosures are engineered to deliver precise and accurate sound reproduction by minimizing cabinet resonances and controlling the diaphragm motion of the loudspeaker driver.

This design approach effectively absorbs sound waves originating from the rear of the diaphragm within the enclosure, thereby preventing any interference with the sound waves projected from the front. As a result, listeners benefit from a more cohesive and well-defined audio performance, characterized by enhanced bass response and diminished distortion.

These enclosures also provide improved transient response, allowing for music and vocal details to be reproduced with exceptional clarity. By isolating the speaker from external influences, closed-box designs significantly enhance overall sound fidelity, making them a favored choice among audiophiles who seek a rich and immersive listening experience.

Ported (Reflex) Enclosures

Ported enclosures, often referred to as bass reflex boxes, are meticulously designed to enhance low-frequency response by enabling sound waves generated by the rear of the loudspeaker driver to interact with those produced at the front. This interaction effectively tunes the enclosure to a specific frequency.

This innovative design features a precisely calculated port or vent that produces an optimal resonance effect, amplifying bass tones while reducing distortion. By facilitating the interaction between outgoing sound waves, the enclosure capitalizes on the acoustic energy from both the front and rear of the speaker, thereby extending the depth and clarity of bass performance.

The principles of sound wave interaction, resonance, and the meticulous sizing of the port are critical factors that influence the performance of these enclosures. They contribute to a richer audio experience that accurately conveys the subtleties of bass frequencies in both music and soundtracks. Such designs are essential for audiophiles seeking an immersive listening experience.

Dipole Enclosures

Dipole enclosures employ an open baffle design that enables sound waves to radiate from both sides of the loudspeaker driver, resulting in a distinctive cancellation effect that enhances spatial sound perception.

This innovative method significantly influences the listener’s experience of music and audio production by fostering a more immersive soundstage. By effectively managing sound dispersion, dipole designs mitigate unwanted reflections that can compromise audio clarity, ensuring a cleaner and more accurate reproduction of sound.

These enclosures are instrumental in minimizing room interaction, a critical consideration for audiophiles aiming to optimize their listening environment. Consequently, the benefits of dipole configurations extend beyond improved sound quality; they also provide a more authentic auditory experience, allowing audiences to engage more profoundly with the content being presented.

Horn Enclosures

Horn enclosures are engineered to significantly enhance sound efficiency and directionality, making them particularly suitable for sound reinforcement applications in large venues and outdoor environments.

These innovative acoustic models leverage the principles of wavefront propagation to facilitate sound travel over greater distances with improved clarity compared to traditional speaker systems. By concentrating sound energy into a focused beam, they effectively minimize unwanted reflections and ambient noise, thereby providing listeners with a more immersive auditory experience. This capability not only elevates the overall sound quality but also enables performers and speakers to project their voices more effectively.

Horn enclosures are often available in various designs tailored to specific frequencies, further optimizing sound projection and ensuring that every note and word is delivered with precision.

Transmission Line Enclosures

Transmission line enclosures are meticulously engineered to optimize low-frequency response through the utilization of an extended path for sound waves to traverse, thereby enhancing bass performance and minimizing distortion effects.

This design approach effectively employs the principles of sound wave propagation, ensuring that the wavelength of lower frequencies aligns harmoniously with the dimensions of the enclosure. By precisely calculating the length and cross-sectional area of the transmission line, audio engineers can create an environment in which sound waves reinforce one another, ultimately enhancing overall bass response.

The gradual tapering of the line plays a critical role in minimizing reflections and phase cancellations, issues that frequently affect other types of enclosures. This careful attention to detail not only elevates the listening experience but also provides greater flexibility in speaker placement, making transmission lines a favored option among audiophiles who seek superior sound quality.

Quarter Wave Enclosures

Quarter wave enclosures function based on the principles of wave resonance, employing a specific tuning frequency to enhance bass response and overall sound quality.

This innovative design enables sound waves generated by the speaker to resonate within an enclosure that is calibrated to a quarter wavelength of the desired frequency. By meticulously adjusting the dimensions of the enclosure, one can optimize sound output, ensuring that lower frequencies are amplified and delivered with greater clarity.

This tuning not only enhances bass response but also aids in minimizing unwanted noise, resulting in a more immersive audio experience.

For audiophiles and sound engineers, a thorough understanding of the dynamics of these enclosures provides valuable insights into achieving optimal audio performance across various listening environments.

Understanding Subwoofer Boxes

Understanding Subwoofer Boxes

Subwoofer boxes are meticulously engineered enclosures specifically intended to enhance bass response and low-frequency performance. These enclosures utilize various design types, including sealed and ported configurations, to provide effective sound reinforcement.

Importance of Subwoofer Box Design

The design of a subwoofer box is essential for achieving the desired bass extension and overall sound quality, as it determines the enclosure’s effectiveness in handling low-frequency sound waves while minimizing distortion effects.

Several factors must be considered when determining the optimal design, including the size and shape of the enclosure, which significantly influence the characteristics of the sound produced. For example, a larger box typically permits deeper bass; however, its dimensions must be meticulously calculated to correspond with the specific specifications of the subwoofer.

The materials utilized in the construction of the box also play a critical role in sound quality. Denser materials can effectively reduce vibrations and minimize resonance, resulting in cleaner sound output. Furthermore, the internal design—whether ported or sealed—affects how sound waves interact within the enclosure, ultimately influencing the listener’s experience.

Different Types of Subwoofer Boxes

There are several types of subwoofer boxes available, including sealed, ported, and passive radiator designs. Each type offers distinct advantages and sound characteristics tailored to various audio applications.

For example, sealed subwoofer boxes are recognized for their tight and accurate bass response, making them particularly suitable for individuals who appreciate music with intricate details. Conversely, ported boxes enhance output efficiency and provide a powerful low-end that many bass enthusiasts favor during high-energy performances. Additionally, passive radiator designs incorporate passive elements to reinforce bass without increasing the overall size of the enclosure, providing a compact solution that still delivers impressive sound quality.

A thorough understanding of the characteristics of these subwoofer box designs can assist individuals in selecting the appropriate system, ultimately leading to a satisfying auditory experience that aligns with their specific sound preferences.

Calculating Box Sizes for Optimal Performance

Calculating the optimal box size for speaker enclosures is crucial for achieving superior performance. The volume of the cabinet directly impacts sound quality and ensures that the driver specifications are met for effective sound reproduction.

Factors Influencing Box Size

Several factors influence box size calculations, including the desired tuning frequency, cabinet volume, and the specific requirements of the loudspeaker driver, all of which are essential for optimizing audio performance.

When evaluating the desired tuning frequency, audio engineers must recognize how the dimensions of the box impact resonance and sound quality. Cabinet volume is equally critical, as it not only affects the overall bass response but also influences efficiency and dynamics.

The specific requirements of the driver are paramount; different types of drivers may require varying enclosure designs, such as sealed or ported configurations, to achieve optimal sound reproduction. Additionally, environmental factors and material selections can significantly affect the determination of the ideal box size, ensuring that the final product delivers clear and powerful audio that meets established performance expectations.

Box Size Calculation Techniques

Box size calculation techniques incorporate mathematical models and acoustic principles, such as resonance frequency and driver specifications, to ascertain the optimal dimensions necessary for achieving the desired sound quality.

By meticulously analyzing these factors, individuals can refine their designs to enhance performance. For example, utilizing the Thiele/Small parameters, which describe the movement of the speaker cone and its interaction with the enclosure, provides a fundamental understanding of how to balance the box volume with the characteristics of the driver.

Additionally, principles such as Helmholtz resonance are instrumental in determining port dimensions for bass reflex designs, thereby ensuring efficient sound wave propagation. Ultimately, adopting a systematic approach that includes simulations and measurements assists both enthusiasts and professionals in defining box dimensions that significantly improve audio fidelity.

Best Practices for Building Your Speaker Box

Best Practices for Building Your Speaker Box

Constructing a speaker box necessitates strict adherence to best practices to ensure structural integrity, optimal sound quality, and durability. This includes the careful selection of appropriate construction materials and the adherence to established performance tuning guidelines.

Materials Used in Speaker Box Construction

The materials employed in the construction of speaker enclosures play a critical role in determining their acoustic performance. These materials influence various factors, including resonance frequency, internal reflections, and overall sound quality through effective acoustic damping.

Wood, particularly Medium Density Fiberboard (MDF) and plywood, is widely regarded as a preferred choice due to its density and capacity to minimize vibrations, resulting in clearer sound reproduction. Conversely, plastic enclosures, while lighter and more cost-effective, may produce undesirable resonances that can adversely affect audio clarity.

The incorporation of acoustic foam and fiberglass significantly enhances sound absorption, mitigating echoes and improving overall clarity. Additionally, construction techniques, such as the type of joinery and the thickness of the materials used, further impact how sound travels within the enclosure.

Selecting the appropriate combination of these elements is essential for achieving optimal acoustic performance in speaker design.

Step-by-Step Guide to Building a Speaker Box

Building a speaker box can be a highly rewarding endeavor, and adhering to a structured step-by-step guide can facilitate the effective implementation of various design types while optimizing sound performance.

  1. To commence, it is essential to clearly define the specific type of speaker box you intend to construct, whether it is a sealed enclosure designed for tight bass response or a ported design aimed at enhancing low-end projection.

  2. Subsequently, one should gather the requisite materials, including wood, screws, and acoustic insulation, along with necessary tools such as a saw, drill, and measuring tape.

  3. Once the design and materials are prepared, the process of measuring and cutting the wood to the appropriate dimensions will establish a solid foundation for your project.

  4. Following the cutting of the panels, the assembly process must be conducted with precision to prevent any sound leakage, which could negatively impact audio quality.

  5. Finally, adding finishing touches such as a protective coating or speaker grill will not only enhance the aesthetic appeal but also extend the longevity of the speaker box, ensuring it maintains an attractive appearance in any setting.

Common Mistakes in Speaker Box Design

Common mistakes in speaker box design can significantly affect audio performance. These include:

  • miscalculations of box size
  • neglecting acoustic damping
  • failing to comply with tuning frequency requirements

Avoiding Pitfalls in Box Construction

Avoiding pitfalls in box construction necessitates meticulous planning and execution, ensuring that aspects such as cabinet volume, material selection, and tuning frequency are carefully considered to achieve optimal sound quality.

To attain the best results, it is imperative for builders to engage in thorough research and apply established design principles. This involves choosing high-quality materials capable of withstanding environmental stresses while preventing unwanted vibrations or distortions.

Accurate calculations concerning dimensions and internal structures can significantly enhance acoustic performance. By dedicating time to develop detailed blueprints and simulations, builders can anticipate potential challenges and implement solutions proactively, thereby facilitating a successful project.

Ultimately, comprehensive preparation not only reduces the likelihood of common construction errors but also enhances the overall integrity and longevity of the final product.

Summarizing Key Takeaways

Key takeaways from the examination of speaker box design encompass the importance of enclosure types, the influence of construction materials, and the necessity of performance tuning in achieving optimal audio performance.

Understanding these factors is essential for individuals seeking to enhance their audio experience, whether in a home theater setup or a professional studio environment.

Different enclosure types, such as sealed or ported designs, can significantly impact sound reproduction, affecting both bass response and overall clarity.

The selection of materials—ranging from plywood to MDF—can influence the durability and sonic characteristics of the speaker box.

Performance tuning, which involves the adjustment of internal components and acoustic parameters, is critical for optimizing sound output and ensuring that audio quality aligns with the listener’s expectations.

Further Reading and Resources

For individuals interested in enhancing their knowledge of speaker box design, a diverse array of reading materials and resources is available, including books, scholarly articles, and online forums focused on audio engineering and sound quality.

To effectively navigate this extensive pool of information, it is advisable to explore recognized titles such as “The Art of Speaker Design” by Phil C. and “Loudspeaker Design Cookbook” by Vance Dickason. Both texts provide comprehensive insights into the mechanics and aesthetics associated with speaker construction.

Additionally, engaging with online communities such as the DIY Audio Forum or the r/homelab subreddit can offer valuable peer support and practical guidance. Websites like Parts Express and Audioholics also host a wealth of articles and tutorials that can assist emerging designers in honing their skills while addressing both theoretical and practical elements of sound reproduction.

The Complete Guide to Installing Canon Jacks

Installing Canon jacks can seem daunting, but with the right guidance, it can be a straightforward process. This comprehensive guide walks you through everything you need to know, from understanding the importance of proper installation to the tools required for the job.

You’ll find step-by-step instructions for both wired and wireless connections, along with troubleshooting tips for common issues. Additionally, there are extra tips to enhance your printer’s functionality.

Dive in to ensure your Canon jack is set up for optimal performance!

Overview of Canon Jacks

Overview of Canon Jacks

Canon jacks play a vital role in the effective installation and operation of Canon printers by enabling various connection methods, including USB cables and wireless setups. A comprehensive understanding of the different types of jacks available can assist users in selecting the most appropriate connection method to ensure proper printer installation and optimal connectivity.

The primary types of Canon jacks include:

  • USB jacks, typically located at the rear of the printer, provide a direct connection to computers or laptops, ensuring reliable data transfer for seamless printing.
  • Ethernet ports facilitate a wired network connection, allowing multiple users to access the printer over a local area network, which is particularly advantageous in office settings.
  • Wireless connectivity options enable convenient printing from mobile devices and laptops without the necessity for physical cables, thereby enhancing flexibility and improving the user experience.

Selecting the appropriate type of jack is crucial, as it can significantly influence the printer’s performance and overall user satisfaction.

Importance of Proper Installation

The proper installation of a Canon printer is crucial not only for establishing reliable connectivity but also for ensuring optimal print quality and minimizing potential troubleshooting challenges that may arise from installation errors. Dedicating time to a comprehensive installation process can lead to a more efficient and satisfactory printing experience.

When installation is conducted improperly, users may face connectivity issues that disrupt workflow, resulting in missed deadlines and diminished productivity. Furthermore, the quality of printed materials may be adversely affected, leading to smudged or faded documents that do not meet professional standards.

If these issues occur, users may need to undertake troubleshooting measures, such as verifying cable connections, reinstalling drivers, or adjusting network settings. To mitigate these challenges, it is essential to adhere to a proper setup guide that clearly outlines each step, thereby ensuring that the printer functions smoothly and efficiently from the outset.

Preparing for Installation

Preparing for the installation of a Canon printer necessitates the collection of essential tools and materials. This includes the printer installation CD, a USB-A to USB-B cable for wired setups, and ensuring the availability of compatible ink cartridges.

Furthermore, it is advisable to identify a suitable power outlet and confirm network settings in advance. These steps will facilitate a more efficient installation process, regardless of whether a USB or wireless configuration is selected.

Tools and Materials Needed

Before initiating the installation process, it is imperative to collect the necessary tools and materials for your Canon printer. This includes a USB cable for wired connections, compatible ink cartridges, and, if applicable, an external CD reader to access the printer installation CD. Ensuring that these items are readily available will facilitate a more efficient setup process and mitigate potential delays.

Along with these fundamental components, it is advisable to secure a wireless network connection if you intend to utilize a Wi-Fi setup, which may require a router and relevant network credentials. A screwdriver may also be useful for securing any components, if necessary.

Furthermore, do not overlook the importance of the power cable to provide an adequate power source for your printer. Access to a computer or mobile device equipped with the latest drivers can further streamline the installation process.

Collectively, these tools are essential for establishing effective connectivity and ensuring the printer operates correctly, whether through USB or wireless methods.

Understanding Your Canon Model

Understanding the specific model of your Canon printer, such as the Canon PIXMA G4200, is essential for a successful installation. Different models may possess unique requirements and features, which are detailed in the printer’s instruction manual. Familiarity with the printer’s model number also aids in locating the appropriate printer drivers and setup guides on the Canon support website.

This knowledge not only streamlines the setup process but also proves invaluable when troubleshooting issues. For example, if an error arises during printing, knowing the exact model facilitates the identification of targeted solutions or troubleshooting manuals that address specific problems. Users can access FAQs, video tutorials, and community forums tailored to their particular printer model, thereby enhancing their overall experience and ensuring optimal performance.

In summary, being well-informed about the specific features and specifications of the printer is crucial for maximizing its functionality and longevity.

Safety Precautions

Safety Precautions

Before commencing the installation of your Canon printer, it is crucial to consider safety precautions. These include ensuring that the printer is positioned near a reliable power outlet and away from potential hazards that could damage the device. Implementing these safety measures will not only protect the printer but also facilitate a smoother installation process.

It is imperative to maintain the installation area in a dry condition and free from any exposure to water, as this co