The Importance of Pin Configuration in Canon Jacks

In the world of audio and video equipment, Canon jacks play a pivotal role in connecting devices seamlessly.

Understanding the importance of pin configuration within these jacks is essential for anyone looking to enhance their setup.

This article explores what Canon jacks are, the different types available, and how pin configuration impacts performance.

From ensuring optimal signal transmission to troubleshooting common issues, we cover everything you need to know to make the most of your Canon jacks.

Dive in and discover how to elevate your audio-visual experience!

Understanding Canon Jacks

Understanding Canon Jacks

Canon jacks, recognized for their extensive application in professional audio and video configurations, function as essential electrical connection points that enable communication between various devices, including cameras and flashes.

What are Canon Jacks?

Canon jacks are specialized electrical connectors designed to establish a secure connection between various devices, such as cameras and flashes, thereby ensuring reliable signal transmission.

These jacks are characterized by a robust design that typically incorporates metal connectors and insulated casing. This construction not only enhances durability but also minimizes the risk of interference. Such features enable photographers and videographers to achieve consistent and stable connections, which are crucial for synchronizing equipment during shoots.

The design of Canon jacks supports a wide range of applications, accommodating various audio and video equipment, thereby expanding creative possibilities. Given their integral role in professional setups, reliability is of utmost importance, as even minor connectivity issues can disrupt a shoot. Consequently, investing in high-quality connectors is essential for optimal performance.

Types of Canon Jacks

There are various types of Canon jacks available, including the widely recognized XLR connector, each designed with specific pin configurations to accommodate diverse applications.

These connectors are essential for ensuring reliable audio and video signals across different environments, ranging from professional filmmaking to event photography. The XLR jack, for example, is frequently employed in high-end microphones, making it a preferred choice among audio professionals. Additionally, mini-jack connectors provide a convenient option for compact devices, while dedicated Canon multi-terminal jacks facilitate seamless integration with Canon cameras and flashes, enabling advanced functionalities such as remote control of lighting.

By understanding the unique capabilities and appropriate applications of each jack, users are give the power toed to make informed decisions that enhance their creative projects.

The Role of Pin Configuration

Pin configuration is essential in ensuring that Canon jacks establish a secure electrical connection and effectively transmit signals. This is critical for achieving optimal performance across various applications, particularly within the entertainment industry.

What is Pin Configuration?

What is Pin Configuration?

Pin configuration refers to the specific arrangement and assignment of pins in connectors, such as those utilized in Canon jacks, which dictates how electrical connections are established between devices such as cameras and flashes.

This arrangement is essential for ensuring effective communication between devices, mitigating the risk of misconnection or malfunction. Each pin is designated for a particular function, whether related to signaling, power supply, or data transfer.

By adhering to a standardized pin configuration, manufacturers can ensure compatibility across a variety of equipment, thereby enhancing the user experience. In professional environments, such as photography and videography, the importance of an accurate pin layout is paramount, as it plays a critical role in maintaining consistent performance and preventing potential connection issues that could impede workflow.

Importance of Pin Configuration in Canon Jacks

The significance of pin configuration in Canon jacks is paramount, as it directly affects signal quality, voltage stability, and the overall performance of connected devices, such as cameras and flashes.

Ensuring each pin is correctly assigned and aligned facilitates efficient signal transmission, thereby minimizing the potential for data loss or interference. This meticulous arrangement addresses possible connectivity issues, enabling users to capture high-quality images and videos without interruptions.

By reducing voltage fluctuations, a well-implemented pin configuration enhances reliability, thereby prolonging the lifespan of both the jacks and their associated peripherals. In a dynamic shooting environment, these technical details are essential, allowing photographers and videographers to concentrate on their creative pursuits without the concern of equipment malfunction.

Common Pin Configurations in Canon Jacks

Common pin configurations in Canon jacks encompass various arrangements designed to fulfill specific functions in establishing secure electrical connections. These connections are essential for ensuring reliable performance in devices such as cameras and flashes.

Standard Pin Layouts

Standard pin layouts in Canon jacks are meticulously designed to ensure compatibility across a wide range of devices, facilitating seamless electrical connections that enhance communication and performance.

These layouts typically feature a specific arrangement of pins corresponding to various audio and video signals, power delivery, and control commands. For example, a standard 3-pin configuration supports balanced audio connections, which significantly reduces noise interference and enhances signal integrity.

This thoughtful design promotes optimal performance in professional settings, such as live sound or studio environments, where reliability is paramount. Variations in pin configurations may exist based on the application, affecting factors such as impedance levels and signal clarity. Therefore, it is essential for users to select the appropriate jack type to meet their specific device requirements.

Variations in Pin Configuration

Variations in Pin Configuration

Variations in pin configuration can significantly influence the interaction between Canon jacks and various devices, affecting aspects such as signal transmission and overall device compatibility.

These differences may result in varying performance levels across equipment; certain configurations may facilitate higher data rates or improved power delivery. For example, utilizing a legacy Canon jack with a modern camera may lead to reduced functionality, as newer devices typically employ advanced pin layouts designed for enhanced integration and efficiency.

This incompatibility can adversely affect not only audio and video quality but also the reliability of connections. Therefore, understanding the specific pin arrangement and ensuring compatibility with the appropriate device is essential for users seeking to achieve optimal performance and seamless connectivity in their workflows.

How Pin Configuration Affects Performance

Pin configuration significantly affects the performance of devices that utilize Canon jacks. It influences various factors, including signal transmission quality and compatibility with accessories.

Signal Transmission and Quality

The pin configuration of Canon jacks is essential for ensuring high-quality signal transmission, as improper configurations can compromise signal integrity during communication between devices.

The complexity of this configuration resides in the arrangement and grounding of the pins; any misalignment may introduce crosstalk or noise, adversely affecting the clarity and strength of the transmitted signal. Each pin is designated for a specific function, such as power delivery or data transmission, and proper pin assignments are crucial for efficient signal transmission free from interference.

Moreover, the materials utilized in the construction of these jacks, in conjunction with their adherence to relevant industry standards, can significantly impact their performance. Therefore, it is imperative for both manufacturers and users to comprehend the technical specifications associated with pin configuration to achieve optimal results.

Compatibility with Accessories

Compatibility with accessories is predominantly determined by the pin configuration of Canon jacks, as variations in arrangement can either facilitate or impede effective communication between devices.

This complex interplay of connections necessitates careful consideration when selecting accessories, particularly in professional environments where reliability is of utmost importance. For example, utilizing microphones or lighting equipment with mismatched pin layouts may result in challenges such as subpar audio quality or inconsistent power supply.

Comprehending the various pin configurations not only assists users in optimizing their toolkit but also underscores potential pitfalls associated with the use of incompatible devices. Thus, recognizing the intricacies of these connections is essential for achieving seamless integration, ensuring that creative endeavors are executed without disruption.

Troubleshooting Pin Configuration Issues

Troubleshooting Pin Configuration Issues

Troubleshooting pin configuration issues in Canon jacks is crucial for ensuring seamless communication and optimal performance in devices such as cameras and flashes, as misconfigurations can lead to signal disruptions.

These issues may present symptoms including erratic behavior, frequent disconnections, or even complete malfunctions of the equipment. Users may observe that their camera fails to communicate effectively with the external flash or that certain features become unresponsive.

To address these challenges effectively, it is advisable to begin by inspecting the jacks for any dirt, debris, or wear that could interfere with the connection. Additionally, verifying the integrity of the cables and ensuring they are properly seated can often resolve many common issues.

Utilizing a multimeter to check for continuity and appropriate voltage levels can further assist in diagnosing more complex pin misconfigurations.

Best Practices for Using Canon Jacks

The implementation of best practices for utilizing Canon jacks is essential for maintaining optimal performance and extending the longevity of devices such as cameras and flashes.

Adhering to these practices ensures secure connections and reliable functionality in operation.

Proper Handling and Maintenance

Proper handling and maintenance of Canon jacks are critical to ensuring the longevity and reliability of electrical connections in devices such as cameras and flashes.

To accomplish this, users should consistently maintain cleanliness by keeping the jacks free from dust and debris, as accumulated particles can impede performance and potentially lead to damage. It is essential to employ gentle handling techniques when inserting or removing cables; users must avoid yanking or twisting the connectors, as this may exert undue stress on the ports. Regular inspections of the jacks for signs of wear, along with prompt attention to any identified issues, can further enhance their lifespan.

Additionally, utilizing protective caps when the jacks are not in use serves to safeguard against accidental impacts or moisture, underscoring the importance of diligent care.

When to Seek Professional Help

Recognizing the appropriate time to seek professional assistance for Canon jack issues is crucial, particularly when addressing complex problems that may affect the functionality of cameras and flashes.

Identifying the signs that indicate the necessity for expert intervention can conserve both time and prevent potential damage to valuable equipment. For instance, if a user encounters persistent connectivity issues, such as intermittent audio or failure to charge, these may serve as clear indicators of underlying problems.

Furthermore, unusual sounds or overheating during operation should be regarded as significant warning signs that require immediate attention. Engaging professional technicians ensures that the appropriate solutions are applied, thereby preserving the integrity of the camera equipment and mitigating the risk of further complications.

Timely intervention can ultimately enhance the performance and extend the lifespan of the device.

Summary of Key Points

This summary outlines the key points regarding the importance of pin configuration in Canon jacks, emphasizing its influence on performance and device compatibility.

A thorough understanding of the precise arrangement of pins is essential, as it directly affects the efficacy of communication and operation among devices. Proper pin configuration guarantees the accurate transmission of signals, thereby enhancing the overall functionality of compatible devices and reducing the likelihood of errors and potential malfunctions. This aspect is particularly critical when utilizing various peripherals, as it ensures seamless interaction between equipment.

As technology continues to advance, it becomes increasingly important to recognize the intricacies of pin configuration in order to maintain optimal performance and achieve the desired outcomes across diverse applications.

Final Thoughts on Pin Configuration

The final considerations regarding pin configuration emphasize its vital importance in the functionality and performance of Canon jacks, highlighting the necessity for users to prioritize this aspect to ensure seamless operation.

A comprehensive understanding of the layout and arrangement of pins within these jacks can significantly enhance connection reliability, thereby minimizing potential disruptions during use. When users take the time to familiarize themselves with the intricate details of pin assignments, they not only ensure optimal equipment performance but also extend the lifespan of their devices.

It is important to recognize that even a minor oversight in pin configuration can lead to functionality issues that may prove frustrating and costly to resolve. Consequently, users must reflect on these insights, as they serve a foundational role in effective troubleshooting and device longevity.

In today’s fast-paced digital landscape, where high-quality audio and visual outputs are essential, mastering the nuances of pin configurations is increasingly relevant.

Best Field Subwoofer for Powerful Outdoor Sound

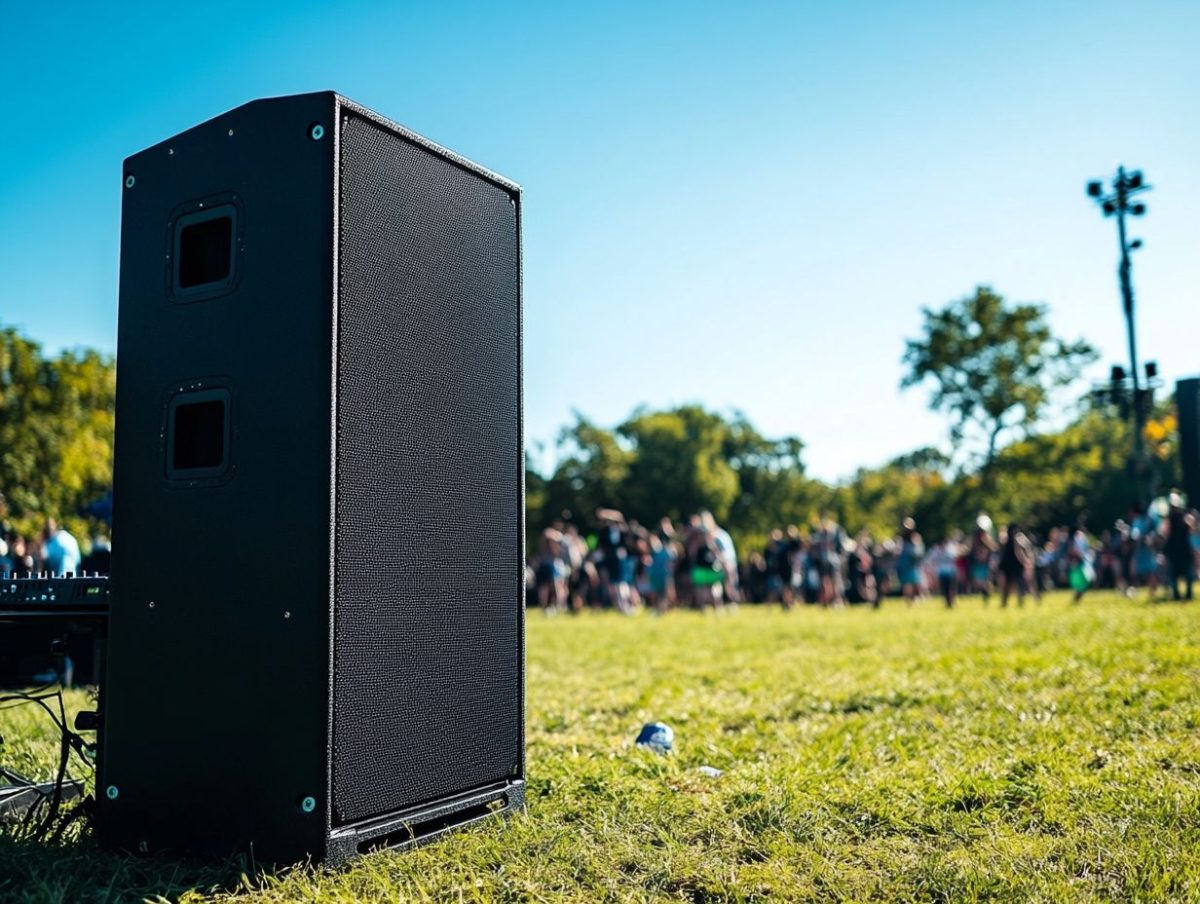
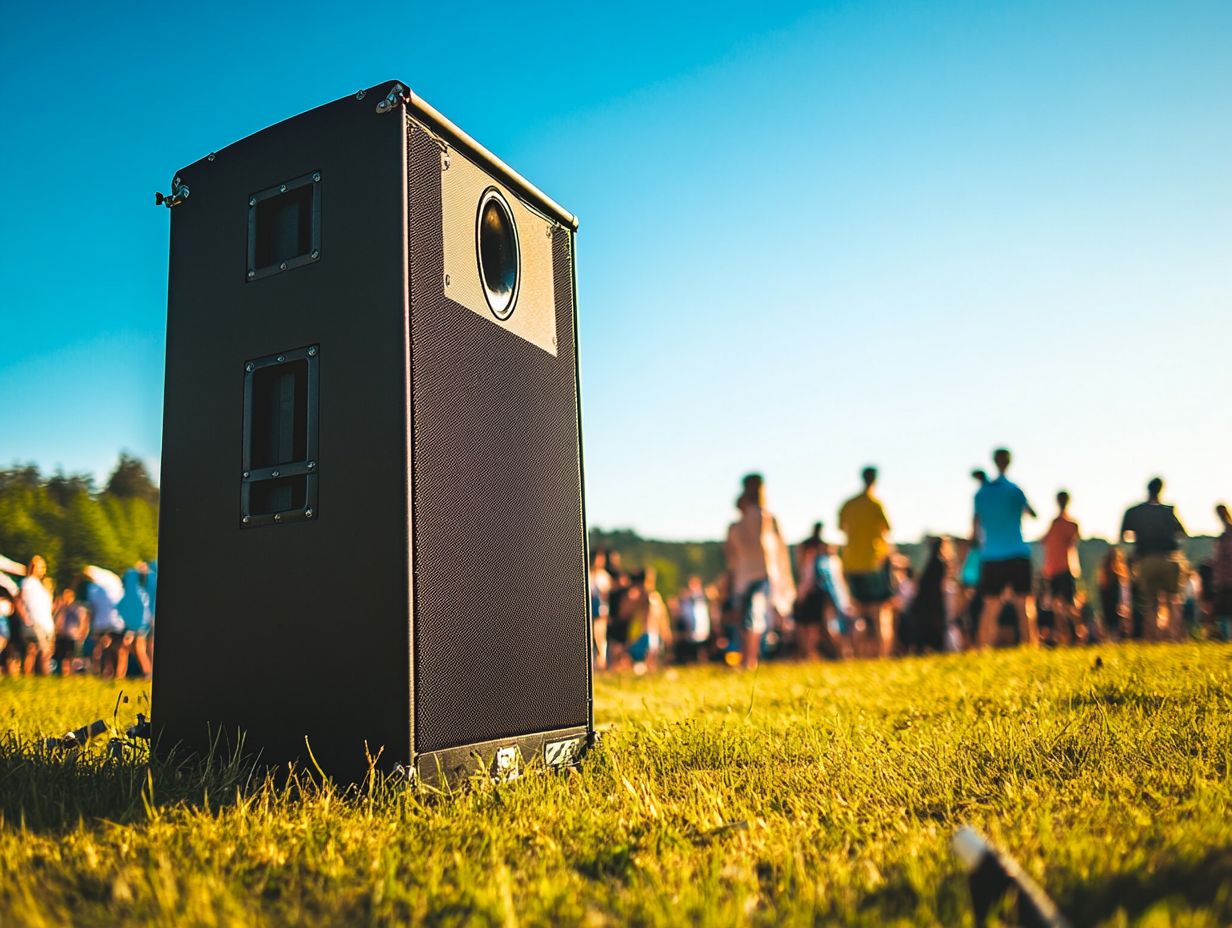
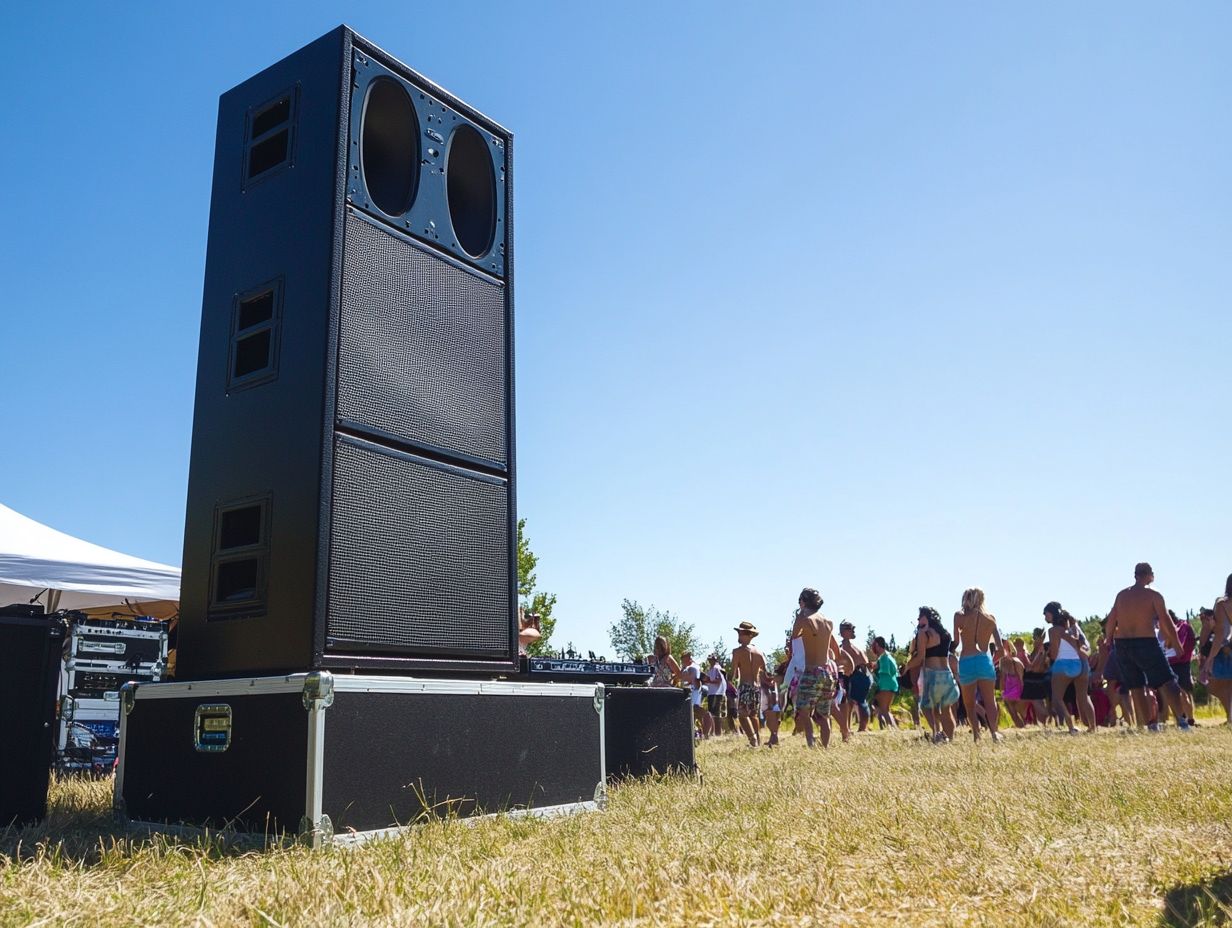
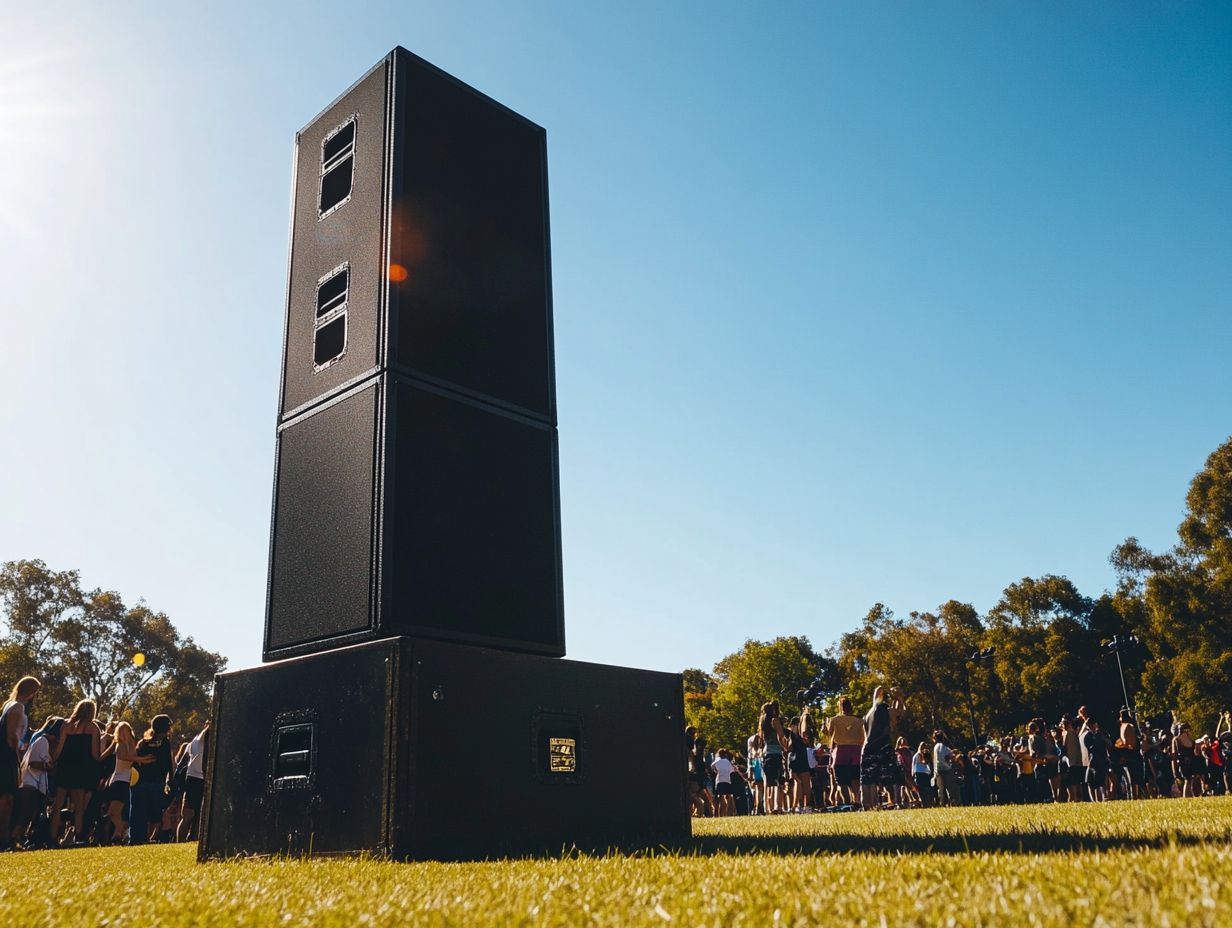
When it comes to enjoying music or sound in outdoor settings, a quality subwoofer is crucial for delivering the deep bass and powerful sound that create an immersive experience.

Whether you’re hosting a backyard party, setting up for a community event, or simply enjoying a day at the park, the right outdoor subwoofer can transform your audio experience.

This guide will help you navigate essential factors to consider, recommend top models across various price ranges, and share tips for optimal installation and setup.

Dive in to discover how to elevate your outdoor sound with the best field subwoofers available!

Why a Subwoofer is Essential for Outdoor Sound

Why a Subwoofer is Essential for Outdoor Sound

A subwoofer is a crucial component for outdoor sound systems, as it significantly enhances bass response, which is essential for providing a comprehensive auditory experience when listening to various music genres in open environments. Without the deep, resonating tones produced by a high-quality subwoofer, outdoor music listening can feel flat and lack the richness needed to adequately fill larger spaces such as backyards or patios.

The dynamic capabilities of a subwoofer ensure effective sound wave propagation, maintaining audio clarity and balance across extended listening distances, even amidst environmental noise.

This enhancement is particularly important in outdoor settings, where sound can easily dissipate. The design of different subwoofers, such as ported versus sealed enclosures, plays a significant role in their performance outdoors. For example, ported subwoofers often deliver more powerful bass at lower frequencies, making them well-suited for vibrant music styles like hip-hop, while sealed subwoofers offer more precise and tighter sound, making them ideal for genres such as classical or acoustic.

Integrating subwoofers with high-quality audio systems, including amplifiers and speakers specifically designed for outdoor use, further optimizes the listening experience. By ensuring compatibility and strategic placement, one can achieve a balanced soundscape that enhances the enjoyment of the outdoor ambiance for all attendees.

Key Factors to Consider When Choosing an Outdoor Subwoofer

When selecting an outdoor subwoofer, it is essential to consider several critical factors to ensure optimal sound quality and durability in various weather conditions. Key considerations include the subwoofer’s weather-resistant design, which is vital for withstanding environmental elements, and its compatibility with an audio receiver or existing speaker system.

The installation process should be user-friendly, facilitating seamless integration into an outdoor audio setup while taking into account the desired bass response and overall speaker performance tailored for open spaces.

The overall power output of the subwoofer is significant in achieving the desired volume levels without distortion, thereby enhancing the immersive listening experience. It is advisable to seek models that exhibit robust construction and protective enclosures to improve durability and ensure resilience against rain, sun, and other outdoor elements.

Additionally, evaluating the frequency range can provide valuable insights into the clarity of sound reproduction, which is particularly crucial for expansive outdoor environments. Lastly, ease of maintenance should not be overlooked; convenient access to components for servicing can significantly extend the lifespan of the subwoofer.

Top Recommendations

Selecting the optimal outdoor subwoofer involves navigating a diverse market that provides a variety of options tailored to different needs and budget constraints. This ensures that consumers can identify a suitable model that aligns with their audio requirements.

The range includes the best overall outdoor subwoofers, which are engineered for exceptional sound performance, as well as budget-friendly alternatives that still offer commendable bass response. For audiophiles seeking advanced features, there are high-end models available.

Furthermore, portable outdoor subwoofers present an ideal solution for individuals desiring flexibility in their outdoor audio arrangements.

Best Overall Outdoor Subwoofer

The OSD Audio AP650 is recognized as the premier outdoor subwoofer, offering exceptional sound quality and performance tailored for outdoor environments. Constructed with a robust, weather-resistant enclosure, this subwoofer guarantees consistent audio playback across diverse outdoor conditions, making it an excellent choice for music enjoyment on patios or during social gatherings. Its powerful bass response enhances a wide range of audio products, delivering an immersive listening experience while maintaining sound balance and clarity, regardless of listening distance.

This subwoofer features 6.5-inch polypropylene cones and a high-quality built-in amplifier, which significantly enhance its capabilities, ensuring deep, rich bass that can effectively fill larger spaces without distortion. Users will find the installation process to be straightforward, as it can be seamlessly integrated with existing audio systems utilizing standard speaker wire connections.

Listening tests demonstrate that the AP650 performs exceptionally well in outdoor settings, providing clear sound reproduction even at elevated volumes. Its versatile design allows for multiple mounting options, making it a flexible addition to any outdoor audio setup. Ultimately, the combination of durability, ease of installation, and superior acoustic performance cements its status as the preferred choice for outdoor sound enthusiasts.

Best Budget Outdoor Subwoofer

For individuals seeking an affordable solution that does not compromise on performance, the Dayton Audio IO8XTB stands out as the premier budget outdoor subwoofer, offering exceptional value for its price. This model is designed with durability in mind, allowing it to withstand outdoor conditions while delivering remarkable sound quality and bass response.

Its straightforward installation process and compatibility with various outdoor speaker connections make it an ideal choice for enhancing audio experiences without incurring significant costs.

Equipped with weather-resistant components, users can have confidence that their investment is safeguarded against the elements, thus ensuring both longevity and reliability. The speaker provides clarity and depth, facilitating crystal-clear highs and rich lows, which makes it suitable for both social gatherings and tranquil evenings spent outdoors.

Additionally, its lightweight design allows for easy mounting and placement, while still delivering powerful performance typically associated with higher-end models. This subwoofer effectively balances affordability with superior sound characteristics, catering to both audiophiles and casual listeners who seek an improved outdoor audio experience.

Best High-End Outdoor Subwoofer

For audiophiles, the ideal high-end outdoor subwoofer seamlessly integrates exceptional audio performance with superior build quality. A notable example is the Victrola Rock Speaker Connect, which provides remarkable sound quality and deep bass response.

Engineered for discerning listeners, this high-end subwoofer complements sophisticated audio receivers and enhances outdoor audio systems. Its weather-resistant features ensure durability, making it an excellent long-term investment for outdoor sound quality.

With a visually appealing rock design, it blends effortlessly into garden landscapes while delivering an enhanced listening experience. The Victrola Rock Speaker Connect is equipped with advanced technology that allows for easy connectivity to multiple devices, ensuring uninterrupted enjoyment of favorite music.

Its superior sound staging and clarity elevate outdoor gatherings, creating memorable experiences. This model not only distinguishes itself through robust performance but also fosters the immersive atmosphere that audiophiles seek.

Furthermore, the product is backed by reliable customer support, reflecting a commitment to excellence in providing high-quality outdoor audio experiences.

Best Portable Outdoor Subwoofer

Best Portable Outdoor Subwoofer

The OSD Audio BTR805 is a highly recommended option for individuals seeking a premier portable outdoor subwoofer, providing exceptional convenience and sound quality within a compact design. This model enables users to easily transport their audio system from one location to another, making it ideal for outdoor events or gatherings.

Despite its portability, the BTR805 maintains impressive performance, delivering robust bass response and compatibility with a wide range of Bluetooth speakers and other audio devices.

A notable feature of the BTR805 is its user-friendly installation process, which requires minimal setup time—perfect for spontaneous outdoor gatherings or barbecues. Its lightweight and compact structure ensures that transporting it, whether for a picnic in the park or a beach party, is convenient and effortless.

This subwoofer is also built to be highly durable, designed to withstand various environmental conditions, thus ensuring quality sound even in less than ideal settings.

Ultimately, it embodies the essence of contemporary outdoor sound systems, merging portability, superior sound fidelity, and ease of use, making it an essential companion for any outdoor enthusiast.

Performance Features

When evaluating outdoor subwoofers, the performance features are critical in determining their overall effectiveness and suitability for outdoor environments.

Key features to consider include:

  • Sound quality, which encompasses both clarity and richness of audio;
  • Bass response, which is essential for delivering impactful low frequencies;
  • Durability, which ensures that the subwoofer can withstand various weather conditions.

Furthermore, assessing weather resistance is crucial for long-term performance, as it protects the subwoofer from moisture, dust, and other environmental factors.

Sound Quality and Bass Response

Sound quality and bass response are essential elements of any outdoor audio experience, as they significantly affect how music is perceived in open environments characterized by ambient noise. A high-quality outdoor subwoofer must deliver clear audio with a comprehensive sound range that enhances the listening experience across various music genres.

In particular, the bass response should be sufficiently powerful to penetrate outdoor elements, ensuring that deep low frequencies are felt even amidst competing sounds from nature or crowd chatter.

The selection of subwoofer technology is crucial for achieving optimal audio clarity under diverse listening conditions. For example, ported subwoofers typically offer greater efficiency and deeper bass, while sealed models provide enhanced precision and tighter sound reproduction.

Understanding the nuances of each type enables enthusiasts to make informed decisions and customize their setups for optimal performance, whether at a picnic, during a camping trip, or at a backyard gathering. Ultimately, prioritizing sound quality and robust bass not only enhances outdoor enjoyment but also transforms the listening experience into an immersive journey through music.

Durability and Weather Resistance

Durability and weather resistance are critical considerations for outdoor audio devices, particularly subwoofers, which frequently encounter challenging environmental conditions. A robust design with a high Ingress Protection (IP) rating, such as IPX6 or IP54, ensures that the subwoofer can endure exposure to rain, dust, and other elements without compromising sound quality. This protective design not only prolongs the lifespan of the subwoofer but also preserves its performance, enabling consistent audio enjoyment across various outdoor settings.

To achieve optimal outdoor audio quality, these subwoofers utilize materials specifically engineered to resist corrosion and prevent fading due to UV exposure, thereby enhancing their longevity. Additionally, features such as reinforced enclosures and weatherproof connectors play an essential role in safeguarding the internal components, ensuring that the sound produced remains rich and powerful, regardless of weather conditions.

Investing in outdoor subwoofers that emphasize these protective attributes allows audio enthusiasts to relish their favorite music during outdoor events or gatherings without concern for sudden climate changes that could cause damage or diminish performance.

Power and Volume Capabilities

Power and volume capabilities are essential factors to consider when evaluating outdoor subwoofers, as they directly impact the unit’s ability to effectively fill outdoor spaces with rich sound. A proficient subwoofer should possess sufficient power to achieve high volume levels without distortion, ensuring that audio remains clear and balanced, even at extended listening distances.

Features such as adjustable volume control and built-in amplification can significantly enhance the user experience, allowing for customization based on the specific environment and size of the audience.

In outdoor settings, sound coverage is similarly critical; the design of the subwoofer must ensure that sound is evenly dispersed throughout the area. Outdoor environments often present challenges such as wind and ambient noise, necessitating that subwoofers produce deep bass frequencies capable of penetrating these obstacles effectively.

The incorporation of directional audio features can aid in directing sound towards specific areas, thereby minimizing wastage and maximizing auditory impact. Ultimately, achieving the appropriate balance of power and volume control not only enhances the listening experience but also provides the versatility needed to adapt audio output for various outdoor events and scenarios.

Installation and Setup

The installation and setup process for outdoor subwoofers is a critical phase that can greatly influence the overall audio experience. An effective setup should facilitate straightforward wiring options and seamless connections to existing outdoor audio systems without necessitating extensive technical expertise.

It is imperative to position the subwoofer optimally for sound distribution, as this significantly impacts performance. Therefore, it is essential to adhere to the guidance and tools provided by manufacturers during the installation process.

Wiring and Connectivity Options

Wiring and Connectivity Options

Wiring and connectivity options are critical factors to consider when setting up outdoor subwoofers, as they influence the integration of the subwoofer with other outdoor audio systems. The selection of appropriate speaker wire, as well as an understanding of the various available speaker connections—whether wired or wireless—can significantly impact the ease of installation and the overall audio performance.

Additionally, proper installation hardware is essential to ensure stable and secure connections capable of withstanding outdoor conditions.

Furthermore, it is important to assess the gauge or thickness of the speaker wire to mitigate signal loss over longer distances. Generally, thicker gauge wires are recommended for extensive outdoor configurations.

Another crucial element involves choosing weather-rated connectors that resist corrosion, thereby ensuring a reliable connection in diverse environmental conditions. It is advisable to utilize installation hardware specifically designed for outdoor use, such as water-resistant mounts and suitable cable ties, which will enhance both the durability and performance of the audio system.

These carefully considered choices not only enhance sound quality but also ensure that the subwoofer operates effectively in outdoor environments.

Optimal Placement for Best Sound

The optimal placement of outdoor subwoofers is essential for achieving superior sound distribution and overall audio performance in outdoor environments. Strategic positioning of the subwoofer can significantly enhance the listening experience by ensuring that sound waves effectively reach the intended audience while considering factors such as listening distance and surrounding obstacles. Proper placement not only improves bass response but also aids in achieving sound balance across various areas of a patio or backyard.

To accomplish this, it is important to evaluate the layout of the space, taking into account walls, trees, and furniture that may obstruct sound waves. Placing the subwoofer near hard surfaces can facilitate sound reflection, thereby enhancing its impact, while avoiding corners that may lead to a muddied sound quality. It is advisable to test different positions to assess how the bass responds, selecting locations that allow for even sound distribution without overwhelming specific areas.

Additionally, elevating the subwoofer slightly can optimize sound projection, ensuring an immersive and satisfying audio experience for all individuals enjoying the outdoor setting.

Comparison of Top Models

A comprehensive comparison of the leading outdoor subwoofer models highlights significant differences in specifications and features that may impact purchasing decisions for a diverse range of users.

By analyzing factors such as sound quality, power capabilities, and weather resistance, prospective buyers can make informed decisions that align with their particular needs and preferences.

This section is designed to elucidate the performance metrics of each model, assisting users in identifying the most suitable option for their outdoor audio requirements.

Specifications and Features Breakdown

Understanding the specifications and features of leading outdoor subwoofer models is essential for making a well-informed purchasing decision. This section will analyze key specifications such as power output, frequency response, and durability, as well as distinct features designed to enhance audio performance in outdoor settings. By evaluating these factors comprehensively, consumers will be better positioned to identify which subwoofer best meets their outdoor audio requirements.

It is crucial to consider aspects such as weather resistance and material quality, as these significantly impact the longevity and sound clarity of the subwoofer when exposed to outdoor elements. Different models offer varying power outputs; some may provide deeper bass and higher volumes, which are essential for expansive outdoor areas, while others may focus on delivering refined audio suitable for more intimate gatherings.

Frequency response is another critical parameter, determining how effectively a subwoofer reproduces low-end sounds, thereby ensuring that every beat resonates accurately, regardless of ambient noise. A thorough understanding of these elements can enhance the listening experience, transforming backyard barbecues or outdoor parties into memorable events characterized by superior sound quality.

Pros and Cons of Each Model

Evaluating the advantages and disadvantages of each outdoor subwoofer model yields valuable insights into their performance and user satisfaction. By analyzing feedback from listening panelists and considering the strengths and weaknesses of each model, consumers can gain a clearer understanding of which subwoofer best meets their outdoor audio requirements. This comparative analysis will emphasize the unique characteristics that differentiate each model while addressing common concerns expressed by users.

Among the various models available, some exhibit exceptional bass response and weather resistance, making them ideal for outdoor environments, while others may lack sufficient power for larger spaces. User experiences suggest that features such as wireless connectivity and ease of installation significantly enhance overall satisfaction; however, certain models may demonstrate shortcomings in durability over time.

Performance evaluations reveal variations in sound clarity and volume levels, which are critical factors for those seeking to fill expansive areas with rich sound. As potential buyers consider these elements, comprehending the nuanced feedback can assist them in making a more informed decision that aligns with their specific outdoor audio needs.

User Reviews and Feedback

User reviews and feedback are essential in the assessment of outdoor subwoofers, as they offer valuable insights into performance, durability, and overall satisfaction. By systematically analyzing customer feedback from a variety of sources, it is possible to identify recurring issues and strengths associated with different models, thereby assisting potential buyers in making informed decisions.

Gaining an understanding of user experiences is critical for determining which outdoor audio systems effectively meet expectations and provide optimal sound quality across a range of environments.

What Customers Are Saying

What Customers Are Saying

Customer feedback provides a comprehensive overview of the varied experiences and satisfaction levels of users regarding outdoor subwoofers, offering valuable insights into sound quality and overall performance. Many customers emphasize the critical significance of bass response and clarity, highlighting how different models perform in various outdoor settings.

Reviews frequently contain recommendations based on personal experiences, illuminating the strengths and weaknesses of each subwoofer to assist prospective buyers in making informed decisions.

Enthusiasts, in particular, appreciate subwoofers that deliver deep, resonant bass without distortion, thereby creating an immersive listening experience that is ideal for backyard gatherings or outdoor movie nights. Conversely, some users have raised concerns regarding specific models that may lack sufficient power for larger spaces, resulting in a less satisfying auditory experience.

The balance between volume levels and sound clarity is crucial for many consumers, with some even recommending upgrades or additional components to enhance performance. Given that various outdoor listening environments significantly influence customer experiences, selecting the appropriate subwoofer can substantially improve overall enjoyment.

Common Issues and Solutions

Identifying common issues faced by users of outdoor subwoofers is essential for potential buyers to understand the limitations and challenges associated with various models. These challenges can include connectivity problems and durability concerns in harsh outdoor environments, which are often highlighted in user feedback. By addressing these prevalent issues, potential solutions can be proposed to enhance performance and ensure a satisfactory audio experience for outdoor music listening.

For example, numerous users report difficulties with Bluetooth connectivity, particularly when surrounded by competing wireless signals. To address this concern, it may be beneficial to consider models equipped with a stronger and more stable wireless range.

Durability is a critical factor, as users frequently express concerns regarding the vulnerability of their subwoofers to weather elements such as rain or extreme heat. A prudent recommendation is to seek subwoofers that offer weatherproofing features or protective casings.

Additionally, optimizing the placement of the subwoofer can significantly influence sound quality. Positioning the subwoofer away from walls or barriers can help minimize distortion and improve overall acoustics, thereby enhancing the user experience during outdoor gatherings.

Final Thoughts on Choosing the Best Field Subwoofer

Final thoughts on selecting the optimal field subwoofer emphasize the importance of outdoor sound systems in enhancing overall audio experiences, thereby providing immersive enjoyment for music enthusiasts. The appropriate subwoofer not only delivers robust bass but also integrates seamlessly with outdoor speakers, creating a cohesive audio system that addresses diverse listening preferences. By considering leading models, user feedback, and essential performance features, individuals can make informed decisions regarding a subwoofer that complements their outdoor environment.

A properly selected subwoofer can significantly elevate any outdoor gathering, whether it is a casual barbecue or a lively celebration, ensuring that every beat is delivered with clarity and depth. It is crucial to evaluate factors such as durability, size, and wireless capabilities, as these aspects can greatly influence functionality in open spaces.

By thoroughly researching customer reviews, one can gain valuable insights into how specific models perform under various weather conditions, thereby aiding in the assessment of their reliability. Investing in the right outdoor subwoofer not only enhances the auditory experience but also contributes to the overall ambiance, facilitating unforgettable moments shared with family and friends.

Where to Buy Your Subwoofer

When considering the purchase of outdoor subwoofers, potential buyers have a range of options available through both physical retailers and online stores that specialize in audio products. Major retailers typically carry a selection of popular outdoor subwoofer models, allowing customers the opportunity to see and hear the equipment prior to making a purchasing decision.

Conversely, online marketplaces provide convenience and a broader assortment of choices, often accompanied by competitive pricing and customer reviews to assist in the decision-making process.

Individuals contemplating their purchase should consider visiting local audio equipment shops, where knowledgeable staff can offer valuable insights and personalized recommendations. Online retailers, particularly dedicated audio e-commerce platforms, generally feature comprehensive product descriptions, comparison tools, and user reviews, making them suitable for well-considered choices.

In seeking the best deals, it may prove advantageous to wait for seasonal sales, subscribe to newsletters for exclusive discounts, or examine clearance items. It is essential to ensure that the chosen outdoor subwoofer meets specific requirements related to power output, durability, and compatibility with existing audio systems, thereby guaranteeing satisfaction with the purchase.

Further Reading

Individuals interested in delving deeper into outdoor sound systems and enhancing their audio experiences will find that further reading offers valuable insights and practical guidance on best practices and technologies.

Comprehensive guides can assist users in navigating the complexities of outdoor audio setups, including the selection of appropriate outdoor speakers and subwoofers, understanding installation procedures, and optimizing overall performance.

By exploring the intricacies of audio equipment, enthusiasts can significantly elevate their outdoor music listening experiences.

Guides on Outdoor Sound Systems

Guides on outdoor sound systems provide essential information and best practices necessary for achieving optimal audio performance in outdoor environments. These resources encompass various aspects, including the selection of appropriate audio equipment, the installation process, and effective placement strategies for speakers and subwoofers.

Readers can anticipate detailed insights regarding how various environmental factors, such as acoustics and weather conditions, can influence sound quality. These guides frequently offer troubleshooting tips for common issues that may arise following installation.

Whether an individual is aiming to set up a backyard party, enhance the ambiance of a patio, or implement a robust sound system for outdoor events, these resources serve as invaluable tools. By leveraging expert knowledge, users can navigate the complexities of sound optimization, ensuring that they achieve sharp clarity and deep bass, thereby transforming any outdoor space into a captivating auditory experience.

Tips for Maximizing Outdoor Audio Experience

Maximizing the outdoor audio experience requires the implementation of practical tips and strategies aimed at enhancing sound quality and creating an enjoyable listening environment. Key considerations include the selection of appropriate outdoor speakers and subwoofers, as well as the optimization of placement and setup. Numerous factors contribute to achieving the best audio experience in outdoor settings. By applying these strategies, individuals can transform their outdoor spaces into acoustically rich environments suitable for gatherings or casual music listening.

To begin, it is essential to recognize the significance of acoustic spaces. Identifying locations with natural sound amplification, such as patios or areas adjacent to walls, can greatly enhance sound delivery. Utilizing speakers specifically designed for outdoor conditions ensures durability and reliable sound performance in various weather scenarios. Additionally, managing background noise is crucial; positioning audio equipment away from noisy streets or neighboring properties can significantly enhance the overall listening experience.

Furthermore, experimenting with speaker angles and heights can optimize sound dispersion, fostering an immersive atmosphere that all attendees can appreciate, whether during a tranquil evening or a vibrant gathering.

How to Properly Install XLR Cables: Tips and Tricks

XLR cables are essential tools for anyone involved in audio production, from musicians to sound engineers.

Known for their reliability and superior sound quality, these cables play a crucial role in connecting microphones and other audio equipment.

This article covers everything you need to know about XLR cables, including their components, common uses, and the tools required for installation.

It provides a step-by-step guide to ensure your connections are secure and effective, along with tips to avoid common mistakes.

Whether you are a DIY enthusiast or a professional, mastering the installation of XLR cables will enhance your audio setup.

How to Properly Install XLR Cables: Tips and Tricks

How to Properly Install XLR Cables: Tips and Tricks

Proper installation of XLR cables is essential for achieving high-quality audio performance across various applications within the audio industry. These balanced cables, frequently equipped with Neutrik connectors, play a critical role in connecting audio devices for studio wiring, live sound setups, and custom cable assemblies.

Adhering to correct installation techniques not only enhances the durability of the cables but also mitigates issues such as ground loops, which can distort audio signals. A comprehensive understanding of the components involved, along with adherence to best practices, will facilitate efficient cable maintenance and optimize overall performance.

What are XLR Cables?

XLR cables are a specific type of balanced cable designed for professional audio applications, providing an effective means of transmitting audio signals between various audio devices. Typically, these cables feature three pins: pin 1 serves as the ground, pin 2 functions as the positive wire, and pin 3 acts as the negative wire. This configuration ensures a secure and reliable connection.

The design of XLR cables minimizes electromagnetic interference, making them particularly suitable for high-quality audio production and live sound reinforcement.

The intelligent pin configuration of these cables allows for balanced signal transmission, which is essential for maintaining audio integrity over long distances. By effectively rejecting noise and providing a clean signal path, XLR cables enhance sound clarity and offer an increased dynamic range. Their robust construction and locking mechanism further ensure that connections remain stable during performances or recordings, positioning them as a preferred choice among sound engineers and musicians.

Due to their versatility, XLR cables can connect microphones, mixers, and other audio equipment, contributing to a seamless professional audio setup.

Common Uses for XLR Cables

XLR cables are widely utilized in various audio applications, including studio wiring, connecting microphones to mixers, and linking audio electronics. Their robust design renders them suitable for both modern audio devices and vintage equipment, ensuring high-quality signal transmission across diverse setups.

From live sound reinforcement to recording sessions, XLR cables are a fundamental component in the audio industry, providing reliable connections that enhance overall audio performance.

In studio environments, XLR cables play a critical role by linking condenser microphones, which capture vocals or instruments, to mixing consoles, thereby enabling pristine sound quality. During live performances, they connect powered speakers and stage monitors, facilitating seamless audio output for both performers and audiences.

Additionally, their compatibility with classic equipment, such as vintage tube microphones, allows artists to achieve unique tonal qualities often sought after in recordings. The versatility and durability of XLR cables significantly contribute to their essential status within both contemporary and nostalgic audio settings.

Understanding XLR Cable Components

A comprehensive understanding of XLR cables necessitates an examination of their key components, including connectors, wires, and shielding, all of which play a crucial role in their ability to deliver balanced audio signals.

Prominent among these components are Neutrik connectors, which are recognized for their durability and reliability across a range of audio applications, thereby ensuring secure electrical connections.

Moreover, the implementation of shielded wire and meticulous solder joints is essential for preserving the integrity of the audio signal and conforming to established wiring standards that mitigate interference.

XLR Connector Types

XLR Connector Types

XLR cables are equipped with various connector types, among which Neutrik connectors are highly regarded for their reliability and robust design. These connectors are available in different pin configurations, typically including 3-pin, 4-pin, or additional options, to accommodate diverse audio applications. The proper assembly of these connectors is crucial for ensuring secure and efficient audio transmission in both professional and amateur environments.

In practice, the choice of connector can have a significant impact on sound quality and signal integrity. Neutrik connectors are particularly esteemed for their durable construction, which minimizes wear and tear, thereby enhancing longevity. Their design prioritizes both ease of use and versatility, making them suitable for a wide range of audio devices.

When selecting the appropriate connector, it is imperative to pay close attention to the pin configuration, as it determines compatibility with microphones, mixers, and other audio equipment. A careful selection of XLR connectors can lead to optimized performance, ensuring that audio professionals achieve the precise sound reproduction they require.

Wiring Configuration of XLR Cables

The wiring configuration of XLR cables is fundamental to their functionality as balanced cables, which is essential for professional audio transmission. Typically, this configuration adheres to established wiring standards that designate the role of each pin: pin 1 is allocated for ground, pin 2 for the positive wire, and pin 3 for the negative wire.

Implementing effective soldering techniques during cable assembly is critical to ensure optimal performance and to minimize the risk of signal loss or interference.

A comprehensive understanding of this configuration is vital not only for audio engineers and sound technicians but also for anyone involved in music production or live sound reinforcement. Properly connecting these pins is essential for maintaining audio integrity over long distances, as balanced cables significantly reduce unwanted noise and hum that may occur in unbalanced systems.

Adhering to these wiring standards is recognized as a best practice that protects equipment while enhancing overall performance, making it imperative to follow these guidelines meticulously during the soldering process.

By utilizing high-quality connectors and techniques, the reliability and durability of the XLR cable setup can be greatly improved, ensuring that every performance or recording proceeds without disruption.

Tools and Materials Needed for Installation

When installing XLR cables, it is essential to have the appropriate tools and materials to achieve high-quality results. A temperature-controlled soldering iron is critical for ensuring secure solder joints, while wire strippers and cable cutters aid in the preparation of the cables for assembly.

Furthermore, the use of heat shrink tubing for insulation and a third-hand tool to stabilize components during the soldering process can significantly improve the efficiency of the installation.

Essential Tools for XLR Cable Installation

The essential tools for XLR cable installation include a soldering iron, wire strippers, and cable cutters, all of which are critical for the preparation and connection of cable components. A soldering iron equipped with temperature control facilitates the creation of precise solder joints, while wire strippers are designed to remove insulation from the wires without causing damage.

Utilizing a third hand tool can provide stability for the connectors and wires during the soldering process, ensuring that all components remain perfectly aligned for optimal performance. A utility knife is invaluable for cutting and trimming the cable length to meet specific requirements, allowing for clean and accurate adjustments.

Additionally, a multimeter plays a crucial role in testing continuity and ensuring that each connection is secure prior to final assembly. Collectively, these tools enhance the installation process, significantly contributing to the durability and functionality of the XLR cable and enabling clear audio connections that meet the high standards of audio professionals.

Recommended Materials for DIY XLR Cables

Recommended Materials for DIY XLR Cables

For individuals interested in constructing DIY XLR cables, it is advisable to utilize high-quality solder, heat shrink for insulation, and durable wiring that adheres to industry standards. A thorough understanding of wiring diagrams is essential for proper cable assembly, as this ensures that connectors are assembled correctly, thereby preventing issues such as ground loops. Selecting materials that provide effective shielding, such as copper shielding, will also enhance the overall performance of the cables.

Along with these critical components, it is imperative to invest in high-grade connectors, as they have a direct impact on audio fidelity and the reliability of connections. The importance of a meticulous soldering process cannot be overstated; substandard joints can result in signal loss and noise interference.

Furthermore, employing twisted pair wiring within the cable aids in minimizing electromagnetic interference, which can adversely affect performance in professional audio environments. By being attentive to these factors during the assembly process, one can create a durable product that delivers exceptional audio quality and maintains reliable performance across various settings.

Step-by-Step Guide to Installing XLR Cables

A comprehensive guide to installing XLR cables is essential for users seeking to achieve optimal performance and reliability in their audio systems. This process encompasses several key steps, including the preparation of the cables, making connections through precise soldering techniques, and conducting tests to ensure proper functionality.

Adhering to these steps is critical not only for ensuring high-quality sound but also for facilitating ongoing cable maintenance, as correct installation significantly influences the longevity and performance of the cables.

Preparing the Cables

Preparing the cables for XLR installation requires careful consideration of the appropriate cable length and meticulous stripping of wire insulation to facilitate soldering. Initially, one should use cable cutters to trim the cables to the desired length, followed by the use of wire strippers to remove insulation from the wire ends without damaging the internal conductors. This preparatory stage is critical for successful cable assembly, as it significantly influences the quality of the electrical connections.

To ensure accuracy, it is advisable to measure the length twice to avoid any miscalculations, marking the cable with a fine-tip marker to indicate clear cutting points. When cutting, one should employ a smooth, steady motion to prevent fraying at the ends. For the stripping process, position the wire in the stripper at the designated mark, applying just enough pressure to slice through the insulation without compromising the integrity of the metal strands beneath.

Ensuring that the exposed wire ends are neat and even is essential for establishing solid connections during the soldering process, as this significantly contributes to the overall durability and performance of the assembled cables.

Making Connections: How to Wire XLR Connectors

Making connections for XLR cables requires meticulous wiring of the XLR connectors in accordance with their specific pin configurations. It is essential to ensure that the ground pin is correctly connected to minimize interference. Effective soldering techniques must be employed to create secure solder joints, ensuring that each wire—positive and negative—is firmly attached to the appropriate pin. This attention to detail is vital for maintaining a balanced cable setup and ensuring optimal audio performance.

When undertaking the wiring process, it is imperative to begin with a clean workspace and organized tools to prevent confusion. Each XLR connector typically comprises three pins, designated as pins 1, 2, and 3, with pin 1 serving as the ground, pin 2 as the positive (hot), and pin 3 as the negative (cold). Before making connections, it is advisable to double-check the specifications of the connectors being utilized, as variations may exist.

For soldering, it is important to heat the joint sufficiently before applying solder and to avoid excessive movement to promote strong bonds. Utilizing heat shrink tubing can offer additional protection against wear and tear, thereby enhancing the longevity of the cable and ensuring reliable performance in professional environments.

Testing the Connections for Proper Functionality

Testing the Connections for Proper Functionality

Testing the connections after wiring XLR cables is essential for ensuring proper functionality and reliable performance in audio devices. This process typically involves utilizing an audio reference or a cable tester to verify that the electrical connections are intact and that the signal is transmitted without issues. Regular testing and maintenance of the cables help prevent potential problems in the future and ensure optimal audio quality.

To effectively test XLR cables, one should begin by connecting the cable to an audio source and a destination, such as a microphone and mixer. Listening for clear sound without hum or distortion is crucial, as this indicates that the connections are functioning correctly. Additionally, observing any loose connections or physical damage is important, as these factors can directly impact performance.

To preserve the integrity of the cables, routine inspections and testing should be conducted, as environmental factors and frequent handling can compromise their durability over time. By remaining diligent about cable maintenance, audio professionals can avoid costly repairs and uphold the highest standards in their audio production.

Tips and Tricks for Effective Installation

The implementation of established techniques for the effective installation of XLR cables can substantially improve the quality and reliability of audio connections. By steering clear of common errors, such as improper soldering methods or incorrect pin configurations, individuals can ensure optimal performance of their XLR cables.

Furthermore, adhering to best practices in cable management can extend the lifespan of the cables and sustain performance over time, thereby facilitating a more seamless audio experience.

Common Mistakes to Avoid

When working with XLR cables, avoiding common mistakes is crucial for enhancing installation success and audio performance. Key errors to be mindful of include inadequate soldering techniques, which can result in weak solder joints, and neglecting wiring standards that outline pin configurations and grounding. Failure to address potential ground loops may lead to unwanted noise and interference in audio signals, ultimately compromising overall quality.

It is imperative to conduct soldering meticulously, as overheating the cable can damage either the conductor or insulation, leading to shorts or breaks. To prevent wiring errors, users should consistently refer to established color codings and pin configurations, which are essential for maintaining signal integrity.

Understanding and preventing ground loops is vital; this can often be accomplished by utilizing balanced connections and properly isolating equipment. Additionally, employing high-quality connectors and cables can further minimize issues and enhance audio fidelity, resulting in a more professional setup.

Best Practices for Cable Management

Implementing best practices for cable management is essential for preserving the integrity and functionality of XLR cables, particularly in environments with multiple audio devices. Properly organizing cables by length and type can prevent tangling and damage, contributing to a cleaner and more efficient setup. Regular maintenance, which includes inspecting cables for wear and ensuring secure connections, further enhances longevity and optimal performance.

Taking the time to label cables can significantly improve organization, enabling audio professionals and enthusiasts to quickly identify connections during setup or troubleshooting processes. Utilizing cable ties and racks can assist in neatly arranging these critical components, thereby reducing the risk of accidental disconnections and maintaining a professional appearance.

It is also imperative to regularly clean and coil XLR cables in accordance with manufacturer specifications, as this careful handling helps preserve audio signal quality and prevents wear that could lead to costly replacements.

By prioritizing these management strategies, individuals can greatly enhance the overall efficiency and audio fidelity of their setups.

Maintaining Your XLR Cables

Maintaining XLR cables is crucial for ensuring long-lasting performance and reliability in audio applications. Proper cable maintenance involves conducting regular inspections, confirming secure electrical connections, and promptly addressing any signs of wear or damage.

Furthermore, understanding the appropriate methods for storing XLR cables can help prevent tangling and damage, thereby extending the lifespan of the cables and ensuring optimal audio quality.

How to Store XLR Cables Properly

Proper storage of XLR cables is essential for maintaining their quality and preventing damage over time. Cables should be stored in a manner that avoids kinks and tangles, as these can lead to wear and tear.

Utilizing cable ties or wraps can assist in organizing cables by length and type, making them easier to access and minimizing the risk of damage during transportation or storage.

Storing XLR cables in a cool, dry environment, away from direct sunlight, can significantly extend their lifespan. If feasible, it is advisable to use a dedicated cable bag or a storage box specifically designed for audio equipment, as this can further protect against adverse environmental conditions.

When rolling cables, it is recommended to use the over-under method to prevent twists, ensuring a smooth connection each time. Regular inspections for any signs of wear, such as fraying or exposed wires, are important, and cables should be replaced as necessary to ensure optimal performance during use.

By adopting these practices, individuals can safeguard their valuable audio equipment and enjoy trouble-free sound experiences.

Regular Maintenance Tips

Regular maintenance of XLR cables is essential for ensuring reliable performance and preventing issues that may arise from wear and tear. Users should routinely inspect the cables for any signs of damage, such as frayed wires or compromised soldering joints, and address any issues promptly to maintain secure electrical connections. Implementing a regular maintenance routine can significantly extend the lifespan of XLR cables.

It is advisable to keep XLR cables coiled properly and stored in a cool, dry environment to prevent kinking and moisture damage.

Additionally, cleaning the connectors periodically with a contact cleaner can enhance connectivity and reduce noise interference. Users should also conduct periodic continuity tests to verify that audio signals are transmitted without loss.

By adhering to these best practices, individuals will not only ensure consistent audio quality but also protect their investment in these vital pieces of audio equipment.

Understanding Speaker Box Names: A Comprehensive Guide

Are you curious about the world of speaker boxes and their various names? This comprehensive guide unpacks everything you need to know, from the basics of speaker box design to the different types available.

You’ll explore the history of speaker enclosures, learn about subwoofer boxes, and discover critical calculations for optimal performance.

Whether you’re a novice or an audio enthusiast, this guide will equip you with the knowledge to navigate speaker box terminology with confidence.

Buckle up for an enlightening journey into audio excellence!

What is a Speaker Box?

What is a Speaker Box?

A speaker box, or enclosure, is a structural component that houses a loudspeaker driver, specifically designed to enhance the performance of sound waves produced by the driver. This enhancement is achieved through various enclosure designs, such as bass reflex or sealed configurations.

These enclosures play a critical role in shaping the acoustic characteristics of the sound produced. The primary components of a speaker box typically include the driver itself, the cabinet or enclosure, and often internal materials that assist in managing sound waves.

For example, a bass reflex design employs a ported enclosure that facilitates increased low-frequency response, resulting in a richer bass sound. Conversely, sealed enclosures provide a tighter and more accurate bass response, albeit with a potential limitation on overall output volume.

Comprehending these design differences can significantly influence an individual’s choice in achieving the desired audio quality across various listening environments.

The Role of Speaker Boxes in Audio Quality

The role of speaker boxes in audio quality is crucial, as they influence sound pressure levels, frequency response, and the overall interaction of sound waves generated by the loudspeaker driver.

A well-designed speaker box can substantially enhance audio performance by optimizing sound pressure, which refers to the maximum loudness achievable without distortion. For instance, larger cabinet sizes typically provide improved low-frequency performance due to increased air displacement volume; however, they can also introduce complexities in frequency response if not designed with precision. Conversely, poor construction may result in unwanted resonances that create a distortion effect, thereby compromising sound clarity.

By considering the materials used and the internal geometry of the cabinet, designers strive to create environments that facilitate balanced and accurate audio reproduction, ultimately enhancing the listening experience.

History of Speaker Box Design

The history of speaker box design has undergone substantial evolution, transitioning from early acoustic models to contemporary innovations.

Pioneers such as Richard Small have made significant contributions, particularly through the development of the Thiele-Small parameters, which established a foundational framework for modern high-fidelity audio systems.

Evolution of Speaker Enclosures

The evolution of speaker enclosures has progressed from basic wooden boxes to sophisticated designs that account for cabinet resonances, acoustic damping, and optimal tuning frequency, thereby enhancing sound performance.

This journey commenced with rudimentary wooden constructions, which frequently resulted in sound distortion due to their limited structural integrity. As knowledge of acoustic models advanced, designers began to incorporate superior materials such as MDF and plywood, which considerably minimized unwanted vibrational interference.

Innovations in construction techniques, including precision joinery and advanced finishing methods, have further enhanced cabinet characteristics, enabling more controlled sound reproduction.

The focus has since shifted toward hybrid designs and computational acoustic modeling, resulting in enclosures that not only accommodate larger drivers but also optimize frequency response and damping. These advancements have ultimately led to the development of today’s high-fidelity audio systems, which deliver exceptional clarity and depth.

Key Innovations in Speaker Box Design

Key innovations in speaker box design, such as the bass reflex system and the introduction of passive radiators, have significantly transformed sound production, enabling greater bass extension and improved overall performance.

These advancements give the power to speakers to generate richer low-frequency sounds while maintaining clarity across all frequency ranges. By optimizing enclosure characteristics, designers can customize speaker behavior to suit specific listening environments, resulting in a more immersive audio experience.

For example, advancements in materials and construction techniques ensure that the enclosure remains rigid and inert, thereby minimizing unwanted resonances that can compromise sound quality. The integration of advanced digital signal processing facilitates precise tuning of bass response, complementing the physical design and maximizing overall efficiency.

Collectively, these innovations not only enhance audio quality but also increase the accessibility of high-performance speakers across various applications.

Types of Speaker Boxes

There are various types of speaker boxes, each engineered to meet specific acoustic requirements. These include:

  • closed-box (sealed) enclosures
  • ported (reflex) systems
  • dipole configurations
  • horn designs
  • transmission line enclosures
  • quarter wave resonators

Closed-box (Sealed) Enclosures

Closed-box (Sealed) Enclosures

Closed-box or sealed enclosures are engineered to deliver precise and accurate sound reproduction by minimizing cabinet resonances and controlling the diaphragm motion of the loudspeaker driver.

This design approach effectively absorbs sound waves originating from the rear of the diaphragm within the enclosure, thereby preventing any interference with the sound waves projected from the front. As a result, listeners benefit from a more cohesive and well-defined audio performance, characterized by enhanced bass response and diminished distortion.

These enclosures also provide improved transient response, allowing for music and vocal details to be reproduced with exceptional clarity. By isolating the speaker from external influences, closed-box designs significantly enhance overall sound fidelity, making them a favored choice among audiophiles who seek a rich and immersive listening experience.

Ported (Reflex) Enclosures

Ported enclosures, often referred to as bass reflex boxes, are meticulously designed to enhance low-frequency response by enabling sound waves generated by the rear of the loudspeaker driver to interact with those produced at the front. This interaction effectively tunes the enclosure to a specific frequency.

This innovative design features a precisely calculated port or vent that produces an optimal resonance effect, amplifying bass tones while reducing distortion. By facilitating the interaction between outgoing sound waves, the enclosure capitalizes on the acoustic energy from both the front and rear of the speaker, thereby extending the depth and clarity of bass performance.

The principles of sound wave interaction, resonance, and the meticulous sizing of the port are critical factors that influence the performance of these enclosures. They contribute to a richer audio experience that accurately conveys the subtleties of bass frequencies in both music and soundtracks. Such designs are essential for audiophiles seeking an immersive listening experience.

Dipole Enclosures

Dipole enclosures employ an open baffle design that enables sound waves to radiate from both sides of the loudspeaker driver, resulting in a distinctive cancellation effect that enhances spatial sound perception.

This innovative method significantly influences the listener’s experience of music and audio production by fostering a more immersive soundstage. By effectively managing sound dispersion, dipole designs mitigate unwanted reflections that can compromise audio clarity, ensuring a cleaner and more accurate reproduction of sound.

These enclosures are instrumental in minimizing room interaction, a critical consideration for audiophiles aiming to optimize their listening environment. Consequently, the benefits of dipole configurations extend beyond improved sound quality; they also provide a more authentic auditory experience, allowing audiences to engage more profoundly with the content being presented.

Horn Enclosures

Horn enclosures are engineered to significantly enhance sound efficiency and directionality, making them particularly suitable for sound reinforcement applications in large venues and outdoor environments.

These innovative acoustic models leverage the principles of wavefront propagation to facilitate sound travel over greater distances with improved clarity compared to traditional speaker systems. By concentrating sound energy into a focused beam, they effectively minimize unwanted reflections and ambient noise, thereby providing listeners with a more immersive auditory experience. This capability not only elevates the overall sound quality but also enables performers and speakers to project their voices more effectively.

Horn enclosures are often available in various designs tailored to specific frequencies, further optimizing sound projection and ensuring that every note and word is delivered with precision.

Transmission Line Enclosures

Transmission line enclosures are meticulously engineered to optimize low-frequency response through the utilization of an extended path for sound waves to traverse, thereby enhancing bass performance and minimizing distortion effects.

This design approach effectively employs the principles of sound wave propagation, ensuring that the wavelength of lower frequencies aligns harmoniously with the dimensions of the enclosure. By precisely calculating the length and cross-sectional area of the transmission line, audio engineers can create an environment in which sound waves reinforce one another, ultimately enhancing overall bass response.

The gradual tapering of the line plays a critical role in minimizing reflections and phase cancellations, issues that frequently affect other types of enclosures. This careful attention to detail not only elevates the listening experience but also provides greater flexibility in speaker placement, making transmission lines a favored option among audiophiles who seek superior sound quality.

Quarter Wave Enclosures

Quarter wave enclosures function based on the principles of wave resonance, employing a specific tuning frequency to enhance bass response and overall sound quality.

This innovative design enables sound waves generated by the speaker to resonate within an enclosure that is calibrated to a quarter wavelength of the desired frequency. By meticulously adjusting the dimensions of the enclosure, one can optimize sound output, ensuring that lower frequencies are amplified and delivered with greater clarity.

This tuning not only enhances bass response but also aids in minimizing unwanted noise, resulting in a more immersive audio experience.

For audiophiles and sound engineers, a thorough understanding of the dynamics of these enclosures provides valuable insights into achieving optimal audio performance across various listening environments.

Understanding Subwoofer Boxes

Understanding Subwoofer Boxes

Subwoofer boxes are meticulously engineered enclosures specifically intended to enhance bass response and low-frequency performance. These enclosures utilize various design types, including sealed and ported configurations, to provide effective sound reinforcement.

Importance of Subwoofer Box Design

The design of a subwoofer box is essential for achieving the desired bass extension and overall sound quality, as it determines the enclosure’s effectiveness in handling low-frequency sound waves while minimizing distortion effects.

Several factors must be considered when determining the optimal design, including the size and shape of the enclosure, which significantly influence the characteristics of the sound produced. For example, a larger box typically permits deeper bass; however, its dimensions must be meticulously calculated to correspond with the specific specifications of the subwoofer.

The materials utilized in the construction of the box also play a critical role in sound quality. Denser materials can effectively reduce vibrations and minimize resonance, resulting in cleaner sound output. Furthermore, the internal design—whether ported or sealed—affects how sound waves interact within the enclosure, ultimately influencing the listener’s experience.

Different Types of Subwoofer Boxes

There are several types of subwoofer boxes available, including sealed, ported, and passive radiator designs. Each type offers distinct advantages and sound characteristics tailored to various audio applications.

For example, sealed subwoofer boxes are recognized for their tight and accurate bass response, making them particularly suitable for individuals who appreciate music with intricate details. Conversely, ported boxes enhance output efficiency and provide a powerful low-end that many bass enthusiasts favor during high-energy performances. Additionally, passive radiator designs incorporate passive elements to reinforce bass without increasing the overall size of the enclosure, providing a compact solution that still delivers impressive sound quality.

A thorough understanding of the characteristics of these subwoofer box designs can assist individuals in selecting the appropriate system, ultimately leading to a satisfying auditory experience that aligns with their specific sound preferences.

Calculating Box Sizes for Optimal Performance

Calculating the optimal box size for speaker enclosures is crucial for achieving superior performance. The volume of the cabinet directly impacts sound quality and ensures that the driver specifications are met for effective sound reproduction.

Factors Influencing Box Size

Several factors influence box size calculations, including the desired tuning frequency, cabinet volume, and the specific requirements of the loudspeaker driver, all of which are essential for optimizing audio performance.

When evaluating the desired tuning frequency, audio engineers must recognize how the dimensions of the box impact resonance and sound quality. Cabinet volume is equally critical, as it not only affects the overall bass response but also influences efficiency and dynamics.

The specific requirements of the driver are paramount; different types of drivers may require varying enclosure designs, such as sealed or ported configurations, to achieve optimal sound reproduction. Additionally, environmental factors and material selections can significantly affect the determination of the ideal box size, ensuring that the final product delivers clear and powerful audio that meets established performance expectations.

Box Size Calculation Techniques

Box size calculation techniques incorporate mathematical models and acoustic principles, such as resonance frequency and driver specifications, to ascertain the optimal dimensions necessary for achieving the desired sound quality.

By meticulously analyzing these factors, individuals can refine their designs to enhance performance. For example, utilizing the Thiele/Small parameters, which describe the movement of the speaker cone and its interaction with the enclosure, provides a fundamental understanding of how to balance the box volume with the characteristics of the driver.

Additionally, principles such as Helmholtz resonance are instrumental in determining port dimensions for bass reflex designs, thereby ensuring efficient sound wave propagation. Ultimately, adopting a systematic approach that includes simulations and measurements assists both enthusiasts and professionals in defining box dimensions that significantly improve audio fidelity.

Best Practices for Building Your Speaker Box

Best Practices for Building Your Speaker Box

Constructing a speaker box necessitates strict adherence to best practices to ensure structural integrity, optimal sound quality, and durability. This includes the careful selection of appropriate construction materials and the adherence to established performance tuning guidelines.

Materials Used in Speaker Box Construction

The materials employed in the construction of speaker enclosures play a critical role in determining their acoustic performance. These materials influence various factors, including resonance frequency, internal reflections, and overall sound quality through effective acoustic damping.

Wood, particularly Medium Density Fiberboard (MDF) and plywood, is widely regarded as a preferred choice due to its density and capacity to minimize vibrations, resulting in clearer sound reproduction. Conversely, plastic enclosures, while lighter and more cost-effective, may produce undesirable resonances that can adversely affect audio clarity.

The incorporation of acoustic foam and fiberglass significantly enhances sound absorption, mitigating echoes and improving overall clarity. Additionally, construction techniques, such as the type of joinery and the thickness of the materials used, further impact how sound travels within the enclosure.

Selecting the appropriate combination of these elements is essential for achieving optimal acoustic performance in speaker design.

Step-by-Step Guide to Building a Speaker Box

Building a speaker box can be a highly rewarding endeavor, and adhering to a structured step-by-step guide can facilitate the effective implementation of various design types while optimizing sound performance.

  1. To commence, it is essential to clearly define the specific type of speaker box you intend to construct, whether it is a sealed enclosure designed for tight bass response or a ported design aimed at enhancing low-end projection.

  2. Subsequently, one should gather the requisite materials, including wood, screws, and acoustic insulation, along with necessary tools such as a saw, drill, and measuring tape.

  3. Once the design and materials are prepared, the process of measuring and cutting the wood to the appropriate dimensions will establish a solid foundation for your project.

  4. Following the cutting of the panels, the assembly process must be conducted with precision to prevent any sound leakage, which could negatively impact audio quality.

  5. Finally, adding finishing touches such as a protective coating or speaker grill will not only enhance the aesthetic appeal but also extend the longevity of the speaker box, ensuring it maintains an attractive appearance in any setting.

Common Mistakes in Speaker Box Design

Common mistakes in speaker box design can significantly affect audio performance. These include:

  • miscalculations of box size
  • neglecting acoustic damping
  • failing to comply with tuning frequency requirements

Avoiding Pitfalls in Box Construction

Avoiding pitfalls in box construction necessitates meticulous planning and execution, ensuring that aspects such as cabinet volume, material selection, and tuning frequency are carefully considered to achieve optimal sound quality.

To attain the best results, it is imperative for builders to engage in thorough research and apply established design principles. This involves choosing high-quality materials capable of withstanding environmental stresses while preventing unwanted vibrations or distortions.

Accurate calculations concerning dimensions and internal structures can significantly enhance acoustic performance. By dedicating time to develop detailed blueprints and simulations, builders can anticipate potential challenges and implement solutions proactively, thereby facilitating a successful project.

Ultimately, comprehensive preparation not only reduces the likelihood of common construction errors but also enhances the overall integrity and longevity of the final product.

Summarizing Key Takeaways

Key takeaways from the examination of speaker box design encompass the importance of enclosure types, the influence of construction materials, and the necessity of performance tuning in achieving optimal audio performance.

Understanding these factors is essential for individuals seeking to enhance their audio experience, whether in a home theater setup or a professional studio environment.

Different enclosure types, such as sealed or ported designs, can significantly impact sound reproduction, affecting both bass response and overall clarity.

The selection of materials—ranging from plywood to MDF—can influence the durability and sonic characteristics of the speaker box.

Performance tuning, which involves the adjustment of internal components and acoustic parameters, is critical for optimizing sound output and ensuring that audio quality aligns with the listener’s expectations.

Further Reading and Resources

For individuals interested in enhancing their knowledge of speaker box design, a diverse array of reading materials and resources is available, including books, scholarly articles, and online forums focused on audio engineering and sound quality.

To effectively navigate this extensive pool of information, it is advisable to explore recognized titles such as “The Art of Speaker Design” by Phil C. and “Loudspeaker Design Cookbook” by Vance Dickason. Both texts provide comprehensive insights into the mechanics and aesthetics associated with speaker construction.

Additionally, engaging with online communities such as the DIY Audio Forum or the r/homelab subreddit can offer valuable peer support and practical guidance. Websites like Parts Express and Audioholics also host a wealth of articles and tutorials that can assist emerging designers in honing their skills while addressing both theoretical and practical elements of sound reproduction.

The Complete Guide to Installing Canon Jacks

Installing Canon jacks can seem daunting, but with the right guidance, it can be a straightforward process. This comprehensive guide walks you through everything you need to know, from understanding the importance of proper installation to the tools required for the job.

You’ll find step-by-step instructions for both wired and wireless connections, along with troubleshooting tips for common issues. Additionally, there are extra tips to enhance your printer’s functionality.

Dive in to ensure your Canon jack is set up for optimal performance!

Overview of Canon Jacks

Overview of Canon Jacks

Canon jacks play a vital role in the effective installation and operation of Canon printers by enabling various connection methods, including USB cables and wireless setups. A comprehensive understanding of the different types of jacks available can assist users in selecting the most appropriate connection method to ensure proper printer installation and optimal connectivity.

The primary types of Canon jacks include:

  • USB jacks, typically located at the rear of the printer, provide a direct connection to computers or laptops, ensuring reliable data transfer for seamless printing.
  • Ethernet ports facilitate a wired network connection, allowing multiple users to access the printer over a local area network, which is particularly advantageous in office settings.
  • Wireless connectivity options enable convenient printing from mobile devices and laptops without the necessity for physical cables, thereby enhancing flexibility and improving the user experience.

Selecting the appropriate type of jack is crucial, as it can significantly influence the printer’s performance and overall user satisfaction.

Importance of Proper Installation

The proper installation of a Canon printer is crucial not only for establishing reliable connectivity but also for ensuring optimal print quality and minimizing potential troubleshooting challenges that may arise from installation errors. Dedicating time to a comprehensive installation process can lead to a more efficient and satisfactory printing experience.

When installation is conducted improperly, users may face connectivity issues that disrupt workflow, resulting in missed deadlines and diminished productivity. Furthermore, the quality of printed materials may be adversely affected, leading to smudged or faded documents that do not meet professional standards.

If these issues occur, users may need to undertake troubleshooting measures, such as verifying cable connections, reinstalling drivers, or adjusting network settings. To mitigate these challenges, it is essential to adhere to a proper setup guide that clearly outlines each step, thereby ensuring that the printer functions smoothly and efficiently from the outset.

Preparing for Installation

Preparing for the installation of a Canon printer necessitates the collection of essential tools and materials. This includes the printer installation CD, a USB-A to USB-B cable for wired setups, and ensuring the availability of compatible ink cartridges.

Furthermore, it is advisable to identify a suitable power outlet and confirm network settings in advance. These steps will facilitate a more efficient installation process, regardless of whether a USB or wireless configuration is selected.

Tools and Materials Needed

Before initiating the installation process, it is imperative to collect the necessary tools and materials for your Canon printer. This includes a USB cable for wired connections, compatible ink cartridges, and, if applicable, an external CD reader to access the printer installation CD. Ensuring that these items are readily available will facilitate a more efficient setup process and mitigate potential delays.

Along with these fundamental components, it is advisable to secure a wireless network connection if you intend to utilize a Wi-Fi setup, which may require a router and relevant network credentials. A screwdriver may also be useful for securing any components, if necessary.

Furthermore, do not overlook the importance of the power cable to provide an adequate power source for your printer. Access to a computer or mobile device equipped with the latest drivers can further streamline the installation process.

Collectively, these tools are essential for establishing effective connectivity and ensuring the printer operates correctly, whether through USB or wireless methods.

Understanding Your Canon Model

Understanding the specific model of your Canon printer, such as the Canon PIXMA G4200, is essential for a successful installation. Different models may possess unique requirements and features, which are detailed in the printer’s instruction manual. Familiarity with the printer’s model number also aids in locating the appropriate printer drivers and setup guides on the Canon support website.

This knowledge not only streamlines the setup process but also proves invaluable when troubleshooting issues. For example, if an error arises during printing, knowing the exact model facilitates the identification of targeted solutions or troubleshooting manuals that address specific problems. Users can access FAQs, video tutorials, and community forums tailored to their particular printer model, thereby enhancing their overall experience and ensuring optimal performance.

In summary, being well-informed about the specific features and specifications of the printer is crucial for maximizing its functionality and longevity.

Safety Precautions

Safety Precautions

Before commencing the installation of your Canon printer, it is crucial to consider safety precautions. These include ensuring that the printer is positioned near a reliable power outlet and away from potential hazards that could damage the device. Implementing these safety measures will not only protect the printer but also facilitate a smoother installation process.

It is imperative to maintain the installation area in a dry condition and free from any exposure to water, as this could result in malfunctions or pose electrical hazards.

Furthermore, proper ventilation is an important factor to monitor, as it ensures that the printer’s cooling system operates effectively and prevents overheating during use. Additionally, keeping the printer out of direct sunlight will contribute to its longevity.

By adhering to these safety guidelines, users can navigate the installation process effectively while safeguarding their equipment and ensuring optimal performance.

Step-by-Step Installation Process

The step-by-step installation process for your Canon printer is crucial for understanding how to efficiently connect and set up the device, whether utilizing a USB cable for direct connections or configuring it for a wireless network.

This guide will provide a comprehensive overview of the installation prompts, assisting you in navigating each essential step to ensure a successful setup, with the support of resources available on the Canon support website.

A. Installing Wired Connections (USB)

Installing a Canon printer through a wired connection via a USB cable is often the most straightforward method for new users. This process involves connecting the USB cable from the printer to the computer and following the installation prompts to configure the Windows printer settings appropriately. This simple procedure ensures reliable printer connectivity and ease of use.

To commence, it is essential to ensure that both the printer and the computer are powered on.

  1. Next, connect one end of the USB cable to the printer and the other end to an available USB port on the computer.
  2. Once this connection is established, the operating system will typically recognize the new device automatically. If prompted, it is advisable to download the latest printer drivers from Canon’s official website to ensure optimal performance.
  3. Subsequently, navigate to the ‘Devices and Printers’ section in Windows to select the newly connected printer. This step will enable any necessary settings and confirm that it is designated as the default printer.

By following these steps, the printer will be seamlessly integrated with the computer system.

B. Installing Wireless Connections (Wi-Fi)

Installing a Canon printer via a wireless network provides significant flexibility and convenience, enabling the connection of multiple devices without the complications associated with cables. Utilizing Wi-Fi Protected Setup can streamline the configuration process by securely connecting the printer to your wireless network with minimal effort. Familiarity with the necessary steps will enhance the overall connectivity experience.

  1. To begin, ensure that the printer is powered on and ready for setup. Access the printer’s control panel and navigate to the wireless setup wizard. From this menu, select your Wi-Fi network and input the password if prompted.

  2. If your router supports WPS (Wi-Fi Protected Setup), you can simply press the WPS button on the router, followed by selecting WPS on the printer, which will facilitate a seamless connection.

Once the connection has been established, it is advisable to verify the network settings displayed on the printer to confirm a successful connection. For optimal performance, ensure that the printer is positioned within a reasonable range of the router to avoid weak signals and potential interference.

Troubleshooting Common Issues

Troubleshooting common issues encountered during the installation of a Canon printer is essential for ensuring optimal printer functionality and effectively addressing challenges that may arise, such as the printer not being recognized by the computer or experiencing connectivity problems.

Familiarity with the appropriate troubleshooting steps can mitigate concerns and facilitate a seamless installation process.

1. Printer Not Recognized by the Computer

1. Printer Not Recognized by the Computer

When a Canon printer is not recognized by a computer, it can be a source of frustration. Common causes of this issue may include problems with the USB cable connection or outdated printer drivers, which can typically be addressed through standard troubleshooting procedures. Ensuring that the USB cable is securely connected and that the appropriate printer drivers, available on the Canon support website, are installed can often resolve the issue.

Along with examining physical connections, users should verify that the printer is powered on and not in sleep mode, as this can occasionally result in detection problems. For printers connected via a wireless network, it is essential to confirm that the network settings on both the printer and the computer are correct.

Moreover, utilizing the printer’s built-in diagnostic tools can assist in identifying any connectivity issues. Regularly updating drivers and ensuring that the computer’s operating system is compatible with the specific printer model can also be instrumental in preventing recognition problems.

2. Printer Not Connecting to Wi-Fi

If a Canon printer is experiencing difficulties connecting to the wireless network, several factors may be involved, including incorrect network settings or complications with the Wi-Fi Protected Setup. To address these issues, it is essential to verify the network name and password, as well as to ensure that the printer is within the effective range of the router to establish a reliable connection.

To begin troubleshooting, access the printer’s menu to navigate to the network settings. Verify that the printer is configured to the correct SSID, which identifies the specific network it should connect to.

Subsequently, confirm that the entered password is accurate and does not contain any inadvertent spaces or incorrect characters. It is also advisable to restart both the printer and the router, enabling the devices to refresh their connections.

If the issue persists, consider temporarily relocating the printer closer to the router to assess any potential signal interference that may be contributing to the connectivity problem.

3. Driver Installation Fails

Failed driver installation can significantly impede the performance of your Canon printer; however, this issue is often resolvable by verifying compatibility with your operating system or downloading the latest drivers from the Canon support website. Adhering to the appropriate troubleshooting procedures is essential to ensure that the printer operates smoothly and efficiently.

Several common factors may contribute to installation failures, including outdated software, improper removal of previous drivers, or conflicts with existing applications. To mitigate these issues, it is imperative to ensure that both the operating system and printer drivers are consistently updated.

Users can enhance their likelihood of successful driver installation by temporarily disabling antivirus software during the installation process and ensuring they possess administrative access. Regularly checking for updates can help prevent compatibility issues, thereby ensuring that the printer remains functional and effective for daily tasks.

4. Printer Offline Issues

Experiencing printer offline issues can pose a significant impediment to printing tasks, typically arising from incorrect printer status settings or connectivity challenges. It is essential to ensure that the printer is designated as the default device within the Windows printer settings and to verify the connection, as these steps can effectively resolve the issues in a timely manner.

Additional troubleshooting may be required to fully restore functionality. Begin by confirming that the printer is connected to the same network as the computer, as discrepancies in network connectivity can result in offline statuses. Restarting both the printer and the computer can help refresh network connections, often resolving any persistent issues. If a USB connection is in use, it is important to ensure that the cable is securely attached and to consider testing a different USB port.

Furthermore, checking for updates to printer drivers can enhance connectivity, thereby ensuring that communication between the device and the computer remains seamless.

Additional Tips for Successful Installation

Along with adhering to the installation steps, there are several supplementary recommendations for the successful installation of your Canon printer that can enhance the overall printing experience. These include:

  • Proactive printer maintenance
  • Application of best printing practices
  • Exploration of options for cloud printing and mobile printing

By implementing these strategies, users can ensure their printer remains in optimal condition.

Maintaining Your Canon Jack

Maintaining Your Canon Jack

Regular maintenance of your Canon printer is essential for ensuring sustained print quality and longevity. This includes monitoring ink cartridge levels and performing routine troubleshooting steps to identify any potential issues before they escalate. By prioritizing maintenance, you can achieve optimal printer performance and mitigate common problems.

Incorporating practices such as cleaning print heads and ensuring the printer remains free of dust can significantly enhance the device’s efficiency. Vigilantly monitoring ink levels enables timely replacements, thus preventing any degradation in print quality due to insufficient supplies.

Engaging in these maintenance tasks not only improves the overall functionality of the printer but also extends its lifespan, making it a more reliable tool for daily tasks. Over time, a well-maintained printer can lead to cost savings by minimizing the need for repairs and replacements, ultimately ensuring that users maximize their investment.

Using Canon Software for Enhanced Functionality

Utilizing Canon software can significantly improve the printing experience by offering features such as mobile printing and cloud printing, which simplify the printing process and expand the functionality of the printer. Accessing the printer support resources available on the Canon support website will assist users in maximizing the benefits of these tools.

The Canon PRINT app enables users to print photos and documents directly from their smartphones or tablets with ease, providing a seamless experience whether at home or on the go. Additionally, cloud services such as Canon’s image.canon offer an efficient method for storing, sharing, and accessing files, thereby streamlining workflows.

These features not only save time but also enhance collaboration, as users can easily share files from virtually any location. With straightforward setup processes, Canon software ensures that even those with limited technical expertise can fully leverage modern printing technology, maximizing both creativity and productivity.

FAQs on Installing Canon Jacks

This FAQ section addresses some of the most frequently asked questions regarding printer installation, offering clear responses to assist users in comprehending the process.

Additionally, it encourages the utilization of resources such as the Canon support website for further assistance. Understanding the appropriate steps for printer installation and troubleshooting can help mitigate many common concerns.

1. What do I need to install my Canon Jack?

To install your Canon printer, it is essential to gather several necessary items, including the printer itself, a compatible USB cable for wired installations, and either the printer installation CD or access to the Canon support website for downloading the required drivers. Having these tools prepared will facilitate a smooth installation process.

It is important to ensure that a power outlet is readily available for the printer’s power cord, as well as a stable internet connection, particularly if you are opting for a wireless setup.

Additionally, possessing a pair of scissors or a box cutter can assist in unboxing and removing any packaging materials without causing damage to the printer.

A computer or mobile device that is compatible with the printer’s operating system is crucial for running the installation software and effectively managing printer settings.

Each of these items plays a significant role in ensuring that the printer setup process proceeds smoothly, enabling users to enjoy high-quality printing without unnecessary delays.

2. How can I connect my Canon Jack to a mobile device?

Connecting a Canon printer to a mobile device for mobile printing is typically accomplished through the Canon software, enabling wireless printing from a smartphone or tablet via a wireless network. It is essential to ensure that both devices are connected to the same network to facilitate successful connectivity.

To begin the process, download the Canon PRINT app from your device’s app store, as this application is designed to enable seamless communication between your printer and mobile device.

Once the app is installed, open it and follow the prompts for configuration. It is crucial to verify that your mobile device is connected to the same Wi-Fi network as the printer, as this connectivity is imperative for proper interaction.

If your printer supports Wi-Fi Direct, you also have the option to initiate a direct connection in the absence of a router.

After establishing the connection, you will be able to print documents or photos directly from your mobile device with ease.

3. Where can I find the latest drivers for my Canon Jack?

The latest drivers for Canon printers can be easily located on the Canon support website. Users can search for their specific printer model and download the necessary drivers for installation. Keeping printer drivers up to date is essential for ensuring optimal performance and compatibility.

To navigate the website, users should enter their printer model in the search bar, which will direct them to a page containing all relevant downloads. Regular updates not only enhance functionality but also address bugs and improve security, thus providing a smoother printing experience. It is important to check for these updates periodically, as outdated drivers may lead to slower operations or even connectivity issues.

By proactively managing driver updates for their Canon printers, users can enjoy seamless printing capabilities and access new features that enhance overall productivity.

Summary of Key Points

This summary encapsulates the essential points addressed in the guide, emphasizing critical elements of printer installation, common troubleshooting procedures, and the significance of utilizing the Canon support website for supplementary resources. This approach ensures users can achieve optimal print quality and connectivity.

Adhering to proper installation protocols establishes the foundation for a s smoothly functioning printer, while effective troubleshooting strategies enable users to resolve issues efficiently, thereby minimizing downtime and frustration.

Ongoing maintenance is vital not only for prolonging the printer’s lifespan but also for ensuring high-quality output. By conducting regular checks and updates, users can maintain consistent performance.

Familiarity with the Canon support website provides access to a comprehensive array of information, including driver updates and user manuals, thereby enableing users to maximize their device’s capabilities.

By integrating these practices, individuals can significantly enhance their overall printing experience.

Final Thoughts

In conclusion, understanding the installation process of your Canon printer, along with the resources available on the Canon support website, will significantly enhance your printing experience while ensuring long-term maintenance and functionality. With the appropriate approach, users can enjoy consistent printing and high-quality output.

Proper installation is essential, as it establishes the foundation for efficient operation and optimal results. Users are advised to take the necessary time to follow the setup instructions meticulously, ensuring that all connections are secure and that the software is correctly installed.

Utilizing Canon’s support resources can provide valuable insights into troubleshooting common issues and accessing updates that may enhance performance. Regular maintenance, including cleaning print heads and monitoring ink levels, will also contribute to the longevity of the printer.

Ultimately, being proactive in both installation and maintenance will enable users to maximize the capabilities of their Canon printer, facilitating a seamless printing experience for years to come.

Exploring the Various Types of Audio Jacks

Audio jacks are a vital part of our everyday audio experiences, from listening to music on headphones to connecting professional equipment. With numerous types and variations, understanding their distinctions can seem overwhelming.

This guide breaks down the different audio jack types, explores their anatomy, and discusses their common applications in both personal and professional settings.

Whether troubleshooting issues or selecting the right jack for your needs, this information will help you navigate the fascinating world of audio connections.

Understanding Audio Jacks: Definitions and Differences

Understanding Audio Jacks: Definitions and Differences

Audio jacks serve as essential connectors for transmitting audio signals between various devices, ensuring compatibility and optimal performance across audio systems and consumer electronics.

These connectors are available in multiple varieties, each engineered to fulfill specific functions, including mono and stereo audio transmission. Common types include the widely utilized 3.5mm jack, frequently found in headphones and portable devices, as well as larger 6.35mm jacks, which are typically employed in professional audio equipment.

Specialized jacks, such as TRRS (Tip-Ring-Ring-Sleeve), facilitate both audio playback and microphone functionality, which is crucial for smartphones and laptops. The design differences, including balanced versus unbalanced configurations, significantly impact audio quality, noise reduction, and durability.

Therefore, it is imperative for users to select the appropriate jack for their specific application in order to achieve the best possible sound performance.

The Anatomy of Audio Jacks

The anatomy of audio jacks comprises several essential components that are engineered to facilitate efficient audio transmission and optimize signal clarity, thereby influencing the overall performance of sound systems.

At the core of these jacks are the pins, which act as the electrical connectors responsible for transmitting audio signals between devices. Each pin serves a specific function, typically categorized into tips, rings, and sleeves, with variations that depend on the type of audio jack, such as 3.5mm, 1/4 inch, or XLR connectors.

The design of the sleeve also holds considerable importance, as its configuration determines compatibility with various equipment and influences the durability and quality of the connection. By understanding the interaction of these elements, one can gain a comprehensive appreciation of how audio jacks impact functionality across a range of applications, from professional sound systems to personal headphones.

Common Types of Audio Jacks

Common types of audio jacks, including the 3.5mm headphone jack, 2.5mm headphone jack, and 6.35mm headphone jack, play essential roles in facilitating the connection of audio devices for both analog and digital sound transmission.

3.5mm Headphone Jack

The 3.5mm headphone jack is one of the most widely recognized audio connectors, facilitating seamless connections between various devices such as headphones, microphones, and portable audio equipment.

Since its introduction in the late 19th century, this compact connector has undergone significant evolution, establishing itself as a staple in the audio industry. Over the years, it has gained considerable popularity due to its convenience and versatility, and it can commonly be found on smartphones, laptops, and gaming consoles.

The jack’s compatibility with a diverse range of devices ensures that users can enjoy their preferred audio without complications. Its analog design has a notable impact on audio quality, providing a rich sound experience that is highly regarded by audiophiles.

As a dependable interface, the 3.5mm jack continues to maintain its relevance even in the face of emerging wireless alternatives, remaining the preferred choice for those who prioritize performance and reliability.

2.5mm Headphone Jack

The 2.5mm headphone jack is a compact audio connector commonly utilized in smaller devices, providing a lightweight alternative for connecting headphones and microphones.

This particular audio port is frequently found in smartphones, portable gaming systems, and certain compact audio recorders, enabling users to experience high-quality sound without occupying significant space. In contrast to larger jacks, such as the 3.5mm variant, the 2.5mm design accommodates the sleek aesthetics of modern gadgets, which prioritize both form and function.

Users will find that this connector typically supports both headphone and microphone functionalities, rendering it versatile for calls and recording purposes. As manufacturing trends continue to favor slimmer profiles, the functionality and efficiency of the 2.5mm headphone jack distinctly stand out in an increasingly congested landscape of digital audio technology.

6.35mm (1/4″) Headphone Jack

6.35mm (1/4") Headphone Jack

The 6.35mm headphone jack, commonly referred to as the 1/4″ jack, is extensively utilized in professional audio equipment due to its robust connections, which significantly enhance sound quality during recording and live performances.

This traditional jack type is particularly favored in studio environments because of its durability and capability to handle higher power levels in comparison to smaller connectors such as the 3.5mm jack. In professional settings, where audio fidelity is of paramount importance, the 6.35mm jack minimizes signal loss and interference, making it ideal for high-end headphones, studio monitors, and musical instruments.

The reliability of this connection type mitigates the risk of accidental disconnections during live performances, which is a critical consideration for sound engineers and musicians. Its widespread usage further ensures compatibility with a wide range of professional equipment, solidifying its position as a cornerstone in the audio industry.

Advanced Audio Jack Types

Advanced audio jack types, such as TRS, TRRS, USB audio jacks, Lightning connectors, and optical connections, offer improved functionality and compatibility for contemporary audio devices and systems.

TRS (Tip-Ring-Sleeve) Connectors

TRS connectors, or Tip-Ring-Sleeve connectors, are widely utilized in audio applications for the purpose of transmitting stereo signals, thereby ensuring optimal sound quality.

These connectors establish a dependable connection across various audio systems, including musical instruments and professional mixing desks. Each component of the connector performs a vital function: the tip transmits the left audio channel, the ring transmits the right audio channel, and the sleeve serves as the ground or return path.

This configuration significantly enhances audio clarity by reducing interference and supports balanced connections, which minimizes noise and facilitates cleaner sound transmission.

Whether used in live performances, recording studios, or home audio systems, TRS connectors are esteemed for their durability and effectiveness in delivering high-fidelity sound, rendering them essential tools in the field of audio engineering.

TRRS (Tip-Ring-Ring-Sleeve) Connectors

TRRS connectors, or Tip-Ring-Ring-Sleeve connectors, are specifically engineered to transmit both audio signals and microphone input, making them essential for headsets and devices that require two-way communication.

These connectors play a crucial role in enhancing the user experience across a variety of modern communication devices, including smartphones, laptops, and gaming consoles. By integrating audio playback and voice transmission into a single plug, TRRS connectors enable seamless interactions for calls, video conferencing, and gaming.

Their extensive application includes headphones equipped with built-in microphones, allowing users to enjoy high-quality sound while retaining the ability to communicate effectively. The versatility of TRRS connectors ensures their compatibility with a broad range of audio equipment, promoting connectivity and ease of use in today’s increasingly digital landscape.

USB Audio Jacks (Type-A and Type-C)

USB audio jacks, available in both Type-A and Type-C configurations, represent a contemporary solution for digital audio transmission, significantly improving compatibility and audio quality across various devices.

These jacks utilize the efficiency of digital signals to provide superior sound quality compared to traditional analog connectors, making them particularly suitable for smartphones, laptops, and audio interfaces. With the ability to support high-resolution audio formats, users can experience a rich and immersive listening experience, whether engaged in gaming, streaming, or music production.

The use of USB audio jacks also eliminates the necessity for separate power sources, thereby simplifying setups in both professional and casual environments. The versatility of Type-A connectors accommodates a wide range of existing hardware, while the minimalist design of Type-C offers future-proofing with universal compatibility, thereby enhancing user experiences across various platforms.

Lightning Jacks

Lightning Jacks

Lightning jacks are proprietary audio connectors predominantly utilized with Apple devices, providing a digital audio interface that significantly enhances sound quality and compatibility with various audio equipment.

This advancement in audio technology enables users to enjoy a richer and more detailed sound profile, catering to both audiophiles and casual listeners. In contrast to traditional analog connections, which may experience interference and signal degradation, Lightning jacks transmit audio using a digital signal, thereby ensuring clarity and fidelity.

The versatility of these connectors supports a broad array of accessories, ranging from high-quality headphones to sophisticated audio interfaces, thereby facilitating seamless integration within the Apple ecosystem. This compatibility not only simplifies the user experience but also encourages the development of innovative audio solutions that enhance overall performance.

Optical Connections

Optical connections utilize light to transmit digital audio signals, providing an advanced solution for achieving high-fidelity sound quality in contemporary audio systems. This innovative technology, commonly known as TOSLINK or fiber optic audio, significantly reduces interference that can compromise signal quality, making it an optimal choice for both home theater and professional audio environments.

Users can experience clear and crisp sound without the concerns of electrical noise that often affect traditional copper connections. Optical connections are capable of supporting multi-channel audio, facilitating immersive listening experiences through formats such as Dolby Digital and DTS.

The sophisticated design of optical cables ensures both durability and longevity, enabling audiophiles and casual listeners alike to benefit from exceptional performance in their audio devices.

Other Uses of Audio Jacks

Audio jacks serve a diverse range of applications that extend beyond basic headphone connections, fulfilling essential roles in both professional audio equipment and home audio systems.

Jack Connectors in Professional Audio Equipment

Jack connectors are essential components of professional audio equipment, providing reliable connections that enhance performance during both recording and live sound events.

These connectors are vital in various applications where clear and distortion-free audio transmission is of utmost importance. In recording studios, for example, they facilitate the connection of microphones, mixers, and monitors, enabling sound engineers to achieve the highest fidelity in their tracks. In broadcasting environments, jack connectors ensure stable audio feeds that preserve the integrity of live announcements and shows.

During live performances, musicians depend on these connectors for seamless instrument integration, contributing to an immersive auditory experience for their audiences. Ultimately, the versatility and reliability of jack connectors significantly enhance the overall quality and professionalism expected within the audio industry.

Application in Home Audio Systems

In home audio systems, audio jacks play a vital role in facilitating connections between various devices, thereby enhancing compatibility and overall sound quality for an immersive listening experience.

These jacks serve as essential links between components such as speakers, receivers, and modern streaming devices, enabling users to achieve a seamless audio experience. For example, when connecting a high-fidelity speaker to a receiver, the appropriate audio jack ensures the clear transmission of sound signals, bringing the nuances of music and movie dialogues to life.

The introduction of various types of audio connections, including 3.5mm, RCA, and optical jacks, allows users to integrate older systems with newer technology, effectively bridging the gap between vintage and contemporary audio solutions. This versatility not only simplifies the setup process but also enables enthusiasts to customize their home audio environments according to their specific needs and preferences.

Choosing the Right Audio Jack for Your Needs

Choosing the Right Audio Jack for Your Needs

Selecting the appropriate audio jack for specific needs necessitates a comprehensive understanding of the compatibility and performance requirements of audio devices, thereby ensuring optimal audio quality across various applications.

This decision-making process requires careful consideration of the particular devices intended for use. For instance, the selection may vary significantly depending on whether the devices are smartphones, laptops, or high-fidelity audio systems. It is essential to assess performance needs, including whether portability or high-quality sound reproduction is the primary focus.

Furthermore, one should consider the different types of audio jacks available, such as 3.5mm, USB-C, or Lightning connectors, as well as the potential impact of cable length and build quality on sound clarity. Ultimately, striving for a balance between compatibility and the desired audio experience will yield more satisfactory outcomes.

Common Issues and Troubleshooting Audio Jacks

Common issues with audio jacks can considerably affect connectivity and performance, thereby making effective troubleshooting essential for maintaining optimal audio quality in devices.

Dirty Connectors and Their Impact on Sound Quality

Dirty connectors represent a prevalent issue that can significantly compromise sound quality, resulting in crackling or muffled audio in devices utilizing audio jacks.

When these connectivity points accumulate dirt, grime, or corrosion, they can introduce resistance that disrupts the signal flow. This degradation often manifests as distorted audio output, impacting both personal listening devices and professional sound systems.

To mitigate these effects, regular preventive maintenance is essential. Users should routinely inspect connectors to ensure they are clean and free from debris. Utilizing isopropyl alcohol along with a soft cloth or cotton swab can effectively remove contaminants. Additionally, applying a small amount of contact cleaner can help protect connectors from future buildup.

By implementing these straightforward yet effective measures, users can significantly enhance audio clarity and prevent unwanted interruptions.

Physical Damage and Connectivity Problems

Physical damage to audio jacks can result in substantial connectivity issues, thereby impeding the performance of audio devices and necessitating meticulous troubleshooting.

Common types of damage include bent pins, broken solder joints, and cracked casings, all of which can disrupt the connection between audio equipment, potentially leading to diminished sound quality or complete audio loss. Specifically, bent pins may prevent the proper seating of the plug, while broken solder joints can result in intermittent connections.

To identify these issues, it is advisable to conduct a thorough inspection of the audio jack for any visible signs of wear or misalignment. Utilizing a multimeter can assist in testing for continuity, and for minor repairs, tools such as soldering irons may be required to restore functionality, thereby ensuring optimal audio performance once again.

FAQs About Audio Jacks

This section provides answers to frequently asked questions regarding audio jacks, with an emphasis on their compatibility, types, and performance across various audio applications.

What is the difference between balanced and unbalanced jacks?

The distinction between balanced and unbalanced jacks is rooted in their design and signal transmission methods, which significantly influence audio performance and noise levels.

Balanced jacks, typically characterized by three connections, employ a mechanism that negates interference by utilizing two identical signals that effectively cancel out unwanted noise. In contrast, unbalanced jacks generally consist of two connections, rendering them more susceptible to noise and signal degradation, particularly over extended distances.

This distinction is particularly important in professional audio environments, where clarity and fidelity are of utmost importance. Balanced connections are preferred in studio settings due to their superior noise rejection capabilities, while unbalanced jacks are commonly used in home audio systems for their simplicity and cost-effectiveness.

A comprehensive understanding of these differences enables users to select the appropriate jack type to meet their specific audio needs.

How do I connect headphones without a headphone jack?

Connecting headphones without a headphone jack is achievable through the utilization of wireless technologies or adapters that convert alternative audio connections into headphone-compatible formats.

One of the most widely used methods is Bluetooth, which facilitates a seamless connection to wireless headphones, thereby eliminating the need for physical audio ports. Many modern devices are equipped with Bluetooth support, making it a convenient option for users seeking to eliminate wired connections.

Alternatively, USB-C or Lightning adapters serve as excellent choices for connecting wired headphones to devices that do not include a traditional headphone jack. It is crucial to select high-quality adapters to ensure that sound fidelity is maintained.

Additionally, it is advisable to keep devices updated, as software enhancements can improve compatibility and performance with various headphone connections.

How to Properly Install Jack Speakon: A Simple Guide

When it comes to audio equipment, ensuring a secure and reliable connection is crucial for optimal performance.

Speakon connectors have gained popularity for their durability and ease of use, making them an excellent choice for professionals and enthusiasts alike.

This guide covers everything you need to know about installing Jack Speakon connectors, from the essential tools and materials to a step-by-step installation process.

Whether you’re a seasoned technician or a beginner, this information will equip you with the knowledge to make your installation a breeze.

What are Speakon Connectors?

What are Speakon Connectors?

Speakon connectors are robust electrical plugs specifically designed for audio applications, facilitating efficient and safe connections between amplifiers and speakers. These connectors are distinguished by their unique design, which incorporates features that prevent accidental disconnection and ensure a secure fit, thereby addressing high-power requirements.

Available in various pole configurations, including 2, 4, and 8-pole options, these connectors cater to diverse wiring needs, providing flexibility for setups that range from basic to complex sound systems.

The rugged construction of Speakon connectors enhances their durability, rendering them resilient to wear and tear, a critical factor in high-current scenarios.

In contrast to traditional connectors, which may be susceptible to overheating and accidental disengagement, Speakon connectors feature a locking mechanism that not only improves safety but also guarantees reliable power transmission, even in challenging environments.

This meticulous design significantly minimizes the risk of signal loss and short circuits, positioning them as a preferred choice among audio professionals.

Benefits of Using Speakon Connectors

The use of Speakon connectors presents significant benefits for audio professionals, including enhanced audio quality, improved safety, and increased reliability in high-power applications. Their design effectively minimizes voltage drop and resistance, thereby ensuring optimal current flow and mitigating potential issues commonly associated with traditional connector types.

These connectors are particularly advantageous in situations that demand substantial power transfers, such as concert venues and large-scale sound systems, where both performance and safety are of utmost importance.

The robust locking mechanism of Speakon connectors guarantees secure connections even in dynamic environments, thereby reducing the risk of accidental disconnections that could disrupt performances.

Furthermore, their compliance with international electrical standards offers assurance to professionals, as these connectors are engineered to safely manage high currents without overheating. This makes them the preferred choice for touring audio systems, club installations, and live sound applications, where reliability and efficiency are critical factors.

Tools and Materials Needed

To install a Speakon connector effectively, it is essential to have a variety of tools and materials to ensure a successful and compliant wiring process.

The necessary tools include:

  • Wire cutters
  • Wire strippers
  • Crimping tools

The required materials comprise:

  • Speakon connector
  • High-quality copper cable
  • Heat shrink tubing
  • Terminals that adhere to established electrical standards.

Essential Tools for Installation

Essential tools for the installation of Speakon connectors include precise instruments such as wire strippers and crimping tools, which are crucial for preparing the cable and ensuring secure connections. The appropriate tools not only enhance efficiency but also preserve the integrity of the wiring, making them vital for achieving a reliable setup.

Plus wire strippers and crimping tools, a high-quality screwdriver set is necessary for securing connectors to their respective sockets. Electrical tape also plays an important role, providing an additional layer of insulation and protection against wear and tear.

Utilizing a multimeter can help verify the integrity of the connections, ensuring that everything is functioning correctly before finalizing the installation. When selecting these tools, it is advisable to invest in reputable brands known for their durability and reliability, as subpar tools can lead to frustration and errors over time.

A well-equipped toolkit can significantly streamline the installation process, enhancing both its smoothness and efficiency.

Materials Required for Proper Wiring

Materials Required for Proper Wiring

The materials required for the proper wiring of a Speakon connector are essential for establishing an efficient and durable connection, with copper cable and heat shrink tubing serving as key components. These materials ensure that the connector functions effectively under high current and voltage conditions, in accordance with electrical standards.

Selecting high-quality copper cables is critical due to their superior conductivity, which reduces resistance and heat generation during operation. Heat shrink tubing acts as an insulating layer, safeguarding the connections from environmental factors such as moisture and dust, which could potentially compromise performance.

When choosing materials, it is vital to seek products that adhere to industry standards, thereby ensuring reliability and safety across various applications. Recommendations include:

  • Stranded copper wire for enhanced flexibility
  • Durable polyolefin heat shrink sleeves for effective insulation

By following these guidelines, one can significantly improve the performance and longevity of the Speakon connector installation.

Understanding the Wiring Configuration

Comprehending the wiring configuration of a 4-pole Speakon connector is crucial for ensuring proper operation and optimizing audio performance. Each pin within the connector serves a distinct function pertaining to current flow and voltage distribution, which significantly influences the overall audio quality and reliability in high-power applications.

Overview of 4-Pole Speakon Wiring

The 4-pole Speakon wiring configuration is specifically designed to facilitate both stereo operation and bridged mono setups, thereby accommodating a diverse range of audio applications. This configuration enables efficient current flow while preserving signal integrity and minimizing resistance, resulting in optimal audio performance.

By utilizing 4-pole Speakon connectors, sound engineers and technicians gain a reliable and straightforward method for connecting loudspeakers and amplifiers. This reliability is particularly crucial in live sound environments where multiple speakers may require simultaneous powering.

Each pole within the configuration handles distinct channels, which not only enhances audio clarity but also mitigates the risk of crosstalk between signals. Adherence to standard wiring practices is imperative to ensure system compatibility and reliability.

Proper polarity and connections are essential, as incorrect wiring can lead to phase issues that negatively impact sound quality and potentially damage equipment. Visual wiring diagrams serve as valuable tools, providing clear guidance for users to establish the correct connections that ultimately enhance audio performance.

Identifying the Pins and Their Functions

Identifying the pins and their functions in a Speakon connector is essential for ensuring proper wiring and functionality within audio systems. Each pin corresponds to specific connections for positive and negative signals, which facilitate effective current flow and audio signal transmission.

The four poles in the Speakon connector typically include two designated for the positive and negative connections (commonly referred to as pole 1 and pole 2). An additional pair may be utilized for bi-amping purposes or for transmitting different signals simultaneously.

Understanding the correct wiring of these connections is critical in preventing issues such as phase cancellation, which can adversely affect audio quality. Improper wiring may not only lead to audio dropouts but also pose a risk of damaging the amplifier or speakers, resulting in potentially costly repairs or replacements.

Therefore, meticulous attention to recognizing the pin assignments and their respective functions is imperative for safeguarding the longevity and performance of audio equipment.

Step-by-Step Guide to Installing Jack Speakon

Step-by-Step Guide to Installing Jack Speakon

This step-by-step guide for installing a Jack Speakon connector provides a comprehensive overview of the wiring process, ensuring that each phase is executed safely and effectively.

By adhering to these instructions, one can achieve a reliable connection that conforms to electrical standards and enhances audio performance within the setup.

Preparing the Cables

Preparing the cables for installation entails several critical steps, including cutting, stripping, and insulating the wires to ensure a secure connection. Proper preparation is essential to prevent issues such as voltage drop and current loss during operation.

To commence, it is important to measure the desired length for each cable run, ensuring that it is slightly longer than necessary to accommodate any adjustments. Utilizing a high-quality pair of wire cutters is recommended to achieve a clean cut, thereby minimizing fraying and ensuring the exposure of clean wire ends.

Subsequently, the insulation must be carefully stripped from the ends of the wires, taking care not to damage the conductors within, as this is crucial for maintaining a good electrical connection. Once stripped, the application of heat shrink tubing is imperative; it not only reinforces the connection but also provides an additional layer of protection against wear and tear.

Each of these steps plays a significant role in achieving reliable audio connections and enhancing the overall performance of the sound system.

Connecting the Wires to the Speakon Connector

Connecting the wires to the Speakon connector requires the careful attachment of each wire to its designated terminal, ensuring a secure and reliable fit capable of withstanding the demands of high-power applications. Precision in this process is essential to maintain audio fidelity and to prevent potential issues during operation.

To commence, it is important to identify the correct terminals on the connector, which are typically labeled as ‘+’ and ‘-‘ for positive and negative connections, respectively.

Next, carefully strip the ends of the wires to expose an adequate amount of copper without damaging the strands. Insert the wires fully into their corresponding terminals, ensuring they are seated properly.

It is advisable to utilize a small screwdriver to securely tighten the terminal screws, thereby minimizing the risk of loose connections. It is crucial to avoid crossing wires or mixing up the polarities, as incorrect connections can lead to audio distortion or even damage to the equipment.

Finally, always conduct a thorough double-check of your work before finalizing the assembly.

Ensuring Secure Connections

Ensuring secure connections during the wiring process is critical for the performance and safety of the Speakon connector installation. Proper tightening techniques and verification processes are essential to prevent accidental disconnections and to maintain the integrity of the audio signal.

To reinforce the reliability of these connections, users should regularly assess the tightness of the connectors, typically by gently tugging on the wires to confirm that they are securely in place. Additionally, it is imperative to conduct thorough inspections for any loose wires, as even minor slack can lead to current loss, which may result in diminished audio quality or equipment malfunctions.

Secure connections play a vital role in electrical safety, as inadequate contact can contribute to overheating, arcing, or other hazardous conditions that could pose risks to both the equipment and the individuals operating it. Therefore, maintaining these connections is not solely a matter of enhancing performance but also a critical aspect of ensuring a safe operating environment.

Testing Your Installation

Testing Your Installation

Testing the installation is an essential step to verify that all components are functioning as intended following the completion of the wiring process for the Speakon connector. This process ensures that the connections are secure and that the audio system operates optimally without any issues.

How to Test for Proper Functionality

To ensure the proper functionality of the installed Speakon connector, one should begin with a thorough visual inspection, followed by a series of operational checks to guarantee reliable audio performance. This initial assessment should include confirming that the connector is seated securely and that there are no visible signs of electrical issues.

Subsequently, connect the Speakon to the corresponding speaker and amplifier, ensuring that all connections are secure. Once the connections are established, power up the system and listen carefully for any irregularities or distortions in sound output, as these may indicate wiring faults or connection problems.

It is essential to monitor the audio quality across various volume levels, paying close attention to clarity and consistency. Additionally, it is important to check for overheating of the connectors during operation, as excessive heat may suggest underlying issues.

Finally, to confirm the correct functioning of the connectors, it is advisable to test multiple configurations to eliminate the possibility of faults within the amplifier or speaker itself, thereby ensuring the setup delivers optimal performance under all conditions.

Common Issues and Troubleshooting Tips

Common issues associated with Speakon connector installations may include poor current flow, audio dropouts, and connection failures, often resulting from improper wiring or faulty components. Understanding these problems and having troubleshooting strategies readily available can significantly enhance audio performance.

These issues frequently arise from loose connections, damaged cables, or incorrect pin configurations, leading to intermittent sound or a complete loss of signal. To effectively diagnose these problems, it is essential to assess the integrity of the cables and ensure that they are securely connected. Regular inspections of connectors for signs of wear and tear can also help prevent issues before they become significant.

In case of audio dropouts, testing each component individually can assist in identifying the source of the fault. By adopting a proactive approach and implementing these straightforward checks, one can ensure the reliability and longevity of the Speakon connectors, thereby facilitating a seamless audio experience.

Recap of Key Steps for Successful Installation

A summary of the key steps for the successful installation of Speakon connectors includes the proper preparation of cables, the establishment of secure connections, and comprehensive testing to ensure functionality and safety. Each step underscores the necessity of meticulous attention to detail in achieving optimal audio system performance.

By adhering to these essential guidelines, installers can prevent common pitfalls and enhance the reliability of audio setups. Key steps to consider include:

  • Preparation of Cables: Ensuring that cables are cut to the correct length and stripped appropriately minimizes signal loss.
  • Making Secure Connections: Establishing robust connections significantly reduces the risk of interference and disconnection during operation.
  • Thorough Testing: Conducting comprehensive tests following installation guarantees that the system operates as intended, providing peace of mind.

Emphasizing these critical actions not only contributes to the longevity of the Speakon connectors but also enhances overall sound quality, resulting in a more enjoyable listening experience.

Final Thoughts on Proper Use of Speakon Connectors

Final thoughts on the proper use of Speakon connectors underscore their critical importance in professional audio systems, where reliability and performance are of utmost significance. Emphasizing correct installation and rigorous testing practices can greatly enhance the audio experience across various setups.

Ensuring that these connectors are securely seated and maintaining vigilance against wear can help prevent connectivity issues during crucial performances. This meticulous attention to detail enables audio engineers and enthusiasts to concentrate on sound quality rather than potential disruptions.

Regular inspections and cleanings can substantially extend the lifespan of these connectors, making them a prudent investment for anyone serious about audio. The broader implications of employing Speakon connectors extend beyond mere convenience, as they contribute to improved sound clarity and safer operational environments.

Consequently, embracing best practices in installation, maintenance, and troubleshooting is not merely advisable but essential for cultivating the reliability that elevated audio experiences necessitate.

How to Choose the Best Car Digital Audio Processor

In today’s world of automotive audio, a car digital audio processor can be the key to transforming your listening experience.

Whether you’re a casual listener or an audiophile, understanding the various types of processors and their capabilities is essential to elevate sound quality.

This guide will walk you through the roles these devices play, the features to prioritize, and the technical specifications that matter.

With insights on top recommendations and important considerations for purchase, you’ll be well-equipped to choose the best digital audio processor for your vehicle.

Get ready to enhance your car audio system and enjoy your favorite tunes like never before!

Understanding Car Digital Audio Processors

Understanding Car Digital Audio Processors

Car digital audio processors (DSP) are integral components of contemporary audio systems, engineered to optimize audio performance and enhance the overall listening experience within vehicles.

Utilizing Digital Signal Processing technology, these processors facilitate precise equalization, signal modifications, and sound shaping that address individual preferences and specific acoustic challenges present in the automotive environment.

The Role of Digital Audio Processors in Car Audio Systems

Digital audio processors (DSP) are essential components in enhancing car audio systems, providing the necessary tools for precise audio adjustments and customizations that significantly improve the listening experience. These advanced devices employ DSP technology to manipulate audio signals in real-time, ensuring optimal sound output by addressing various technical aspects, including frequency response and attenuation rates.

By facilitating gain control adjustments, these digital audio processors enable a more balanced audio output that accommodates individual listening preferences while compensating for differences in speaker sensitivity. Additionally, the phase inversion capabilities allow users to rectify timing issues among multiple speakers, resulting in a cohesive audio environment.

The implementation of DSP not only enhances sound fidelity but also positively influences overall vehicle performance. Drivers frequently report heightened satisfaction, as finely-tuned audio enriches their driving experience, making long commutes or road trips more pleasurable.

Consequently, the role of DSP in automotive sound extends beyond basic functionality, establishing itself as an integral aspect of modern vehicle design.

How Digital Audio Processors Enhance Sound Quality

Digital audio processors enhance sound quality by offering advanced features such as professional equalization, bass boost, and detailed equalization tailored to various listening preferences and acoustic environments. By enabling users to adjust audio settings with precision, Digital Signal Processing (DSP) technology significantly improves the overall audio experience in vehicles.

A particularly beneficial feature of these systems is the automatic equalization (auto EQ) function, which analyzes the acoustic space and adjusts the sound profile accordingly. This ensures a balanced audio output regardless of the environment.

For example, in a vehicle with multiple passengers, the auto EQ can compensate for varying seat positions and optimize sound distribution, effectively reducing dead spots where audio may be lacking.

Real-time analyzers further enhance this experience by providing immediate feedback through visual displays of frequency response. This functionality assists users in identifying problematic frequencies that may introduce harshness or muddiness into the sound.

Such capabilities are crucial for enhancing bass generation, as specific adjustments can lead to tighter and more impactful low-end performance, ultimately elevating the overall audio quality to a professional standard.

Types of Digital Audio Processors

Digital audio processors comprise a range of types, each engineered to perform specific functions within car audio systems, thereby enhancing sound quality and the overall listening experience.

The primary categories include digital crossovers, equalizers, and signal processors, each providing distinct features to customize and optimize audio output according to various configurations and preferences.

Digital Crossovers

Digital crossovers are essential components in car audio systems, tasked with directing specific frequency ranges to the appropriate speakers to ensure optimal sound performance and clarity. This technology effectively manages sound output by separating low, mid, and high frequencies, facilitating enhanced sound shaping and customization.

By accurately dividing audio signals, digital crossovers significantly diminish distortion, leading to a cleaner and more enjoyable listening experience. When integrated into a vehicle’s audio setup, these devices maximize speaker efficiency, preventing them from attempting to reproduce frequencies for which they are not designed.

For example, high-end models such as the JL Audio TWK-D8 and the MiniDSP 2×4 HD exemplify the versatility of digital crossovers, providing customizable settings and multiple output options to accommodate various speaker configurations. These features enable listeners to appreciate every nuance of their favorite tracks without experiencing muddiness or loss of fidelity.

Equalizers

Equalizers

Equalizers are vital components in car audio systems, providing users with the ability to fine-tune their audio experience by adjusting the frequency response across various ranges. Through advanced digital signal processing (DSP) technology, professional equalization capabilities facilitate detailed audio customization, ensuring that each note and beat is reproduced with clarity and precision.

There are different types of equalizers, including graphic and parametric, each offering unique methods for sound tailoring. Graphic equalizers utilize a series of sliders corresponding to various frequency bands, allowing users to make broad adjustments. In contrast, parametric equalizers offer a more sophisticated approach, enabling users to select specific frequency points, along with their bandwidth and gain.

This versatility is particularly advantageous for addressing specific acoustic challenges, such as mitigating unwanted resonances or enhancing vocal clarity. Selecting the appropriate equalizer can significantly enhance overall sound performance, creating an immersive auditory experience that caters to the individual preferences of each listener.

Signal Processors

Signal processors serve as essential components in car audio systems, specifically engineered to manipulate audio signals to enhance clarity, dynamics, and overall sound quality. Utilizing advanced digital signal processing (DSP) technology, these processors can adjust various parameters, including gain control and phase inversion, to deliver a superior audio experience that is customized to individual preferences.

When integrated with other audio components, such as amplifiers and speakers, signal processors function synergistically to optimize performance, ensuring that each element of the system contributes to a cohesive sound profile. Features such as real-time analysis enable users to observe how audio adjustments directly impact sound quality, addressing aspects such as frequency response and dynamic range.

Additionally, the incorporation of remote input capabilities allows users to manage their audio settings with ease, whether from the driver’s seat or through a mobile application. Consequently, these processors not only enhance sound fidelity but also improve the overall user experience, providing flexibility and control that caters to the needs of discerning listeners.

Essential Features to Consider

When selecting a digital audio processor for a car audio system, several critical features should be taken into account, as they significantly influence overall audio performance.

Important considerations include:

  • the number of channels
  • equalization options
  • compatibility with existing car audio systems

These factors are vital for ensuring seamless integration and achieving an optimal sound experience.

Number of Channels

The number of channels in a digital audio processor is a critical factor that significantly influences the overall audio performance of a car audio system. An increased number of channels enables a more complex and customized audio configuration, effectively accommodating various speakers and ensuring that each frequency range is accurately directed to the appropriate output.

With advanced configurations, a digital signal processor (DSP) can efficiently manage multiple speakers, as seen in a surround sound system where distinct channels are allocated to each speaker. This capability not only enhances clarity and detail but also ensures that the bass response does not overwhelm midrange and treble frequencies.

For example, a 12-channel DSP can provide a richer sound experience by synchronizing adjustments between the left and right channels for both front and rear speakers, while also offering dedicated outputs for subwoofers. Products such as the Audison Bit One and the AudioControl DM-810 exemplify how various channel configurations can elevate the immersive audio experience, transforming a standard car interior into a dynamic listening environment.

Equalization Features

Equalization features represent a crucial component of digital audio processors, enabling users to customize sound according to their preferences and the acoustics of their vehicles. Advanced equalization options, including parametric and graphic equalizers, permit precise adjustments to frequency response, thereby facilitating professional-grade equalization that enhances overall audio quality.

Many contemporary digital signal processors (DSPs) incorporate multi-band equalizers capable of targeting specific frequency ranges. This functionality allows users to make nuanced adjustments by cutting or boosting sound levels as needed. Such control is essential for addressing common audio challenges, such as excessive bass or unclear vocal reproduction.

Additionally, users can take advantage of preset equalization settings tailored for various musical genres, which provide a convenient means of optimizing sound for styles such as rock, jazz, or classical music. Effective equalization not only resolves these audio issues but also significantly enriches the listening experience, fostering a more immersive and enjoyable atmosphere.

Compatibility with Existing Car Audio Systems

Compatibility with Existing Car Audio Systems

Ensuring compatibility with existing car audio systems is essential when selecting a digital audio processor, as it directly influences the ease of installation and overall functionality. Compatibility with both aftermarket stereo units and OEM head units (HU) is vital to ensure that the processor can integrate seamlessly into the vehicle’s audio setup without necessitating extensive modifications.

For example, widely recognized aftermarket stereo models such as the Pioneer AVH-W4500NEX and the Kenwood DDX9705S offer an array of features, including Bluetooth connectivity, touchscreen interfaces, and smartphone integration. These advanced systems require processors capable of accommodating their specifications, thereby facilitating features such as time alignment and digital signal processing.

To verify compatibility, it is advisable to review the specifications of both the processor and the stereo system, consult the manufacturer’s website or user manuals, and seek guidance from professionals at car audio retail establishments. This precautionary measure ensures that the investment not only enhances audio quality but also maintains ease of use from the driver’s perspective.

Technical Specifications to Evaluate

Evaluating technical specifications is crucial when selecting a digital audio processor to ensure that it aligns with audio performance expectations. Key specifications, including frequency response, distortion levels, and signal-to-noise ratio, offer valuable insights into the processor’s capabilities and overall sound quality.

Understanding Frequency Response

Frequency response is a critical technical specification that indicates the capability of a digital audio processor to reproduce various frequencies, thereby influencing the overall audio quality. A processor with a wide frequency response ensures accurate representation of both high and low frequencies, contributing to a balanced and rich sound experience in automotive sound systems.

This balance is particularly essential in applications such as home theater systems, where clarity in dialogue and sound effects is paramount. For instance, a processor designed with a frequency range extending from 20 Hz to 20 kHz is effective in reproducing the deep bass tones characteristic of action films while simultaneously preserving the clarity of higher frequencies, such as orchestral music and vocal harmonies.

Conversely, a processor with a limited frequency response may distort sounds or disproportionately emphasize certain frequencies, which can result in an unsatisfactory listening experience. Overall, understanding these nuances can aid consumers in selecting the appropriate audio equipment for their specific needs, thereby ensuring optimal performance and enjoyment.

Decoding Distortion Levels

Distortion levels represent a critical specification to consider when evaluating digital audio processors, as they indicate the accuracy with which the processor can reproduce audio signals without introducing unwanted noise. Low distortion levels are essential for maintaining sound clarity and fidelity, thereby ensuring that listeners experience a high-quality audio performance.

When selecting a digital signal processor, it is imperative to pay close attention to its Total Harmonic Distortion (THD) rating, as well as intermodulation distortion measurements, both of which can significantly influence audio output. To effectively measure distortion levels across different DSP models, utilizing specific audio testing equipment, such as oscilloscopes or specialized distortion analyzers, is recommended.

Interpreting distortion figures requires an understanding of their context; for example, a THD of less than 0.01% is generally regarded as excellent for professional audio applications, while values should be evaluated in relation to the type of audio being processed. By prioritizing processors with low distortion specifications, audio engineers can achieve superior sound quality, resulting in a more enjoyable listening experience.

Importance of Signal-to-Noise Ratio

The signal-to-noise ratio (SNR) is an essential technical specification that quantifies the level of the desired audio signal in relation to background noise, playing a critical role in determining audio quality. A high SNR indicates that the processor can deliver enhanced sound with minimal interference, thereby improving the overall listening experience in car audio systems.

This metric is not only important for evaluating the fidelity of sound reproduction but also serves as a guiding factor in the selection of digital signal processors (DSPs) that exhibit optimal SNR values. When audio systems employ DSPs with superior SNR, listeners are more likely to experience crisp, clear tones devoid of unwanted distortion.

Consequently, a higher SNR facilitates the ability to discern subtle nuances in music, speech, or sound effects, providing an accurate representation of the audio’s intended quality.

Thus, a comprehensive understanding of SNR can significantly impact both the design of audio equipment and the satisfaction of users who seek an immersive listening experience.

Finding the Right Digital Audio Processor

Finding the Right Digital Audio Processor

Selecting the appropriate digital audio processor (DSP) for a car audio system is crucial for optimizing audio performance and enhancing the overall in-car listening experience. By evaluating various factors such as compatibility, features, and specifications, individuals can identify a DSP that aligns with their specific audio requirements and preferences.

Top Recommendations for Car Digital Audio Processors

When selecting the most suitable digital audio processors for car audio systems, several models are distinguished by their exceptional features and performance. Notable recommendations include the Goldhorn DSPA 406, Rainbow Audio SL-PA400, and Pioneer DEQ S1000a, all of which are highly regarded for their advanced DSP technology and user-friendly interfaces.

Each of these processors presents unique advantages designed to enhance the overall listening experience. For example, the Goldhorn DSPA 406 is renowned for its high-resolution audio processing capabilities, enabling users to enjoy crystal-clear sound even at elevated volumes. Conversely, the Rainbow Audio SL-PA400 offers extensive tuning options that allow audiophiles to customize their sound settings for various environments. The Pioneer DEQ S1000a includes built-in Bluetooth connectivity, which facilitates seamless streaming, making it a favored option among technology-oriented drivers.

Collectively, these models meet diverse user needs, establishing them as excellent choices for improving audio performance and quality in car audio systems.

Customer Reviews and Feedback on Popular Processors

Customer reviews and feedback are instrumental in guiding potential buyers toward the most suitable digital audio processors, offering invaluable insights into product performance and user satisfaction. Notable processors such as the Sony GS6DSP and Kenwood XR600-6DSP have received favorable evaluations for their audio quality and user-friendly operation, establishing them as preferred choices among car audio enthusiasts.

These insights underscore the significance of user experiences in selecting a digital signal processor (DSP), as many users prioritize attributes such as sound clarity, ease of installation, and feature robustness. For example, reviews of the Sony GS6DSP frequently highlight its intuitive interface and outstanding sound tuning capabilities, which give the power to users to craft customized audio experiences. Conversely, the Kenwood XR600-6DSP is often commended for its seamless integration with various car models and its versatility in accommodating different audio formats.

Together, these reviews assist prospective buyers in determining which model not only fulfills their technical requirements but also aligns with their overall audio objectives.

What to Consider Before Making a Purchase

Before purchasing a digital audio processor for a car audio system, it is imperative to consider several key factors to ensure a prudent investment that aligns with your audio requirements.

Aspects such as budgeting, installation considerations, and compatibility with your existing sound system are critical elements that can notably influence your overall satisfaction with the final outcome.

Budgeting for a Car Digital Audio Processor

Budgeting for a car digital audio processor is a crucial step in the purchasing process, as it delineates the range of available options and ensures that you achieve optimal audio quality within your financial constraints. A clear understanding of your budget enables you to focus on processors that provide the necessary features and performance without exceeding your financial limits.

To establish a realistic financial plan, it is advisable to consider the average price ranges typically encountered in the market, which may vary from approximately $100 for basic models to over $1,000 for high-end options.

It is essential to prioritize key features such as equalization capabilities, channel counts, and connectivity options, while also recognizing that investing in a quality digital processor can significantly enhance the overall auditory experience.

Individuals who opt to allocate a slightly higher budget often discover that superior sound fidelity and durability lead to greater long-term satisfaction, making the decision to invest a bit more a prudent consideration for any audiophile.

Installation Considerations and Professional Help

Installation considerations are critical when integrating a digital audio processor (DSP) into an automotive audio system, as proper setup significantly influences both performance and functionality. While some individuals may choose to undertake a DIY installation, enlisting the assistance of a professional can ensure that the DSP is integrated correctly, thereby maximizing its potential for enhanced audio quality.

The prospect of conducting the installation independently can be appealing due to potential cost savings and the satisfaction derived from a hands-on project. Many enthusiasts relish the challenge, and with the appropriate tools and resources, they can achieve commendable results.

However, challenges such as the requisite technical knowledge for calibrating settings and ensuring compatibility with other system components often pose significant obstacles for novice installers.

When deciding to hire a professional, it is imperative to select an individual with experience in car audio systems, particularly someone familiar with the specific DSP model being installed. Seeking testimonials or reviews can help validate their expertise.

A proper setup conducted by skilled technicians not only optimizes audio performance but also minimizes the risk of equipment damage, thereby ensuring a superior overall listening experience.

Best Software for Sound System Setup and Configuration

When it comes to creating the perfect sound experience, the right software for sound system setup and configuration can make all the difference. Whether you’re a professional audio engineer or a passionate hobbyist, understanding the importance of sound system setup is crucial.

This article explores various software solutions designed to simplify the process, from acoustic measurement tools to room simulation programs.

Discover top software options, key features to consider, and insights into making the best choice for your unique audio needs.

Importance of Sound System Setup

Importance of Sound System Setup

The significance of an appropriate sound system setup cannot be overstated, as it directly impacts audio quality and the overall listening experience within any home theater or audio environment. Proper speaker placement, coupled with calibrated settings, ensures optimal sound dispersion, facilitating an immersive audio experience that enhances films and music. Achieving accurate frequency response is crucial for creating a balanced sound field that fosters viewer engagement and satisfaction.

Key factors such as acoustic paneling play a vital role in managing sound reflections and minimizing unwanted echoes, thereby enriching the listening environment. The dimensions and characteristics of speakers are also of considerable importance; larger models often deliver deeper bass, while smaller ones excel in handling higher frequencies.

User interface considerations, including ease of navigation and intuitive controls, can significantly influence the accessibility and adjustment of audio settings for optimal improvement. When these elements are integrated seamlessly, they collectively elevate the overall audio experience, enabling enthusiasts to fully appreciate every nuance of sound.

Overview of Software Solutions

An effective overview of audio software solutions highlights the variety of tools available for sound system optimization, which can significantly improve performance measurement and audio engagement in a home theater environment. These software applications typically offer features such as room calibration, speaker configuration, and design visualization, assisting users in achieving their desired audio outcomes. With a range of options available, from professional-grade tools to user-friendly applications, there are solutions suitable for every audio enthusiast.

Among the essential categories of audio software solutions are acoustic measurement tools, which enable users to assess sound quality and diagnose issues within their audio setups. Software such as the Smart Tools Sound Meter facilitates precise sound level measurements, contributing to the fine-tuning of environments for optimal sound clarity. Additionally, speaker design software allows users to create and simulate speaker systems tailored to their specific acoustic requirements. Room simulation programs, utilizing advanced algorithms inspired by industry standards from companies like THX and Dolby, generate realistic soundscapes that replicate various acoustic environments.

Collectively, these tools enable users to enhance their audio experiences by providing professional-level insights in accessible formats for home use.

Types of Software for Sound System Configuration

There are various types of software specifically designed for sound system configuration, each serving a distinct role in enhancing audio performance and user experience.

Acoustic measurement tools concentrate on analyzing room dimensions and frequency response to optimize speaker placement and calibration.

In parallel, speaker design software assists home theater designers in configuring speaker levels and ensuring effective sound dispersion.

Furthermore, room simulation programs offer interactive utilities for the visual representation of audio setups, enabling users to experiment with virtual seating arrangements and audio integration.

Acoustic Measurement Tools

Acoustic measurement tools are essential for accurately assessing the audio environment within a home theater, as they provide critical data for performance evaluation and audio integration. These specialized software applications are designed to analyze sound fields and frequency responses, enabling users to make informed decisions regarding speaker placement and calibration. Tools such as Smart Tools Sound Meter and MAPP 3D are widely utilized by home theater designers to ensure optimal acoustic performance.

By leveraging these advanced technologies, users can identify undesirable resonances and adjust parameters accordingly to achieve a balanced sound profile. Software programs like REW (Room EQ Wizard) enable enthusiasts to visualize room acoustics through detailed graphs and frequency analyses, thereby enhancing their understanding of sound wave behavior within their specific environments.

These insights not only facilitate the optimal setup of audio systems but also contribute to an immersive listening experience, transforming any room into a personal audio haven where every note and beat is faithfully reproduced, allowing even the most subtle details to be heard with clarity.

Speaker Design Software

Speaker Design Software

Speaker design software is essential in sound system design, allowing users to configure and visualize their audio setups with efficiency. These applications enable precise adjustments to speaker levels, dimensions, and placement, ensuring that the final design aligns with the specific requirements of the room and the preferences of the user.

With features such as dynamic optimization and design visualization, speaker design software significantly enhances the overall audio experience in any home theater environment.

Prominent options available in the market, including those provided by Electro-Voice, offer intuitive user interfaces suitable for both novice users and experienced audio engineers. The software typically incorporates advanced acoustic modeling tools and real-time simulations, enabling users to experiment with various configurations without the necessity for physical adjustments.

Additionally, these programs often support Dolby Atmos integration, guaranteeing compatibility with contemporary surround sound technologies. For home theater enthusiasts seeking to achieve the pinnacle of auditory immersion, utilizing such specialized software can result in considerable improvements in sound quality and a more engaging viewing experience overall.

Room Simulation Programs

Room simulation programs offer users a virtual experience that enables them to visualize and optimize their sound system setups prior to implementation. By simulating various configurations and speaker placements, users can effectively evaluate how sound energy interacts with their environment, facilitating more informed decisions regarding audio integration.

This immersive experience enhances the design process and ensures that the final configuration maximizes sound quality and listener engagement.

These programs are typically equipped with features that allow users to manipulate variables such as acoustics, furniture arrangement, and room geometry, ultimately guiding them toward the ideal virtual seating arrangement. By providing precise sound metrics, they assist in evaluating aspects such as reverberation time and sound reflections, enableing users to meticulously fine-tune their audio environments.

The intuitive interfaces allow for seamless exploration of different setups, enabling experimentation without physical limitations. Consequently, whether for a home theater or a professional studio, users can achieve a highly immersive audio experience tailored specifically to their requirements.

Top Software Options for Sound System Setup

An examination of the leading software options for sound system setup uncovers a variety of advanced audio tools aimed at helping users achieve optimal performance and sound quality. This includes acoustic measurement tools such as the Smart Tools Sound Meter, as well as comprehensive speaker design software like MAPP 3D. These solutions address a diverse range of user requirements and preferences.

Familiarity with the key features and pricing structures of these software applications is crucial for making informed decisions regarding audio system integration.

Comprehensive Overview of Leading Software

A comprehensive overview of leading software for sound system setup emphasizes the various functionalities and unique features offered by each application, providing users with valuable options to enhance their audio experience. Programs such as MAPP 3D and Sonicue are at the forefront, delivering robust performance measurement capabilities and user-friendly interfaces designed for both novices and professionals in sound system design. Understanding the strengths of these applications is essential for achieving optimal audio integration and user satisfaction.

These programs cater to a diverse audience, ranging from amateur enthusiasts setting up a home theater to seasoned sound engineers managing large-scale events. MAPP 3D excels in visualizing acoustics, enabling users to simulate and predict sound behavior in different environments, thus ensuring optimal speaker placement.

Conversely, Sonicue streamlines the tuning process with its intuitive setup and real-time monitoring features, allowing users to effortlessly adjust EQ settings and evaluate system performance, making it particularly appealing for live sound applications.

By exploring these leading options, users can identify the ideal tool that aligns with their specific sound system requirements and enhances overall audio quality.

Key Features to Look For

Key Features to Look For

When selecting software for sound system configuration, it is essential to identify several key features that ensure effective audio integration and optimization. Critical functionalities may include room calibration capabilities, user-friendly interfaces, real-time performance measurement, and comprehensive design visualization tools. Support for various audio formats, such as Dolby and eARC, is imperative for ensuring compatibility with modern audio systems.

The inclusion of advanced equalization options can significantly enhance sound quality by allowing users to tailor audio output to their specific acoustic environments. An intuitive setup process is also crucial, as it promotes a seamless user experience and minimizes the learning curve for individuals who may not possess extensive technical knowledge.

Furthermore, regular updates and customer support are pivotal in ensuring that users can promptly resolve issues and access the latest features. Ultimately, the combination of these elements not only enhances the technical performance of the sound system but also contributes to the overall satisfaction of the listener, underscoring the importance of thoughtful software selection.

Pricing and Licensing Options

Understanding the pricing and licensing options available for audio software is essential for users seeking to invest in sound system setup tools that align with their budget and requirements. Numerous software applications offer tiered pricing models, catering to various skill levels and user needs, while some may provide free trials or educational discounts. Evaluating these options enables users to make informed decisions regarding the software that best supports their audio system design objectives.

This evaluation allows users to compare features, support, and updates associated with each pricing tier. For example, entry-level packages may offer basic functionalities suitable for novices, whereas premium tiers often provide a range of advanced features that experienced professionals may find invaluable.

Licensing models can vary significantly, encompassing options from one-time purchases to subscription-based services, each presenting its own advantages and trade-offs. Users may discover that subscription models offer ongoing updates, while permanent licenses typically necessitate a larger initial investment but may prove more economical over the long term.

Detailed Analysis of Popular Software

A comprehensive analysis of popular software options for sound system setup indicates a variety of tools designed to meet specific user needs and preferences in audio analysis and optimization.

Applications such as Sonicue and MARC are recognized for their advanced capabilities, enabling users to meticulously refine their audio environments to achieve optimal listening experiences.

By examining the features, benefits, and suitable use cases of these programs, users can make informed decisions regarding the most appropriate tools for their audio configurations.

Sonicue

Sonicue is a robust audio software solution specifically designed for sound system setup, offering users a comprehensive suite of tools for performance measurement and optimization. This software is highly regarded for its intuitive user interface and features that facilitate real-time adjustments to speaker levels and calibration settings, thereby ensuring optimal audio quality in any environment. Whether utilized for home theater applications or professional audio integration, Sonicue provides both flexibility and precision.

Its functionality extends beyond basic sound adjustment; it also integrates advanced analytical tools that enable users to visualize audio performance, identify potential issues, and fine-tune their systems with ease. The performance measurement capabilities allow for detailed assessments, delivering valuable insights into frequency response and sound distribution.

Additionally, the user-friendly design of Sonicue simplifies complex audio setups, making it accessible to both experienced professionals and novices. The software’s seamless integration with various hardware components ensures that all audio systems can be optimized efficiently, thereby enhancing the overall listening experience, regardless of the setting.

Features and Benefits

The features and benefits of Sonicue position it as a highly attractive option for professionals engaged in audio system design and calibration. Its advanced performance measurement tools, including real-time frequency analysis and sound field visualization, enable users to make informed adjustments to their audio setups. The software’s compatibility with various audio formats further enhances its utility across diverse environments, whether for home theater applications or professional use.

Sonicue supports comprehensive monitoring of acoustic parameters and provides intuitive graphical representations that illustrate sound distribution patterns, facilitating the identification of problematic areas within a given space. Its user-friendly interface streamlines the tuning process, enabling even individuals with limited experience to achieve professional-level results.

The integration of tools for phase analysis and delay measurement ensures that each component of the audio system operates in harmony, ultimately delivering a richer and more immersive audio experience. With features specifically designed for both DSP integration and speaker alignment, Sonicue gives users access to the necessary tools to optimize their sound systems efficiently.

Best Use Cases

Sonicue demonstrates exceptional versatility across various applications, making it suitable for both home theater enthusiasts and professional audio engineers. In residential environments, Sonicue aids users in achieving optimal sound quality through careful calibration of speaker placement and levels. In commercial settings, it serves as a dependable tool for performance measurement and audio integration within larger venues.

This innovative solution is particularly valuable for musicians and recording studios, where precise audio analysis can significantly enhance the overall sound experience during live performances or recordings. Additionally, Sonicue proves beneficial in educational institutions, facilitating sound design courses by providing students with practical experience in audio calibration.

Whether fine-tuning a personal sound system or ensuring superior audio quality in a large concert hall, Sonicue’s adaptability and precision enable users to create immersive audio environments across a range of scenarios.

MARC

MARC

MARC is an advanced software tool meticulously designed for audio configuration, allowing users to optimize their sound systems with precision and efficiency. Renowned for its robust capabilities in performance measurement and analysis, MARC streamlines the calibration process, ensuring that audio levels are accurately set for any environment, thereby enhancing the overall listening experience.

This powerful tool features an intuitive user interface that simplifies navigation, making it accessible even for individuals who are new to audio engineering. With functionalities such as real-time analysis, automatic equalization, and compatibility with various audio integration tools, users can easily make adjustments to their systems to achieve the desired sound quality.

The benefits of utilizing MARC include significant time savings during setup, as well as enhanced consistency and accuracy in audio levels. These advantages ultimately contribute to a superior sound experience for audiences, whether in a concert hall, studio, or home theater.

Features and Benefits

The features and benefits of MARC position it as a preferred choice for audio professionals in search of effective sound system configuration tools. With its advanced performance measurement capabilities, MARC facilitates precise adjustments to speaker placement and levels, thereby ensuring optimal sound dispersion and frequency response. Its user-friendly interface renders it accessible to both novice and experienced users.

MARC employs real-time analysis to enable users to visualize and troubleshoot sound issues immediately. The built-in algorithms optimize settings according to the unique characteristics of a venue, significantly minimizing the need for trial and error.

Furthermore, its integration with other audio tools fosters a seamless workflow, enhancing overall system performance by ensuring compatibility and ease of use. Ultimately, the amalgamation of these innovative features not only elevates sound quality but also streamlines the configuration process, making MARC an critical asset for live sound engineers and studio technicians alike.

Best Use Cases

MARC is exceptionally well-suited for a wide range of applications, from home theater installations to professional audio setups within commercial venues. Its capacity to facilitate precise audio configuration renders it an critical tool for ensuring sound quality across diverse environments, enabling users to achieve their desired audio outcomes with assurance.

In residential settings, for example, MARC can optimize sound delivery in living rooms or dedicated home theaters, thereby enhancing the viewing experience with immersive audio. Conversely, in commercial environments such as restaurants or event spaces, it allows for the fine-tuning of soundscapes to accommodate varying atmospheres and audience sizes.

By effectively utilizing MARC’s features, users can seamlessly adapt their audio systems to a variety of scenarios, whether creating the ideal ambiance for an intimate dinner or providing crystal-clear sound for a corporate presentation. This versatility highlights MARC’s capability to satisfy the requirements of both casual listeners and audio professionals alike.

Online Tools for Sound System Configuration

Online tools for sound system configuration have gained considerable traction, providing users with accessible and flexible options for optimizing their audio setups. These tools encompass a variety of resources, including frequency band estimators and air loss calculators, which enable users to make informed decisions regarding speaker placement and calibration without the necessity of costly software installations.

Many platforms offer interactive guides and tutorials that demystify complex concepts, rendering them suitable for both novices and experienced users. Individuals can experiment with various configurations through virtual modeling tools, ensuring that they achieve the desired sound quality tailored to their specific environments. These online configurations typically support extensive compatibility with diverse audio equipment, allowing users to customize their systems to meet their unique requirements.

Additionally, community forums and support networks associated with these tools can significantly enhance the user experience by providing valuable insights and shared experiences from fellow audio enthusiasts.

Air Loss Estimator

The air loss estimator is an invaluable online tool designed to assist users in assessing acoustic performance and effectively optimizing their sound systems. By calculating potential air loss in a specific audio configuration, this tool enables users to make informed decisions regarding speaker placement and overall system configuration, thereby ensuring optimal sound quality and enhanced listener engagement.

A comprehensive understanding of how sound travels within a given space is essential for maximizing audio performance. The air loss estimator offers critical insights into various factors that may adversely affect sound quality, including room dimensions, speaker type, and frequency response.

Utilizing this estimator enables users to identify areas susceptible to air leakage, which can contribute to sound distortion or reduced clarity. It encourages strategic approaches to speaker positioning, facilitating an immersive listening experience that allows both audiophiles and casual listeners to enjoy their preferred music or films with improved fidelity.

Furthermore, this tool not only enhances the current audio setup but also serves as a valuable resource for planning future upgrades, ensuring the highest standards of audio excellence are maintained.

Frequency Band Estimator

The frequency band estimator is a sophisticated online tool designed to assist users in analyzing and optimizing the frequency response of their audio systems. By offering insights into the performance of various frequency bands, this tool enables users to fine-tune their speaker configurations and placements, ultimately enhancing sound quality and overall user experience.

This estimator functions by measuring real-time audio data, allowing users to visualize the interactions of different frequencies within their specific environments. It effectively highlights both the strengths and weaknesses of the frequency response, facilitating adjustments that can lead to smoother sound reproduction.

Users can rely on this tool to identify problematic frequencies that may contribute to distortion or muddiness in their audio output. By utilizing the insights provided by the frequency band estimator, both enthusiasts and professionals can ensure that their audio setups deliver crystal-clear soundscapes that accurately reflect the artist’s intent, thereby significantly enriching the overall listening experience.

Choosing the Right Software for Your Needs

Selecting the appropriate software for audio requirements is a crucial step in achieving optimal sound system setup and configuration. Given the wide array of options available, it is essential to evaluate factors such as user experience, software features, and the specific needs of the home theater or audio environment.

A well-informed decision can significantly enhance audio engagement and contribute to an overall immersive experience.

Considerations for Different Skill Levels

Considerations for varying skill levels are essential in selecting audio software that effectively meets user needs and expectations.

For instance, novice users may encounter challenges when faced with complex interfaces and intricate features, which could impede their ability to navigate and utilize the software effectively. Conversely, experienced audio engineers are likely to value advanced functionality that enables them to manipulate sound with precision and creativity. These proficient users often require customizable settings, detailed analytics, and compatibility with various hardware, which enables them to implement advanced techniques.

Therefore, it is imperative for developers to acknowledge these differences in skill levels and design software that not only corresponds to the specific capabilities of users but also evolves alongside their developing expertise. This approach ultimately contributes to a more enjoyable and productive audio experience.

Budget-Friendly Options

Exploring budget-friendly options for audio software is essential for users seeking to enhance their sound system setup without incurring significant expenses. Numerous affordable tools provide essential features for calibration, speaker configuration, and performance measurement, making them viable choices for home theater enthusiasts operating within a budget. A comprehensive understanding of these options enables users to achieve audio improvements without compromising quality.

For example, software such as Room EQ Wizard offers a comprehensive suite of tools that assist in analyzing and optimizing speaker placement, thereby ensuring users achieve the best possible acoustics. Additionally, programs like Audacity provide straightforward editing features that allow enthusiasts to enhance their recordings without incurring high costs.

These budget options not only facilitate cost savings but also enable users to take control of their audio experiences. By utilizing these cost-effective solutions, individuals can access a wide range of functionalities that enhance their listening pleasure, ultimately resulting in a richer and more immersive sound experience.

Summary of Best Software Solutions

The summary of the best software solutions for sound system setup underscores the wide range of tools available to audio enthusiasts, encompassing everything from acoustic measurement applications to comprehensive room simulation programs. Each software option presents unique features designed to address specific audio requirements, enabling users to achieve optimal sound quality and immersive experiences, irrespective of their skill level or budget.

Among the prominent choices, certain programs excel in precise frequency analysis, enableing users to fine-tune their audio setups based on real-time data. Others provide robust design capabilities that facilitate detailed visualization of sound room layouts, significantly enhancing overall sound performance.

Many of these solutions are compatible across various devices and platforms, offering flexibility for users who prefer to operate on multiple systems. Importantly, the integration of user-friendly interfaces and guided tutorials ensures that even newcomers can swiftly acclimate themselves to the functionalities, thereby simplifying the process of transforming a standard audio experience into an exceptional one.

Final Thoughts on Sound System Setup

Final thoughts on sound system setup underscore the significance of investing in appropriate tools and adhering to best practices to achieve exceptional audio quality and immersive experiences in home theaters. By utilizing advanced software solutions and comprehending the foundational principles of speaker placement and calibration, users can substantially enhance their audio engagement and overall satisfaction with their sound systems.

The successful integration of various audio components not only enriches the listening experience but also demonstrates the transformative impact of technology on modern entertainment. Whether it involves a sophisticated surround sound system or a multi-room setup, the importance of software cannot be overstated. It provides critical functionalities such as equalization, room correction, and detailed analytics, all of which are essential for optimizing system performance.

By prioritizing these elements, individuals can cultivate environments where every note resonates with clarity, thereby making audio experiences more impactful and enjoyable. Ultimately, adopting these strategies ensures that sound systems reach their full potential, delivering cinematic quality directly into the living space.

A Simple Guide to Wiring a Canon Jack

Wiring a Canon jack might seem daunting at first, but with the right guidance and tools, it can be a straightforward process.

This guide explains the essentials of Canon jacks, the necessary tools, and the step-by-step wiring techniques you need to know.

Whether you’re a novice looking to learn or an experienced user seeking a refresher, you’ll find insights on selecting wires, soldering, and troubleshooting common issues.

Get ready to enhance your audio and video connections with confidence!

Required Tools

Required Tools

To successfully wire a Canon jack, possessing the appropriate tools is essential for ensuring proper connections and high-quality audio output.

Equipping oneself with the necessary tools not only enhances efficiency but also guarantees safety throughout the wiring process. A soldering iron, for instance, is crucial for securely connecting wires to jacks, thereby enabling reliable and durable audio transmission. Cutting pliers are critical for trimming excess wire lengths, allowing for a tidy finish that minimizes the risk of interference. Cable stripping tools are also required to prepare the wires by removing insulation without damaging the conductors, thus ensuring optimal conductivity.

Each of these tools plays a significant role in creating a clean and professional wiring setup, ultimately leading to superior audio performance.

Understanding Canon Jacks

A comprehensive understanding of Canon jacks is essential for individuals engaged in audio production, as these connectors play a critical role in establishing reliable and high-fidelity audio connections.

Anatomy of a Canon Jack

The anatomy of a Canon jack, specifically the XLR connector, comprises several essential components that facilitate the transmission of audio signals.

These components include the housing, which functions as the outer shell that protects the interior from environmental factors, and the pins, which are critical for establishing a secure electrical connection. The XLR connector features three pins: one designated for the ground, another for the hot signal, and the third for the cold signal. This pin configuration is vital for maintaining signal integrity and minimizing noise during transmission, as it creates a balanced audio connection.

The ability of this jack to reduce interference significantly contributes to the preservation of audio quality, particularly in professional environments where clarity and detail are of utmost importance.

Types of Canon Jacks

Types of Canon Jacks

Various types of Canon jacks are employed in audio applications, each serving distinct functions and accommodating different wiring configurations.

These connectors are primarily recognized for their robust design and reliability, and they are available in several configurations, including XLR to XLR and XLR to JACK, which facilitate versatile audio connections. The XLR configurations are commonly utilized in professional environments, as they provide a balanced audio signal that effectively minimizes noise and interference during transmission.

In contrast, the XLR to JACK configuration offers convenience in a range of scenarios but may result in an unbalanced connection, making it more vulnerable to hum and noise, particularly over longer distances.

A comprehensive understanding of the differences between balanced and unbalanced connections is essential, as it directly influences the audio quality and integrity of recordings.

Preparing Your Cables

Proper preparation of cables is a crucial step in ensuring that wired connections uphold high-quality audio signals and mitigate potential issues.

Choosing the Right Wires

Selecting the appropriate wires for Canon jack wiring is crucial, as the type of cable used can significantly impact audio signal quality.

In the context of microphone cables, it is important to understand the difference between balanced and unbalanced options. Balanced cables, which typically feature XLR or TRS connectors, are specifically designed to minimize noise and interference, making them ideal for professional audio applications where clarity is essential.

In contrast, unbalanced cables, often utilizing TS connectors, are simpler in design but are more susceptible to external interference. Therefore, they are best suited for short distances or less critical applications.

Additionally, choosing the correct audio jacks for connecting these cables is vital, as utilizing the appropriate jack type ensures optimal signal transmission and integrity, ultimately enhancing the overall performance of the microphone system.

Color Coding

Color Coding

Color coding in wiring is essential for ensuring proper connections and preventing confusion during the wiring process. It functions as a universal language that enables both professionals and amateurs to quickly identify different wire types and their respective functions within a circuit.

For example, the use of specific colors for ground wires, such as green or bare, significantly reduces the risk of incorrect connections, which can lead to electrical failures or even hazardous situations. Additionally, signal reference wires often employ standardized colors, assisting technicians in establishing effective communication between devices. Adhering to these color code conventions promotes safety and efficiency, ensuring that the ground shield and other components are aligned correctly to achieve optimal electronic performance.

Wiring Process

The wiring process for a Canon jack encompasses several essential steps that guarantee a secure and effective connection for audio equipment.

Stripping the Wires

Properly stripping wires is a fundamental step in the wiring process, as it prepares the cable for a reliable connection to the Canon jack.

To achieve a clean and precise strip, the use of high-quality wire strippers is essential, as they provide varying depths suitable for different wire gauges. Careful alignment of the wire within the stripper is necessary to prevent accidental nicks that could compromise the integrity of the conductor. Additionally, it is important to hold the wire firmly while stripping to ensure that the insulation is removed smoothly without damaging the copper strands beneath.

Inspecting the exposed wire for any frays or incomplete strips prior to connecting it to the jack is crucial for ensuring a stronger and more efficient electrical connection. Attention to these details during the wire preparation process significantly enhances the performance and longevity of the entire setup.

Soldering Techniques

Soldering Techniques

Mastering soldering techniques is essential for achieving strong and reliable connections when wiring a Canon jack. This process not only ensures the longevity of electronic components but also significantly enhances overall functionality.

To begin, it is important to gather the necessary materials: lead-free tin solder, a high-quality soldering iron, and a soldering iron stand for safety. Ensure that the soldering iron is heated to the appropriate temperature, typically around 350°C, which is optimal for soldering without damaging sensitive components.

Next, strip the ends of the wires to expose approximately 1-2 cm of bare metal, ensuring that no insulation remains that could interfere with the connection. Apply a small amount of solder to the tip of the iron and touch it to both the wire and the Canon jack terminal simultaneously, allowing the solder to flow evenly around the connection for a clean finish.

It is also advisable to periodically clean the soldering iron tip using a damp sponge to remove oxidation and improve heat transfer. After soldering, inspect the joint to ensure a smooth, shiny surface, as this indicates a successful solder joint.

Consistent practice of these techniques will lead to improved skills and more reliable electronic projects.

Connecting the Ground

Properly connecting the ground is essential for the optimal performance of the Canon jack and for preventing unwanted noise in audio signals.

The ground wire, commonly denoted as GND, functions as a reference point for the electrical circuit, ensuring the correct operation of both the cold signal and hot signal. The cold signal, which typically represents the negative portion of the audio signal, works in conjunction with the hot signal that carries the positive portion, thereby creating a balanced audio system.

By ensuring a secure ground connection, users can significantly reduce the likelihood of interference, as a well-established GND relationship aids in isolating potential noise sources. Correctly wiring the ground not only enhances audio clarity but also contributes to the overall durability and reliability of the equipment.

Testing Your Connection

Testing the wired Canon jack connection is essential to ensure its proper functionality and to achieve the desired audio quality.

Several methods can be utilized to evaluate the integrity of the audio signal. Employing tools such as audio analyzers or signal generators facilitates precise measurement of the signal’s strength and clarity. Techniques like loopback testing can effectively confirm the connection by transmitting audio signals through the jack and assessing any loss or degradation.

Additionally, using oscilloscopes allows for the visualization of the signal waveform, enabling the identification of anomalies that may adversely affect performance.

It is equally important to ensure that the audio jack and connectors are free from corrosion or damage, as these factors can significantly compromise signal quality. By implementing a comprehensive testing strategy, users can uphold the fidelity of their audio transmission, thereby enhancing their overall audio experience.

Troubleshooting Common Wiring Issues

Troubleshooting common wiring issues is crucial for diagnosing and resolving problems that may arise during the wiring process of a Canon jack.

Many users may encounter issues such as ground loops, which can introduce unwanted hum or noise into the audio signal. Ground loops occur when multiple grounding points are present, creating a looped circuit that interferes with signal integrity.

To address this issue, one effective solution is to ensure a single grounding point, potentially utilizing isolation transformers to break the ground loop.

Additionally, audio signal problems can stem from weak or faulty connections; therefore, checking cable integrity and ensuring robust solder joints will significantly enhance performance.

Familiarity with these common wiring challenges not only facilitates quicker resolutions but also minimizes the likelihood of recurring issues.

Additional Resources

For individuals seeking to enhance their understanding of wiring techniques and audio quality, a variety of resources are available.

These resources include detailed tutorials, hands-on workshops, informative videos, and comprehensive eBooks that address advanced wiring methods and the complexities of audio engineering. Websites such as ProSoundWeb and Sweetwater offer in-depth articles and expert guidance tailored to a range of skill levels.

For those preferring a more structured learning approach, platforms like Coursera and Udemy provide courses specifically designed to improve audio quality through advanced wiring techniques. Additionally, YouTube channels such as The Recording Revolution and Produce Like A Pro present valuable content that can further assist individuals in refining their skills and comprehending the essential elements of sound design.